VIS Usage
Examples of using VIS services with VMware Cloud Foundation deployments and workflows.
Table of Contents
Login to VIS
After the VIS OVA has been successfully deployed and powered on, the VIS UI interface will be available at:
http://<VIS-IP-or-FQDN>The username will be what you had defined as VIS Admin Username during OVF property configuration along with the credentials you had specified.
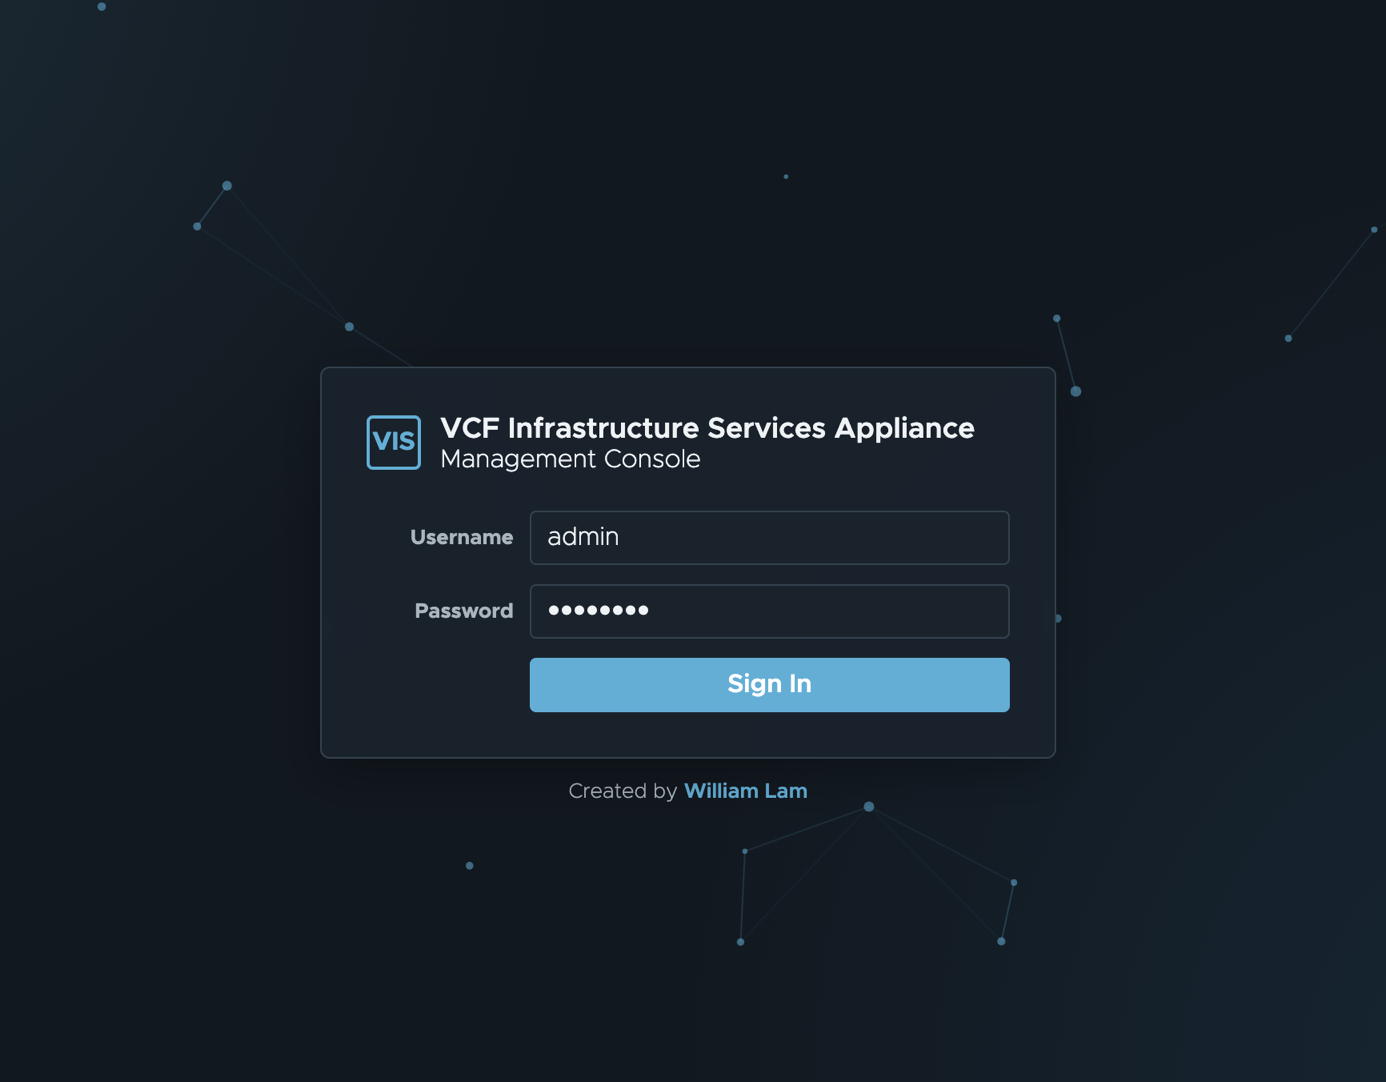
> Note: Port 80 redirects to the VIS UI on port 8080 (e.g. http://<VIS-IP-or-FQDN>:8080). Individual services continue to use their own service ports.
Updates
VIS can be updated without requiring a re-deployment. Appliances with internet access can pull directly from the VIS GitHub repository. Appliances in disconnected environments can use an offline update bundle from a VIS GitHub release.
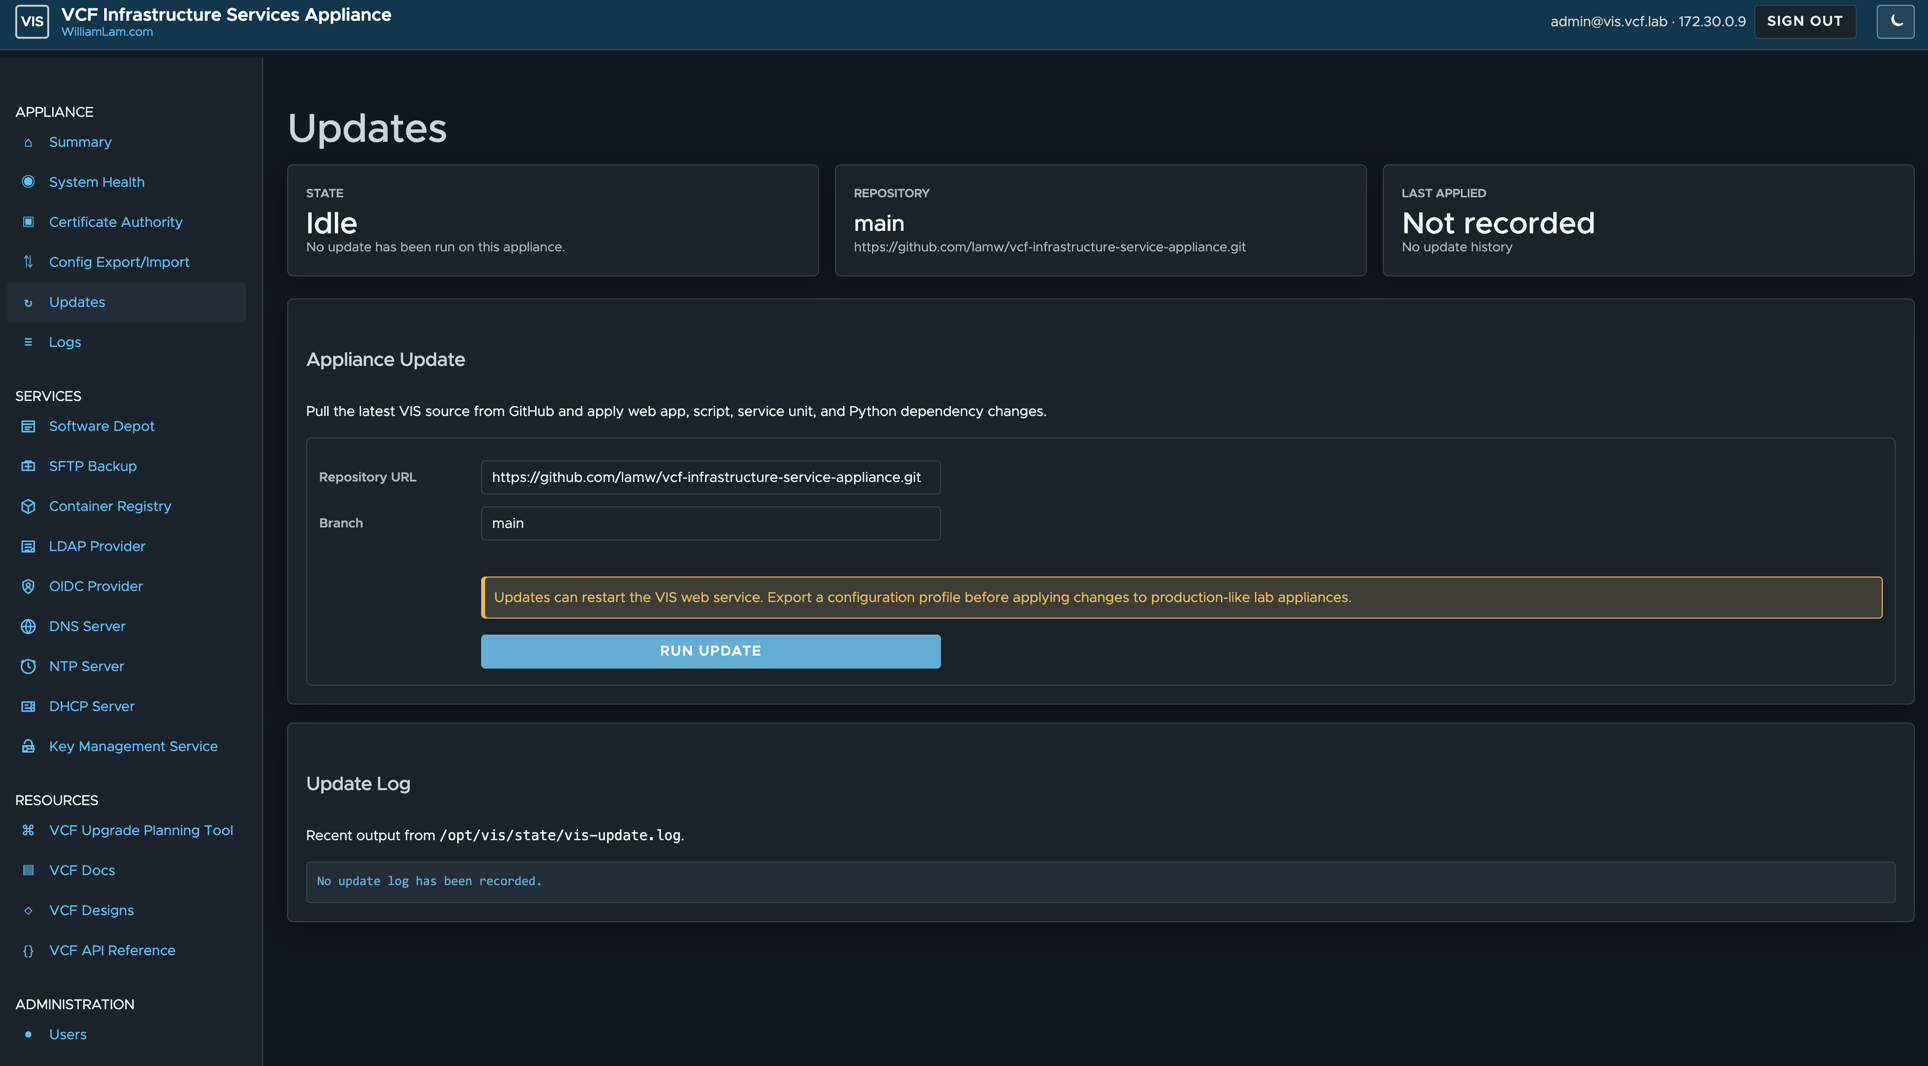
For offline updates, download the matching release files from a trusted machine and upload all three files in Appliance > Updates:
vis-update-<version>.zipvis-update-<version>.zip.sha256vis-update-<version>.zip.sha256.sig
VIS verifies the SHA256 signature with the built-in VIS release public key, verifies the archive hash, safely extracts the release, and then applies the same update workflow used by online updates.
System Health
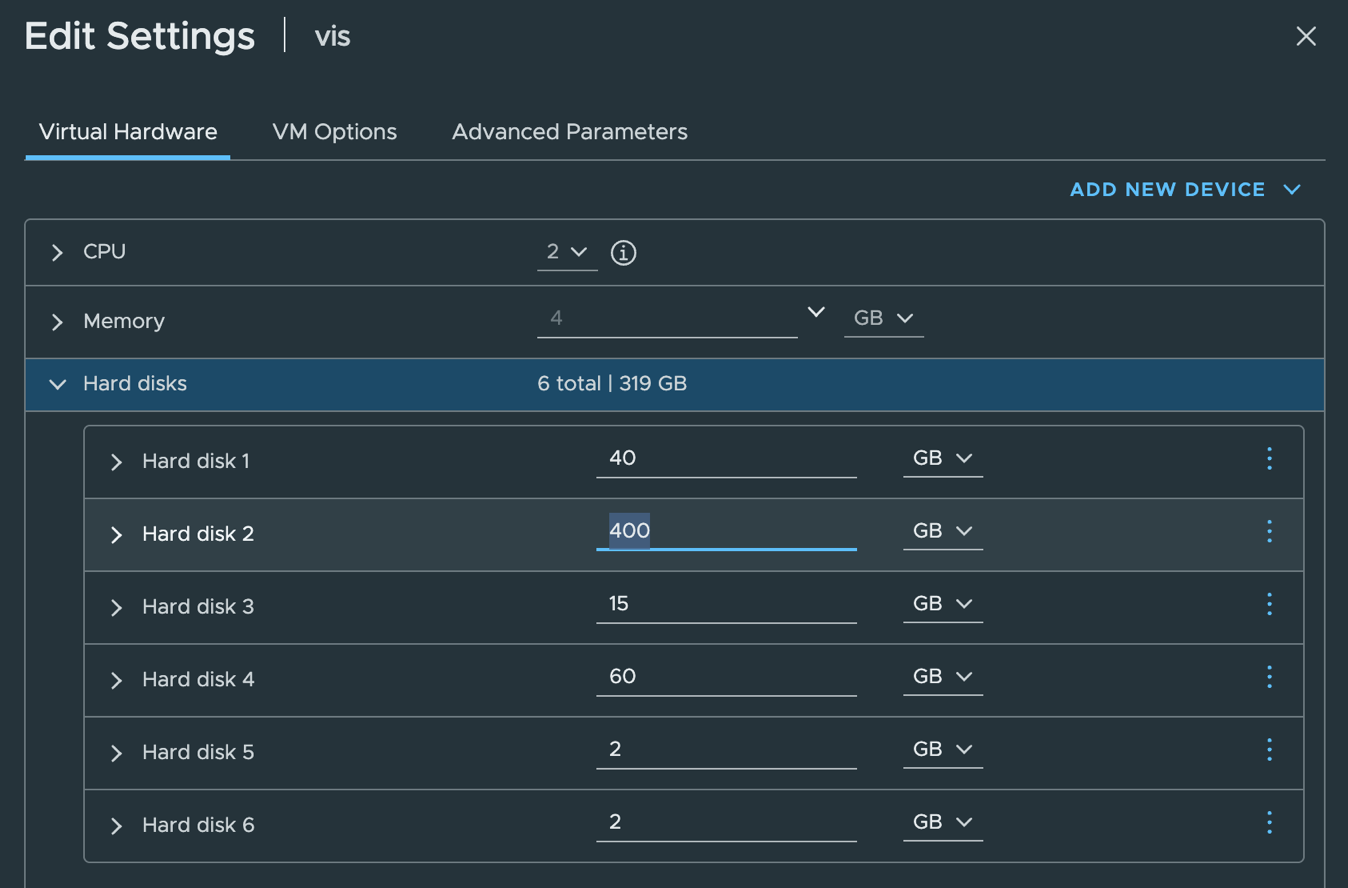
You can view the compute and storage resource utilization for VIS.
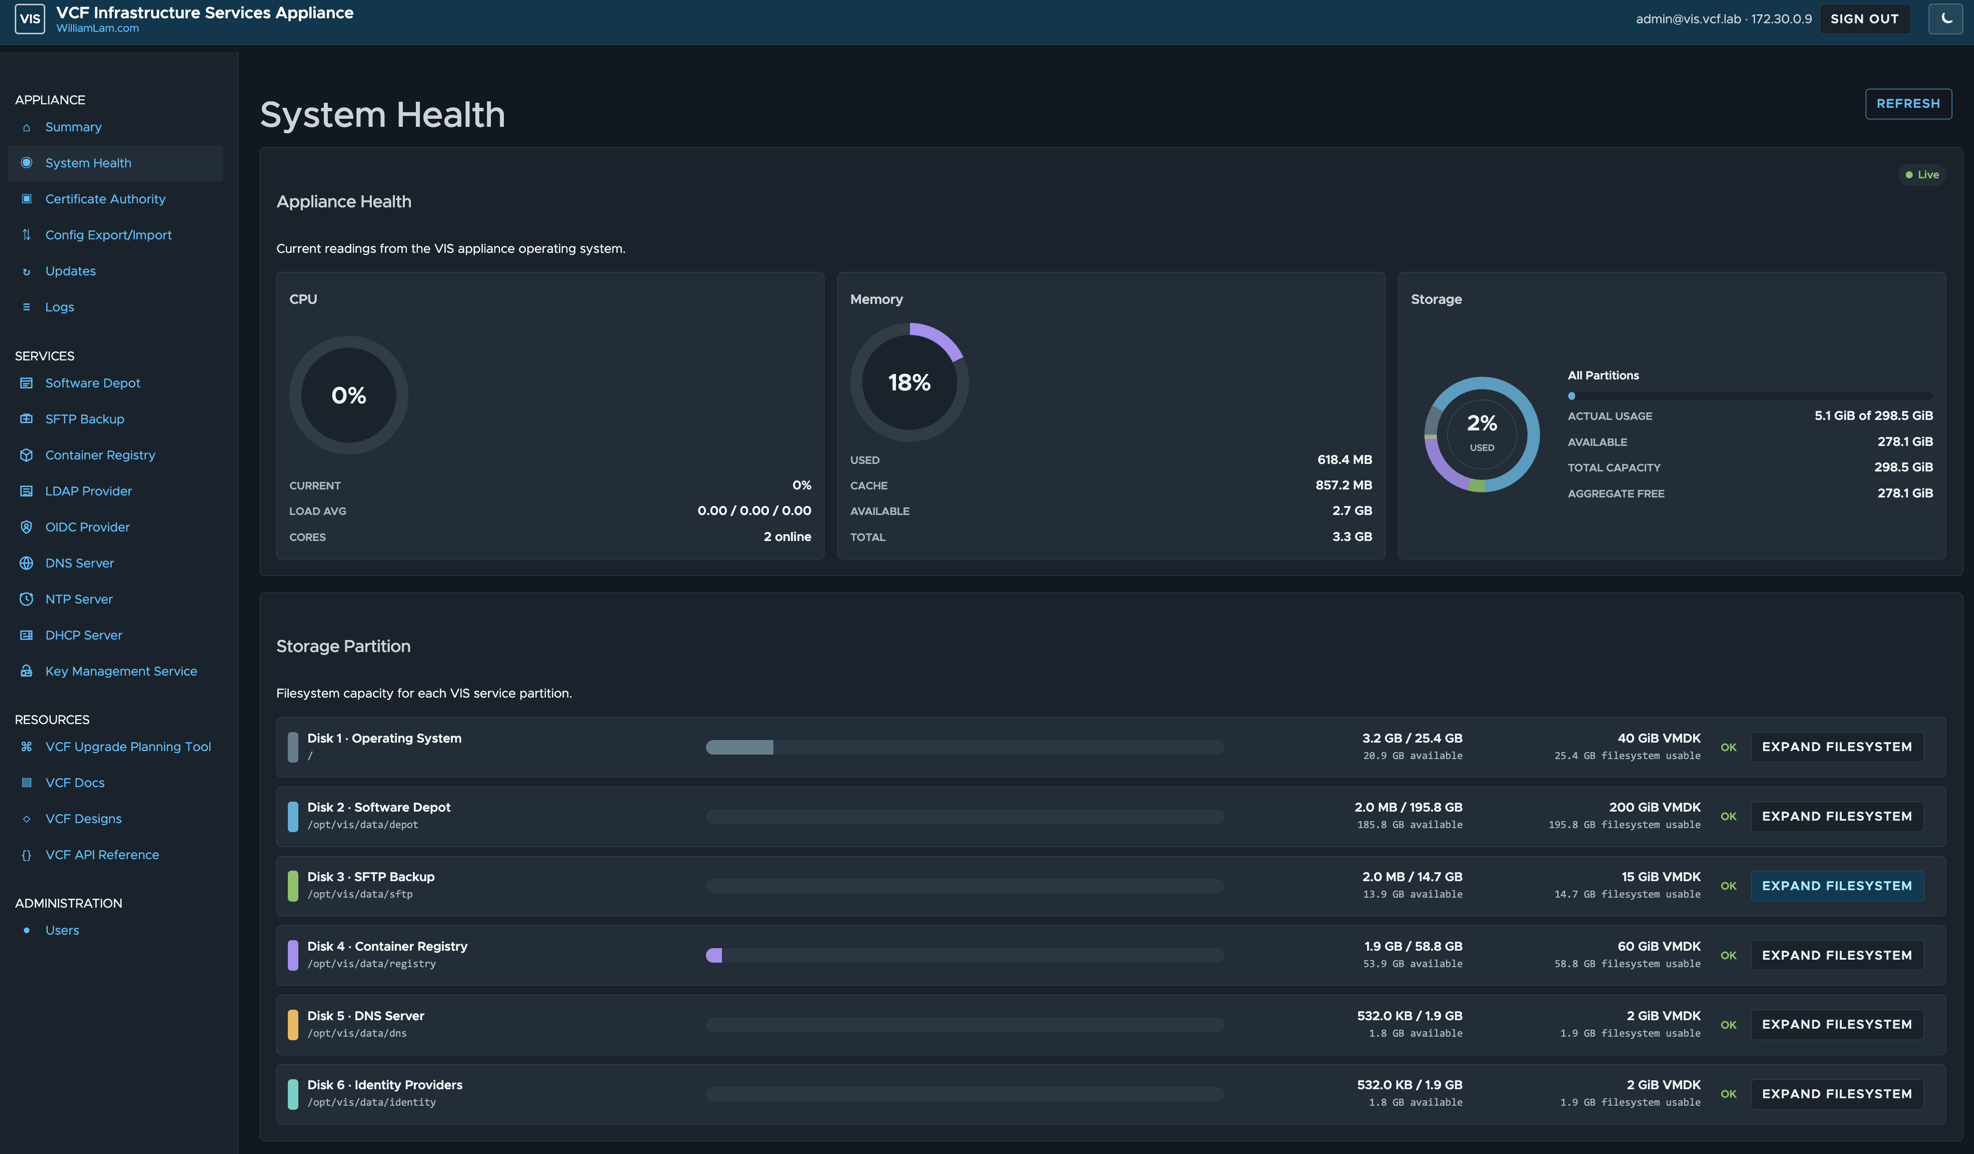
If you need to expand a specific disk partition such as the software depot, first perform the operation within vSphere and then navigate back here to expand the filesystem.
Logs
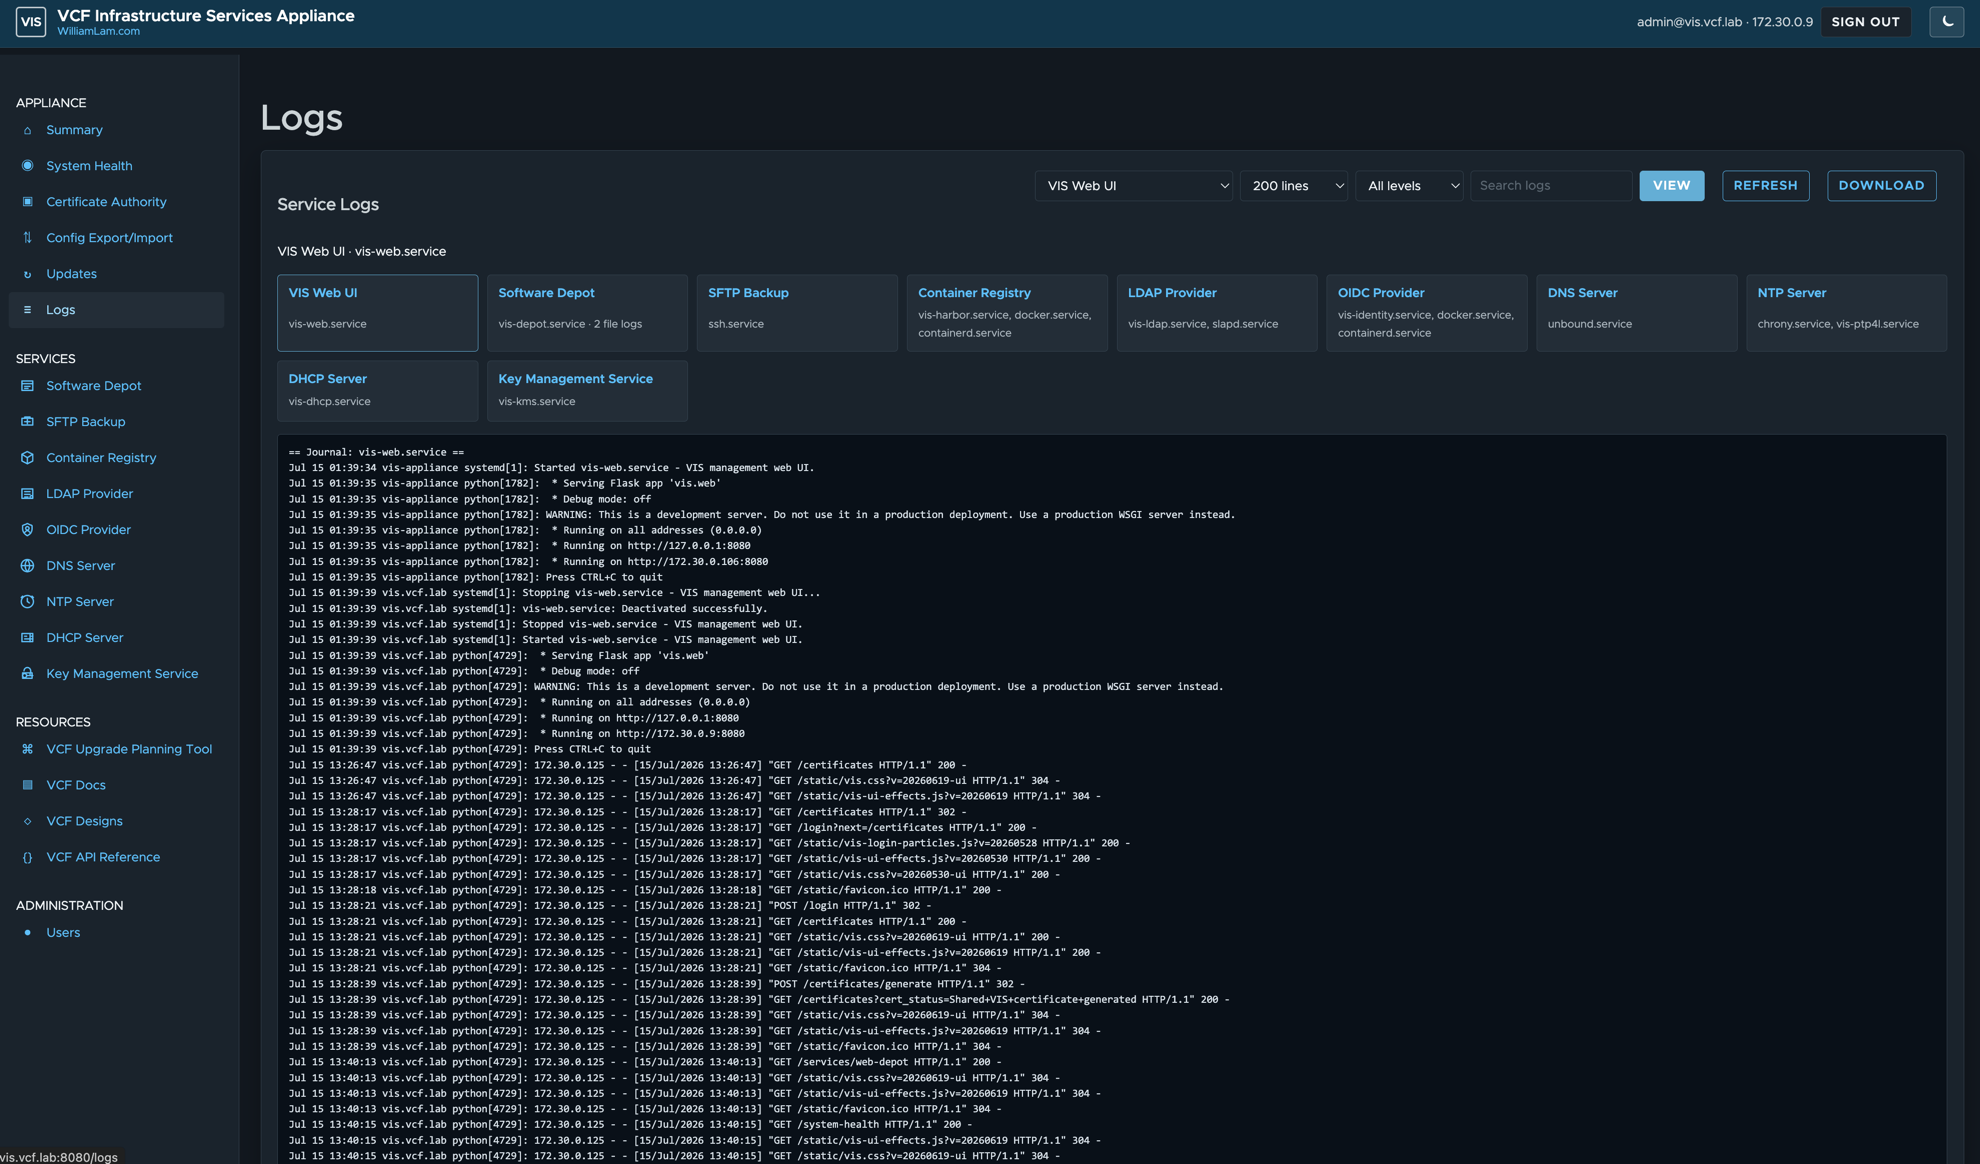
You can view both VIS system logs as well as individual service logs.
Configuration
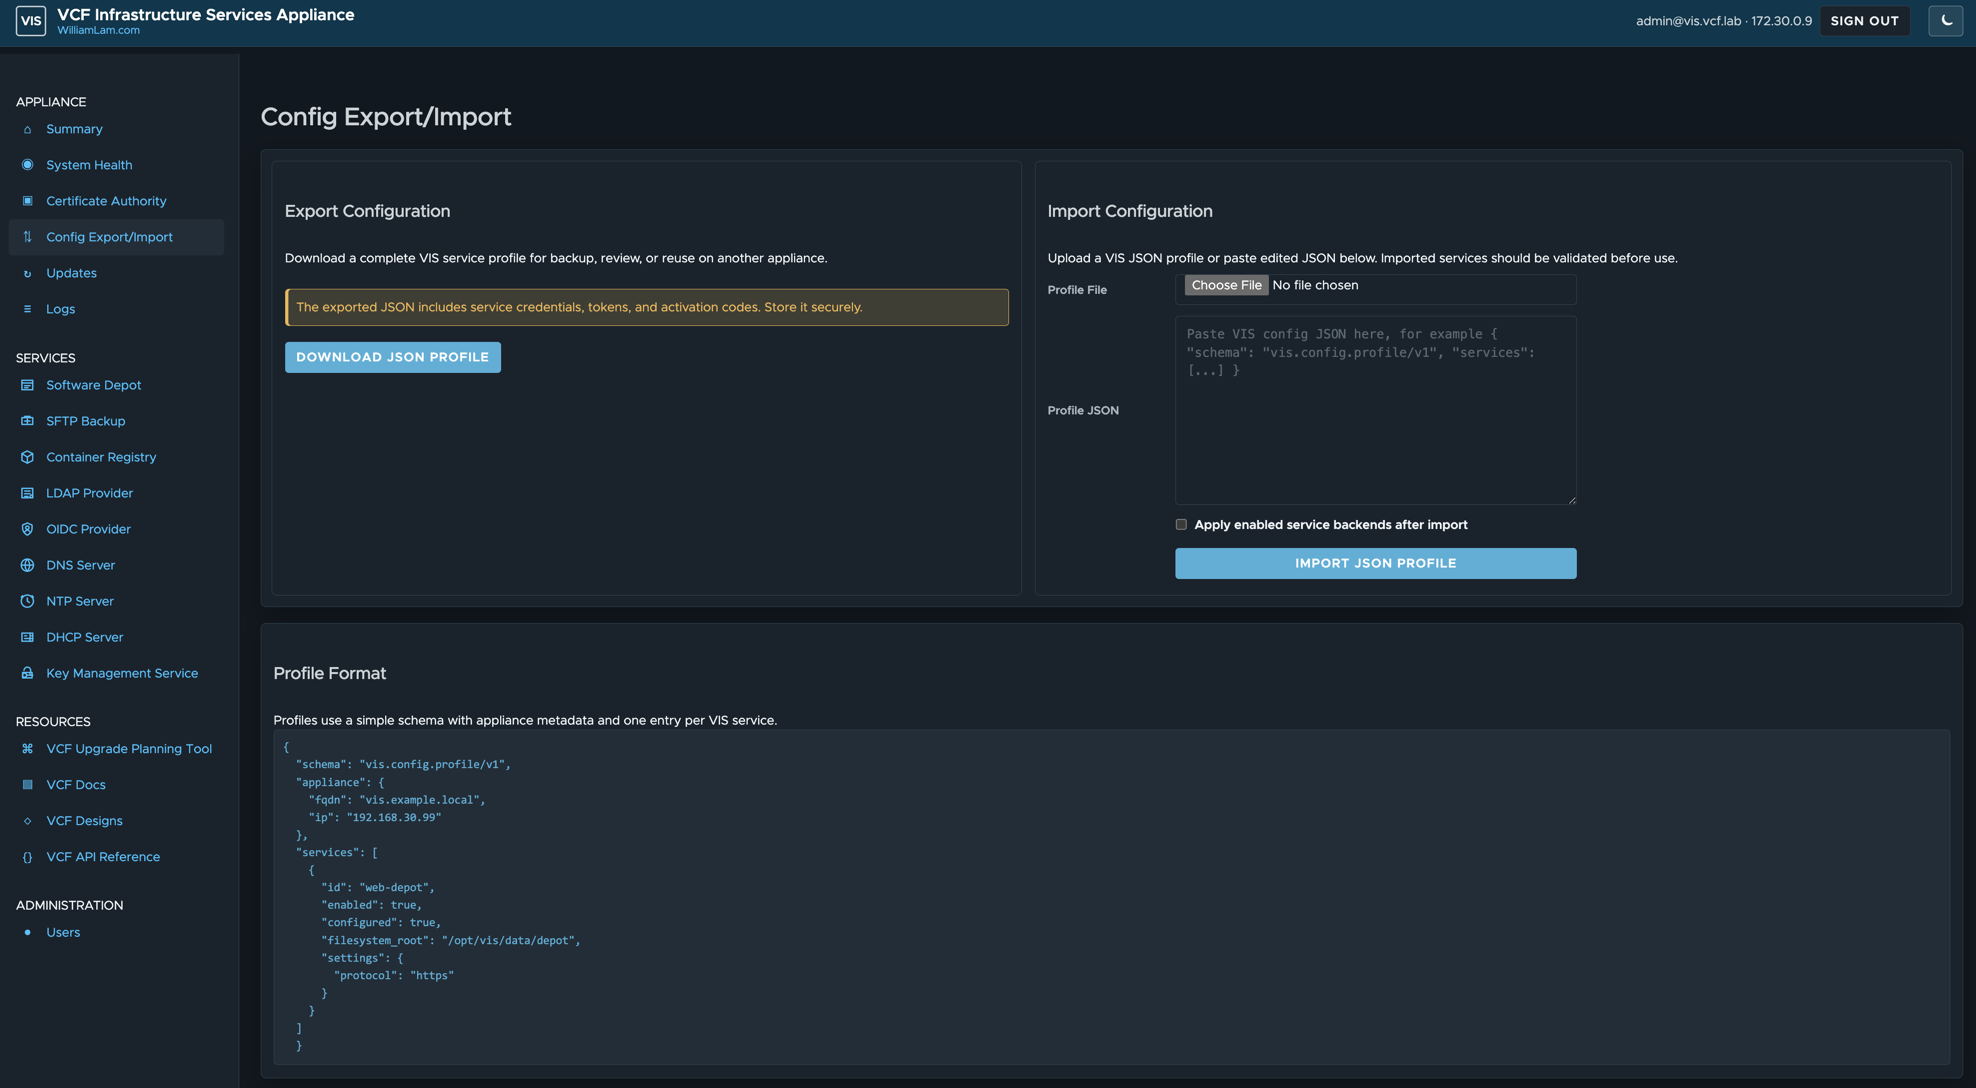
You can export and import VIS configuration for backup or re-deployments.
Initialize Certificate Authority
VIS optionally supports secure TLS for a number of services, which can be enabled by clicking the Initialize VIS CA button to generate and/or rotate the VIS CA.
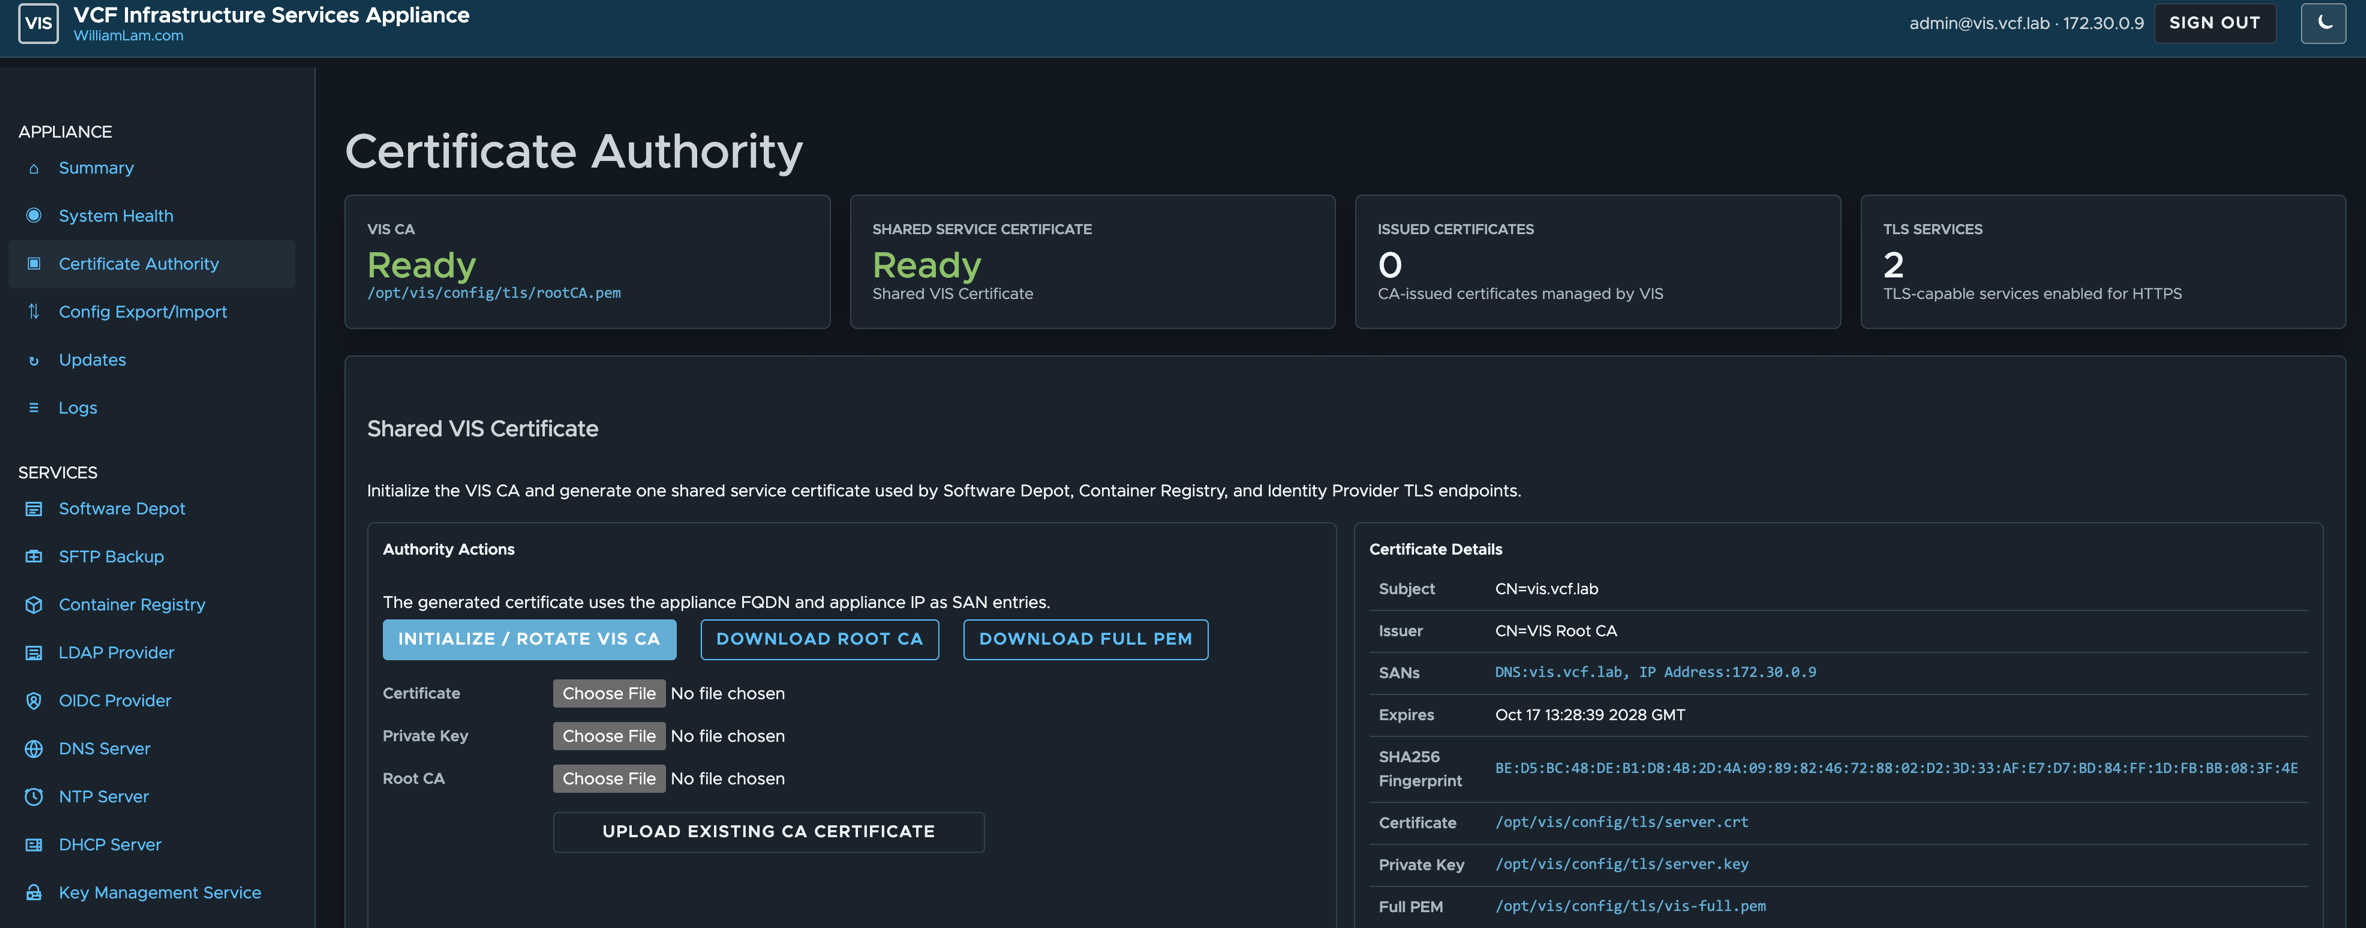
> Note: For VCF Single Sign-On (SSO), the OIDC Service must be configured using TLS and you can download the full PEM certificate from this page
Once enabled, you can issue new TLS certificates as well as see which services are currently using the shared TLS certificate.
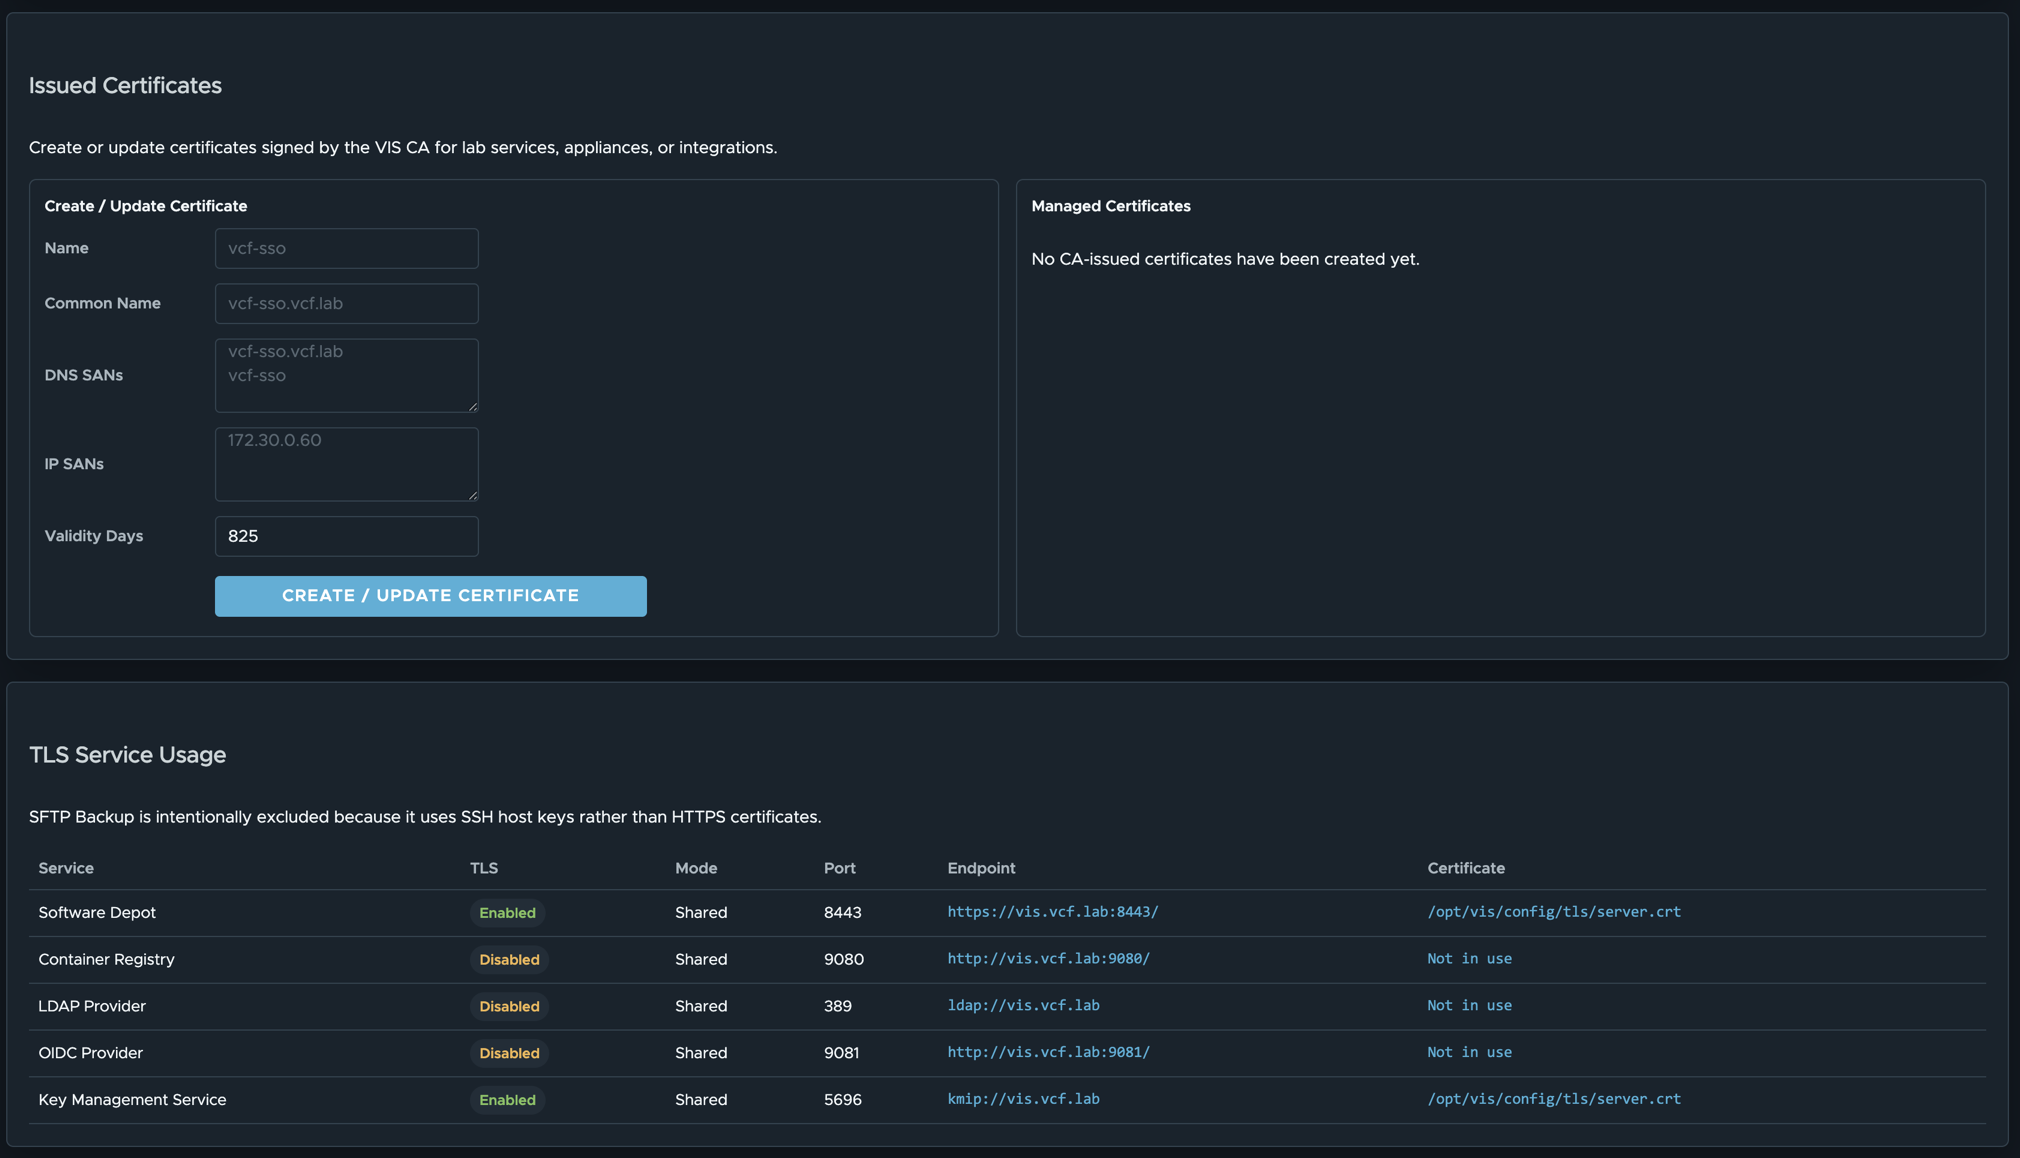
Setup HTTP Server for VCF Offline Depot
Required Input to Initialize Service:
- TLS (Optional)
- Basic Auth (Optional)
- Username
- Password
For an HTTP-only Offline Depot without basic authentication, simply click "Save Configuration" to initialize and then click "Enable Service".
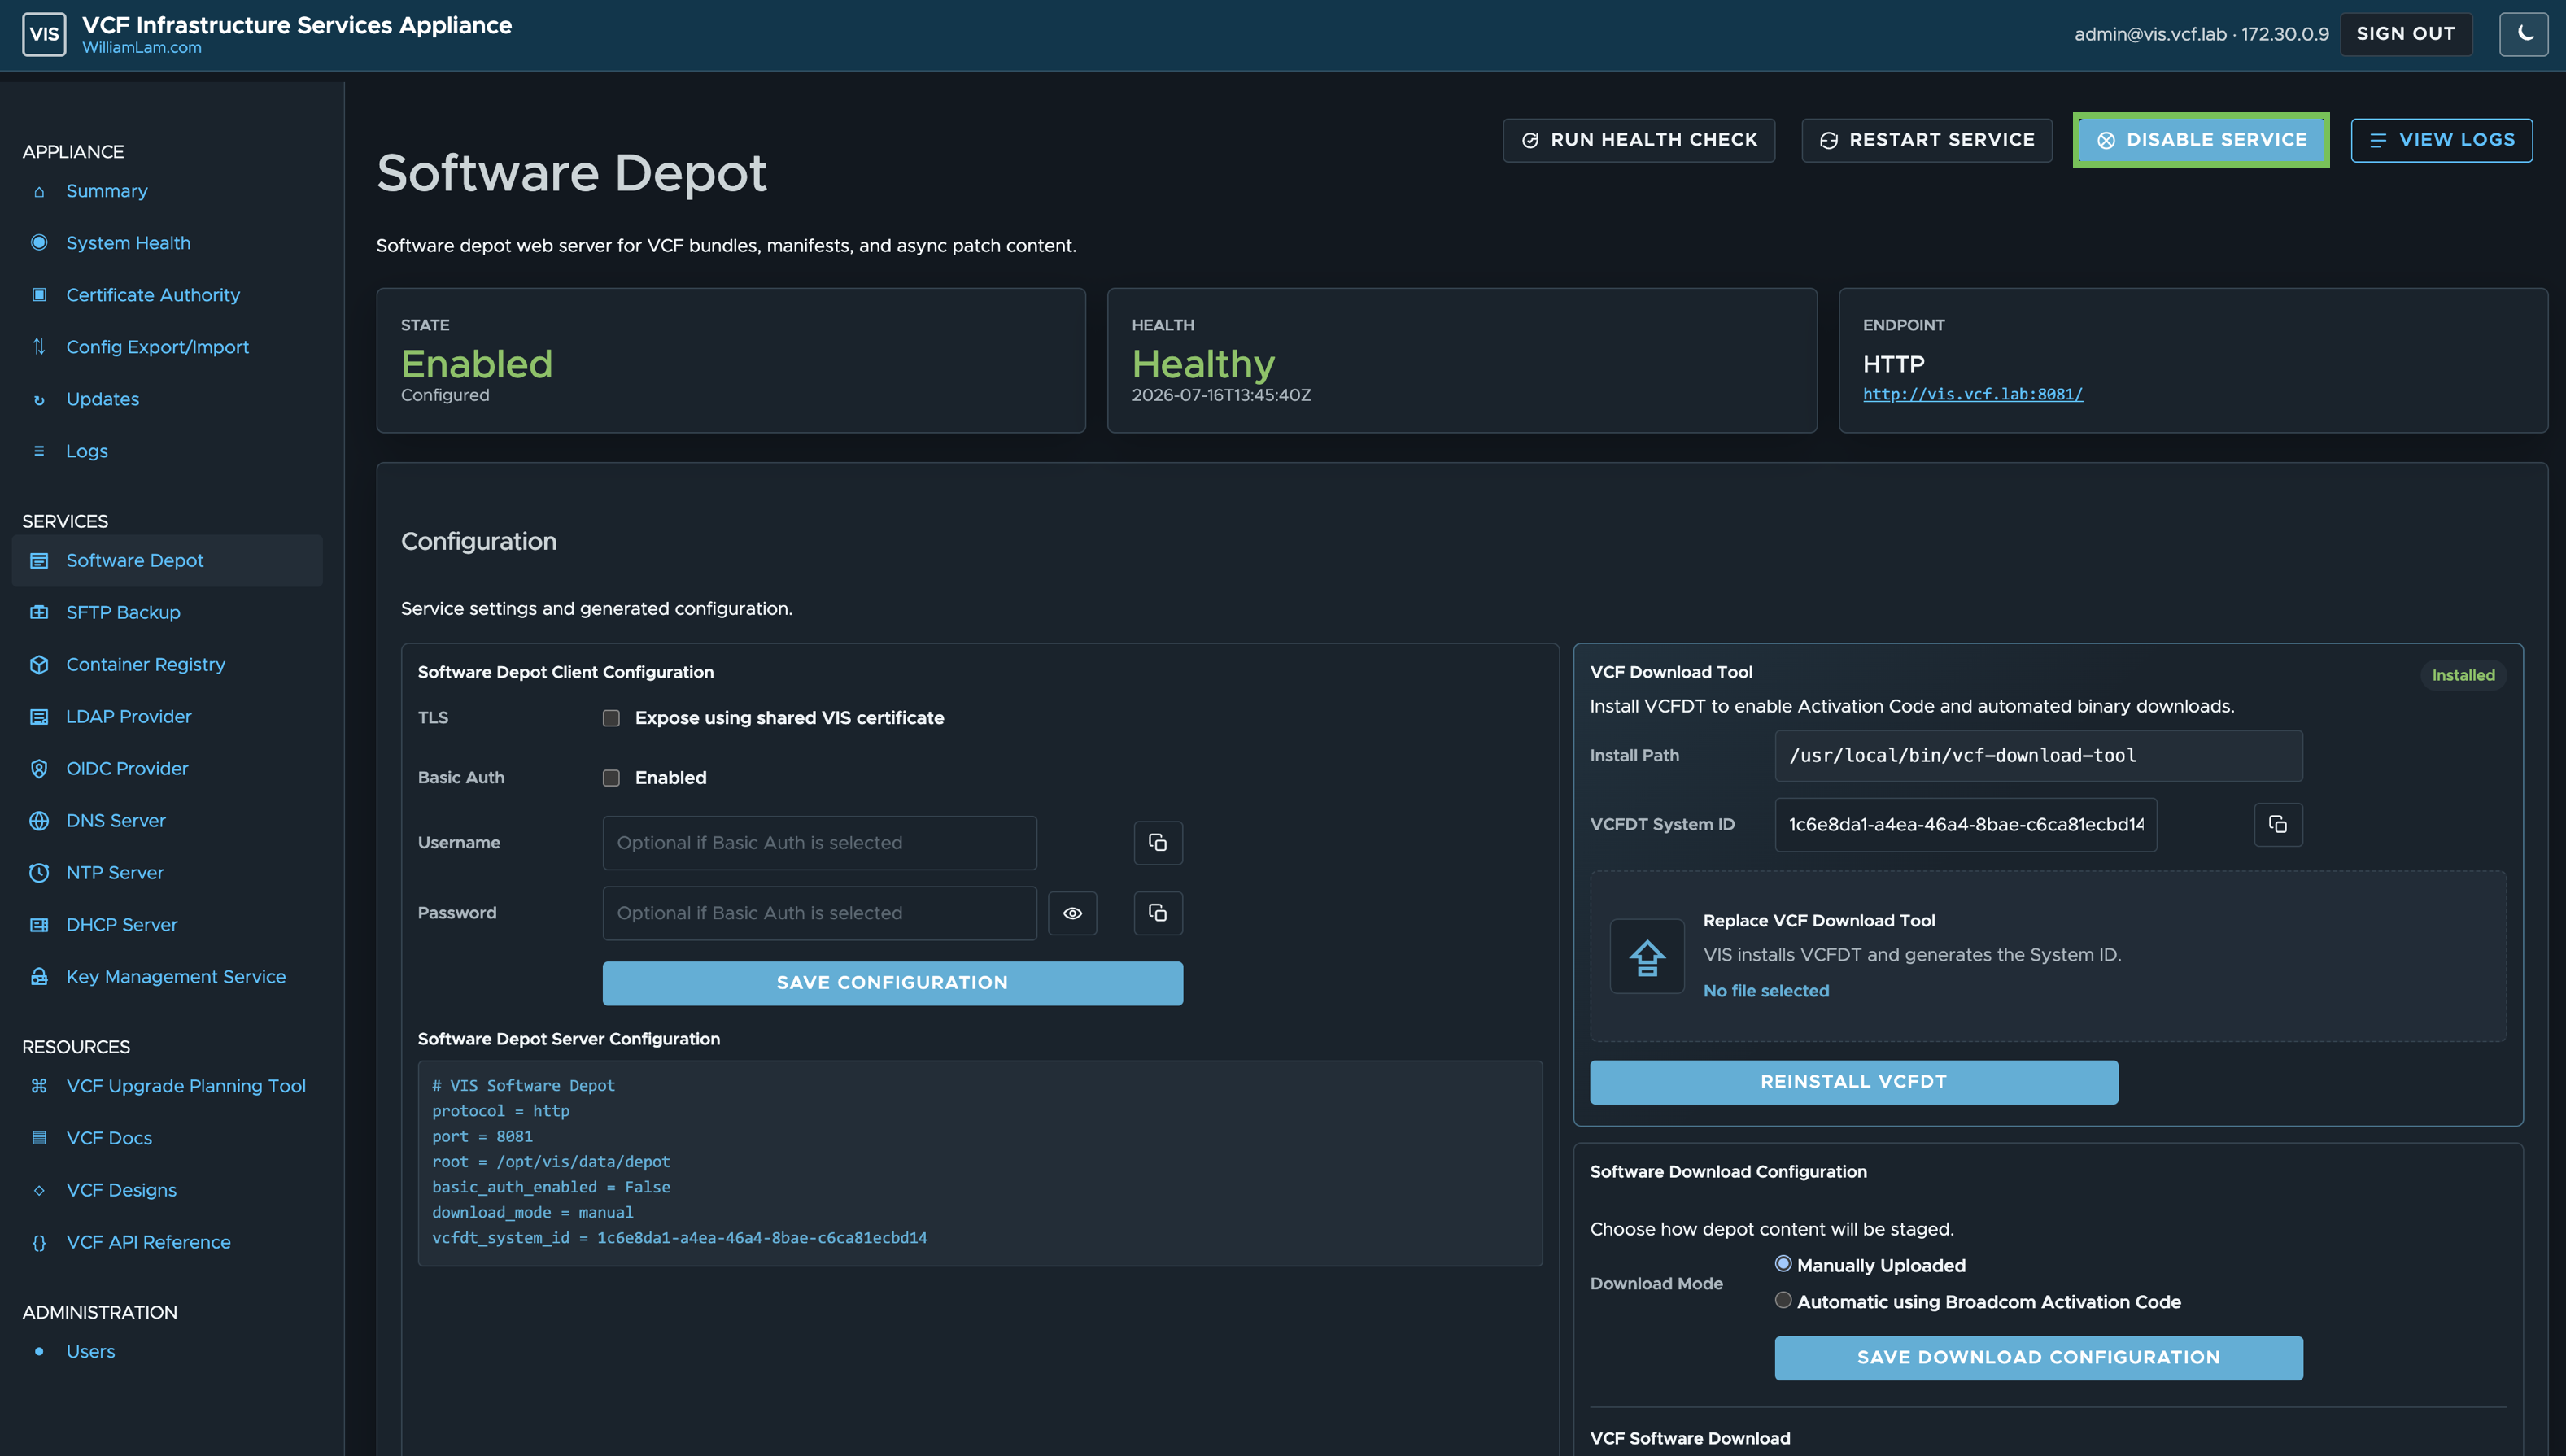
> Note: You will need to follow this blog post for configuring your VCF Installer to use HTTP Software Depot
For an HTTPS Offline Depot with basic authentication, check the TLS checkbox and configure your desired credentials before saving configuration to initialize and then clicking "Enable Service".
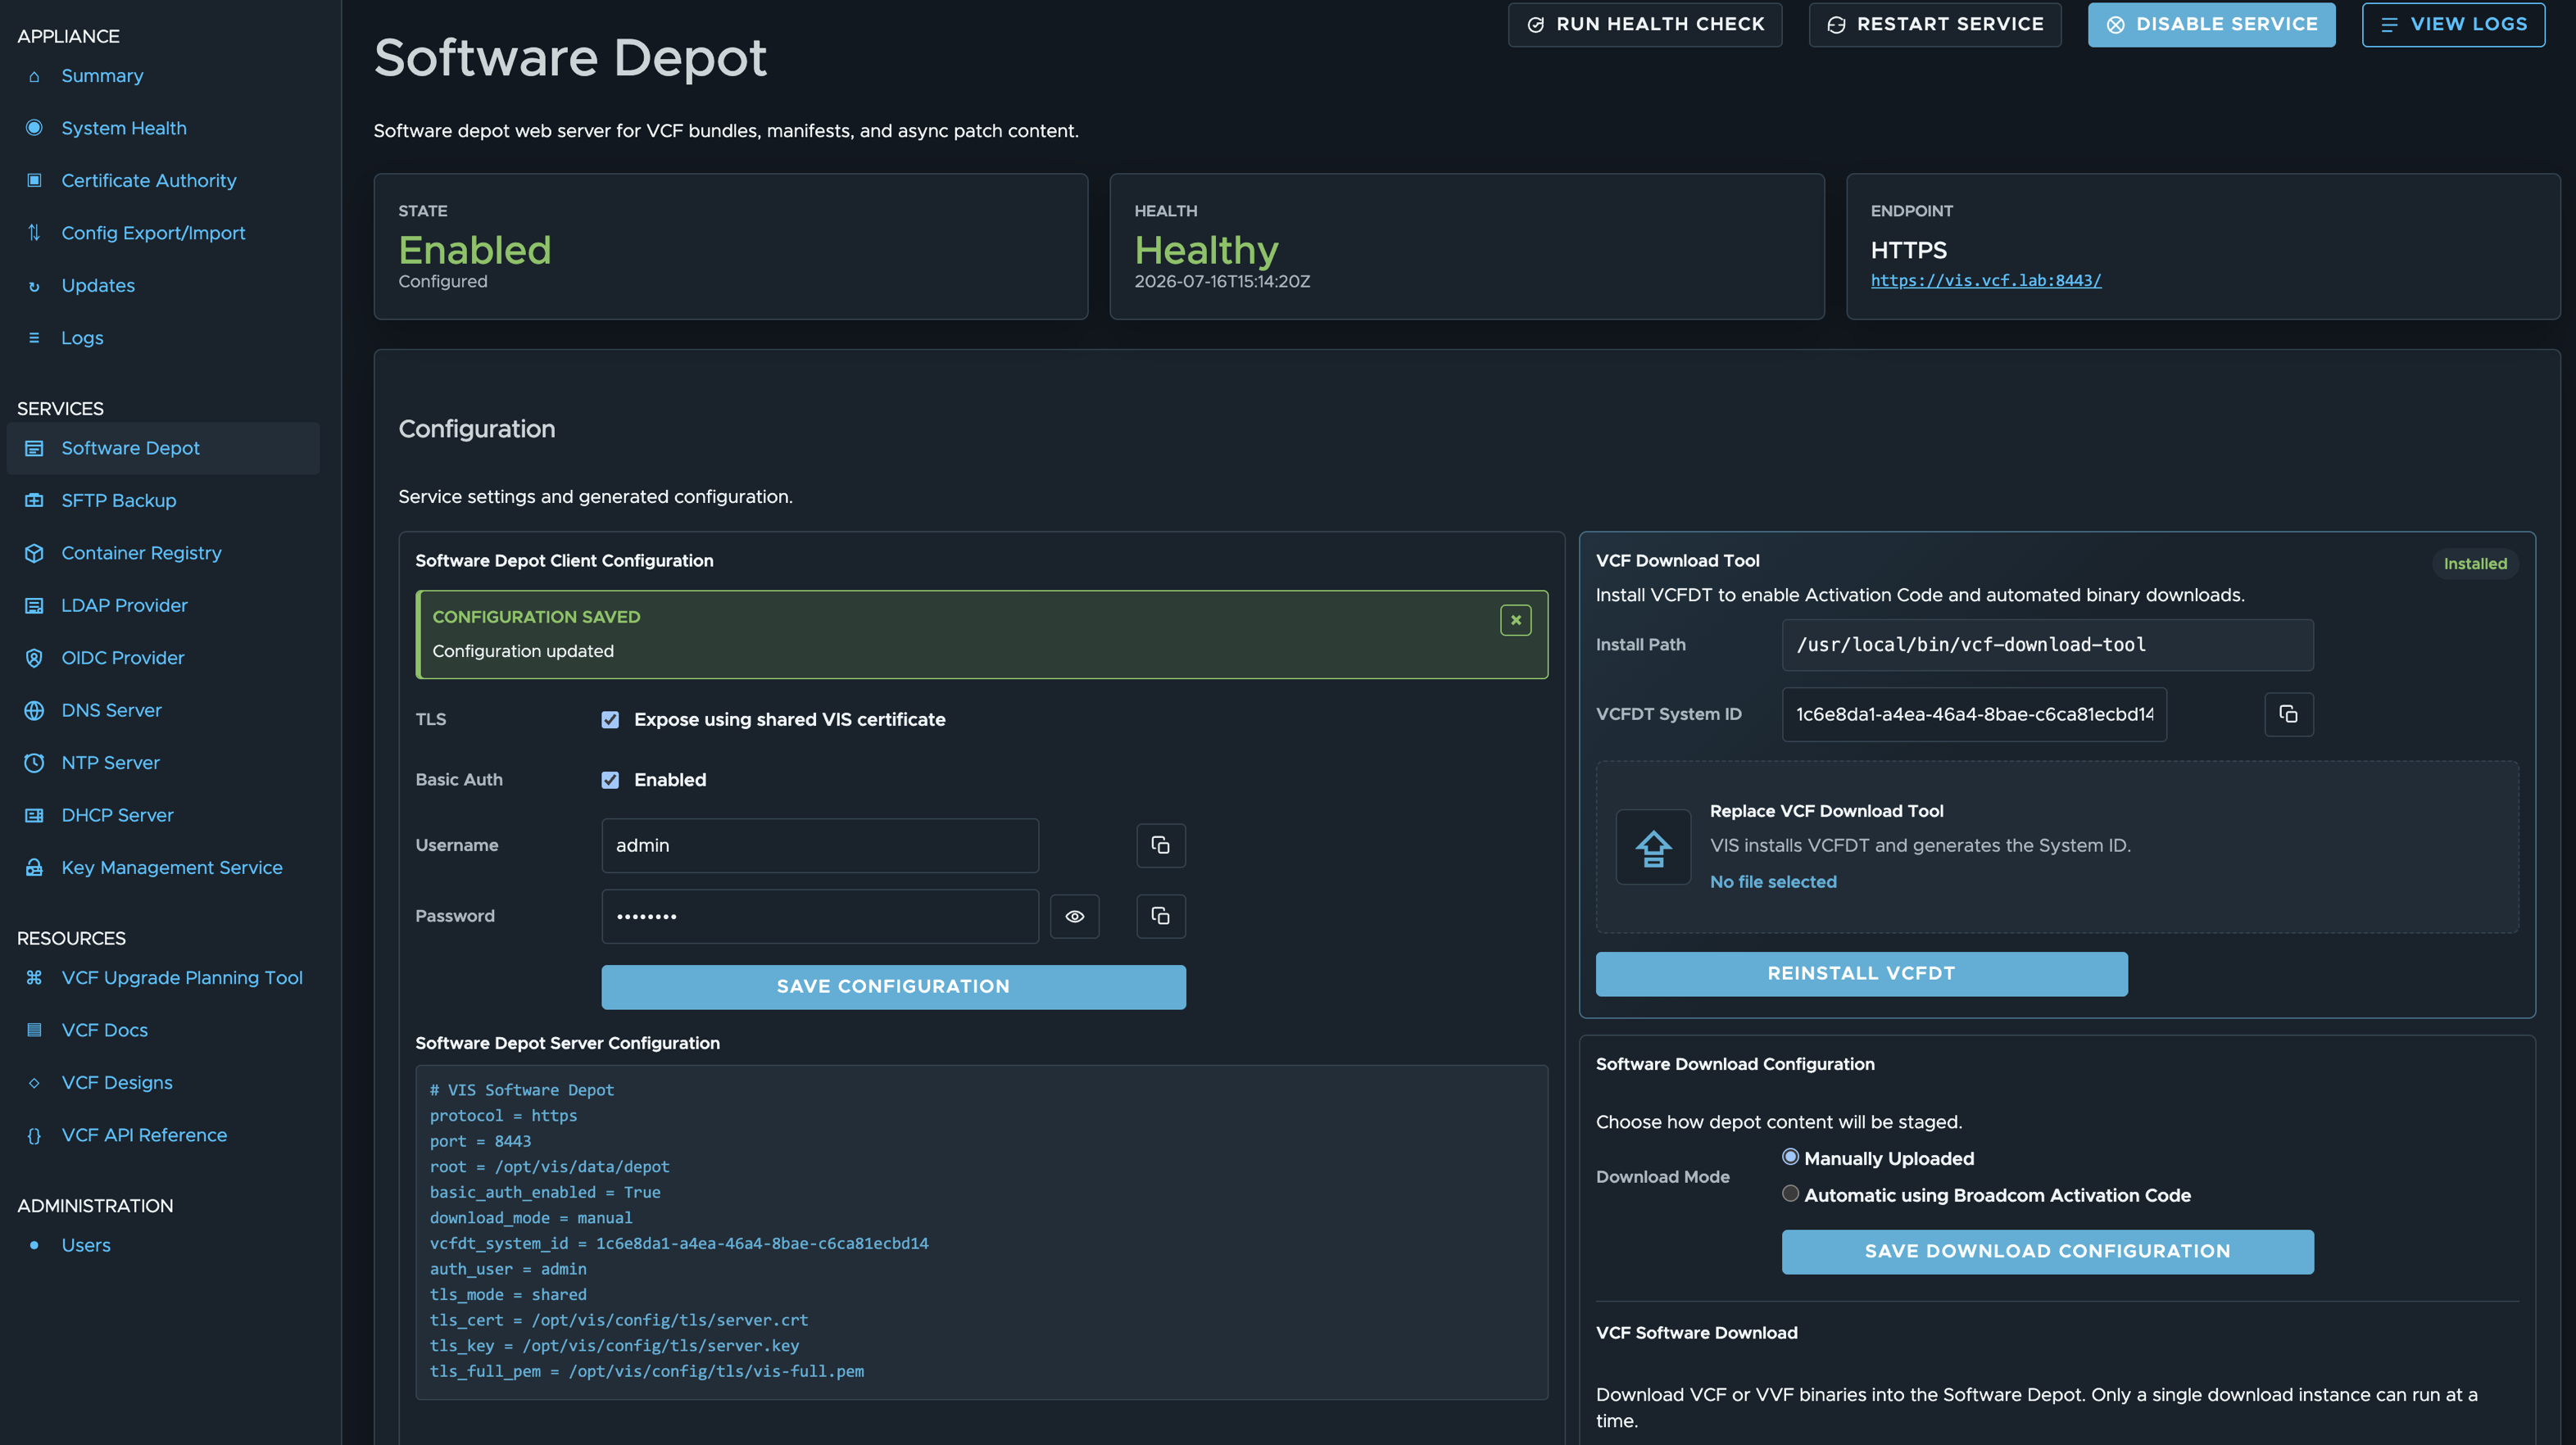
If you have outbound connectivity to Broadcom.com to download the VCF Install/Upgrade Binaries, VIS can perform that on your behalf. You will need to manually download the VCF Download Tool (VCFDT) from the Broadcom Support Portal, then drag and drop it to install VCFDT on VIS.
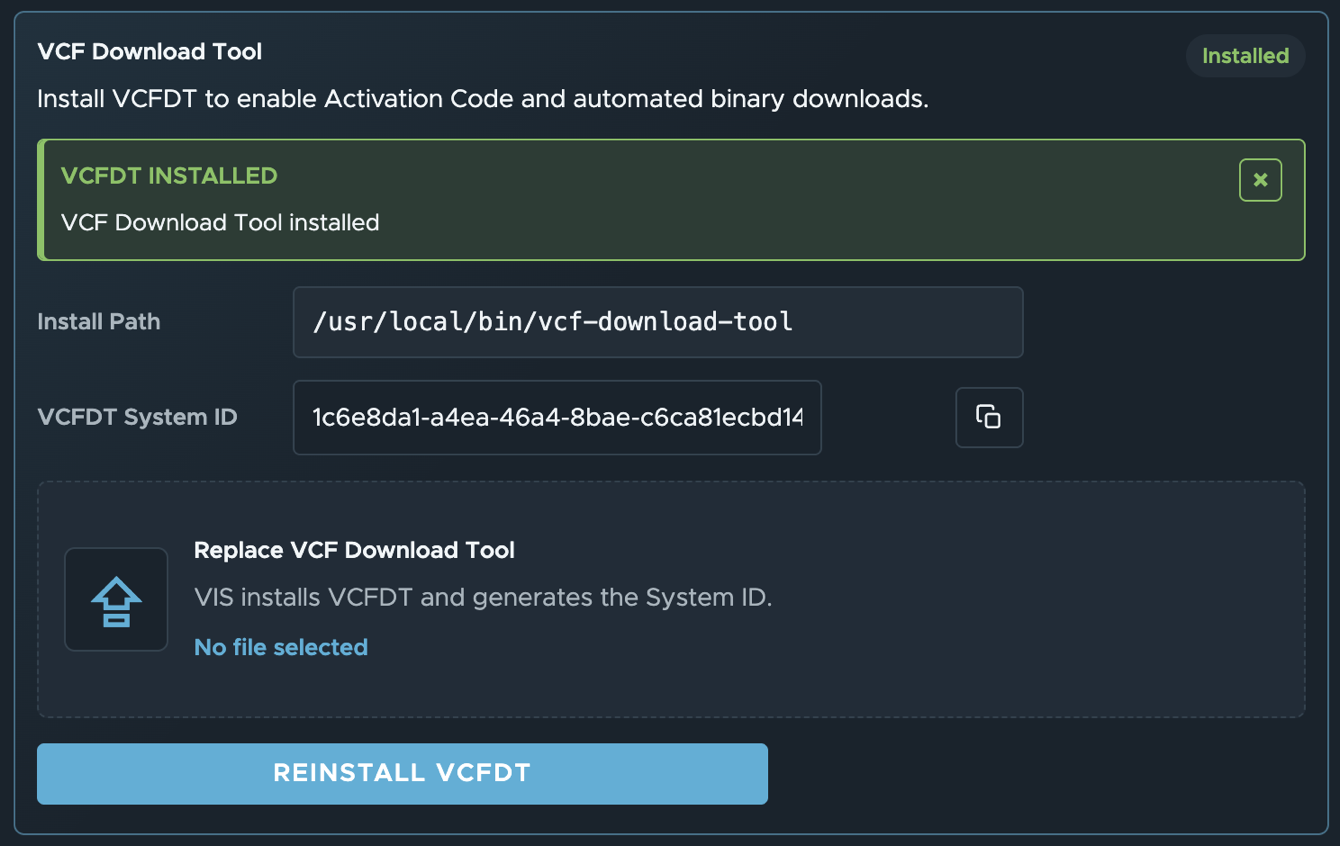
If you choose to have VIS download the binaries, you will need to register your VCFDT System ID with Broadcom Support Portal and generate Broadcom Activation Code
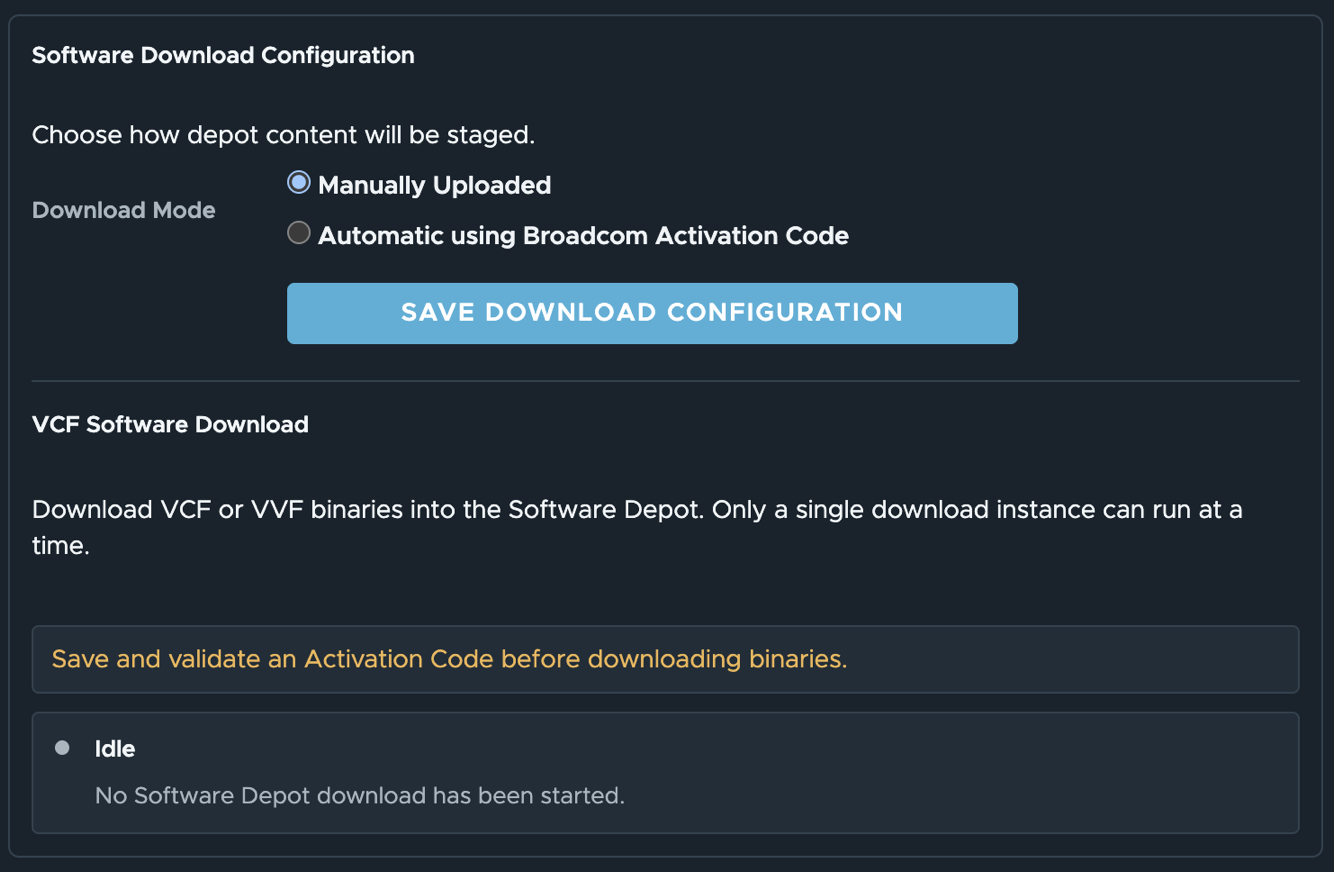
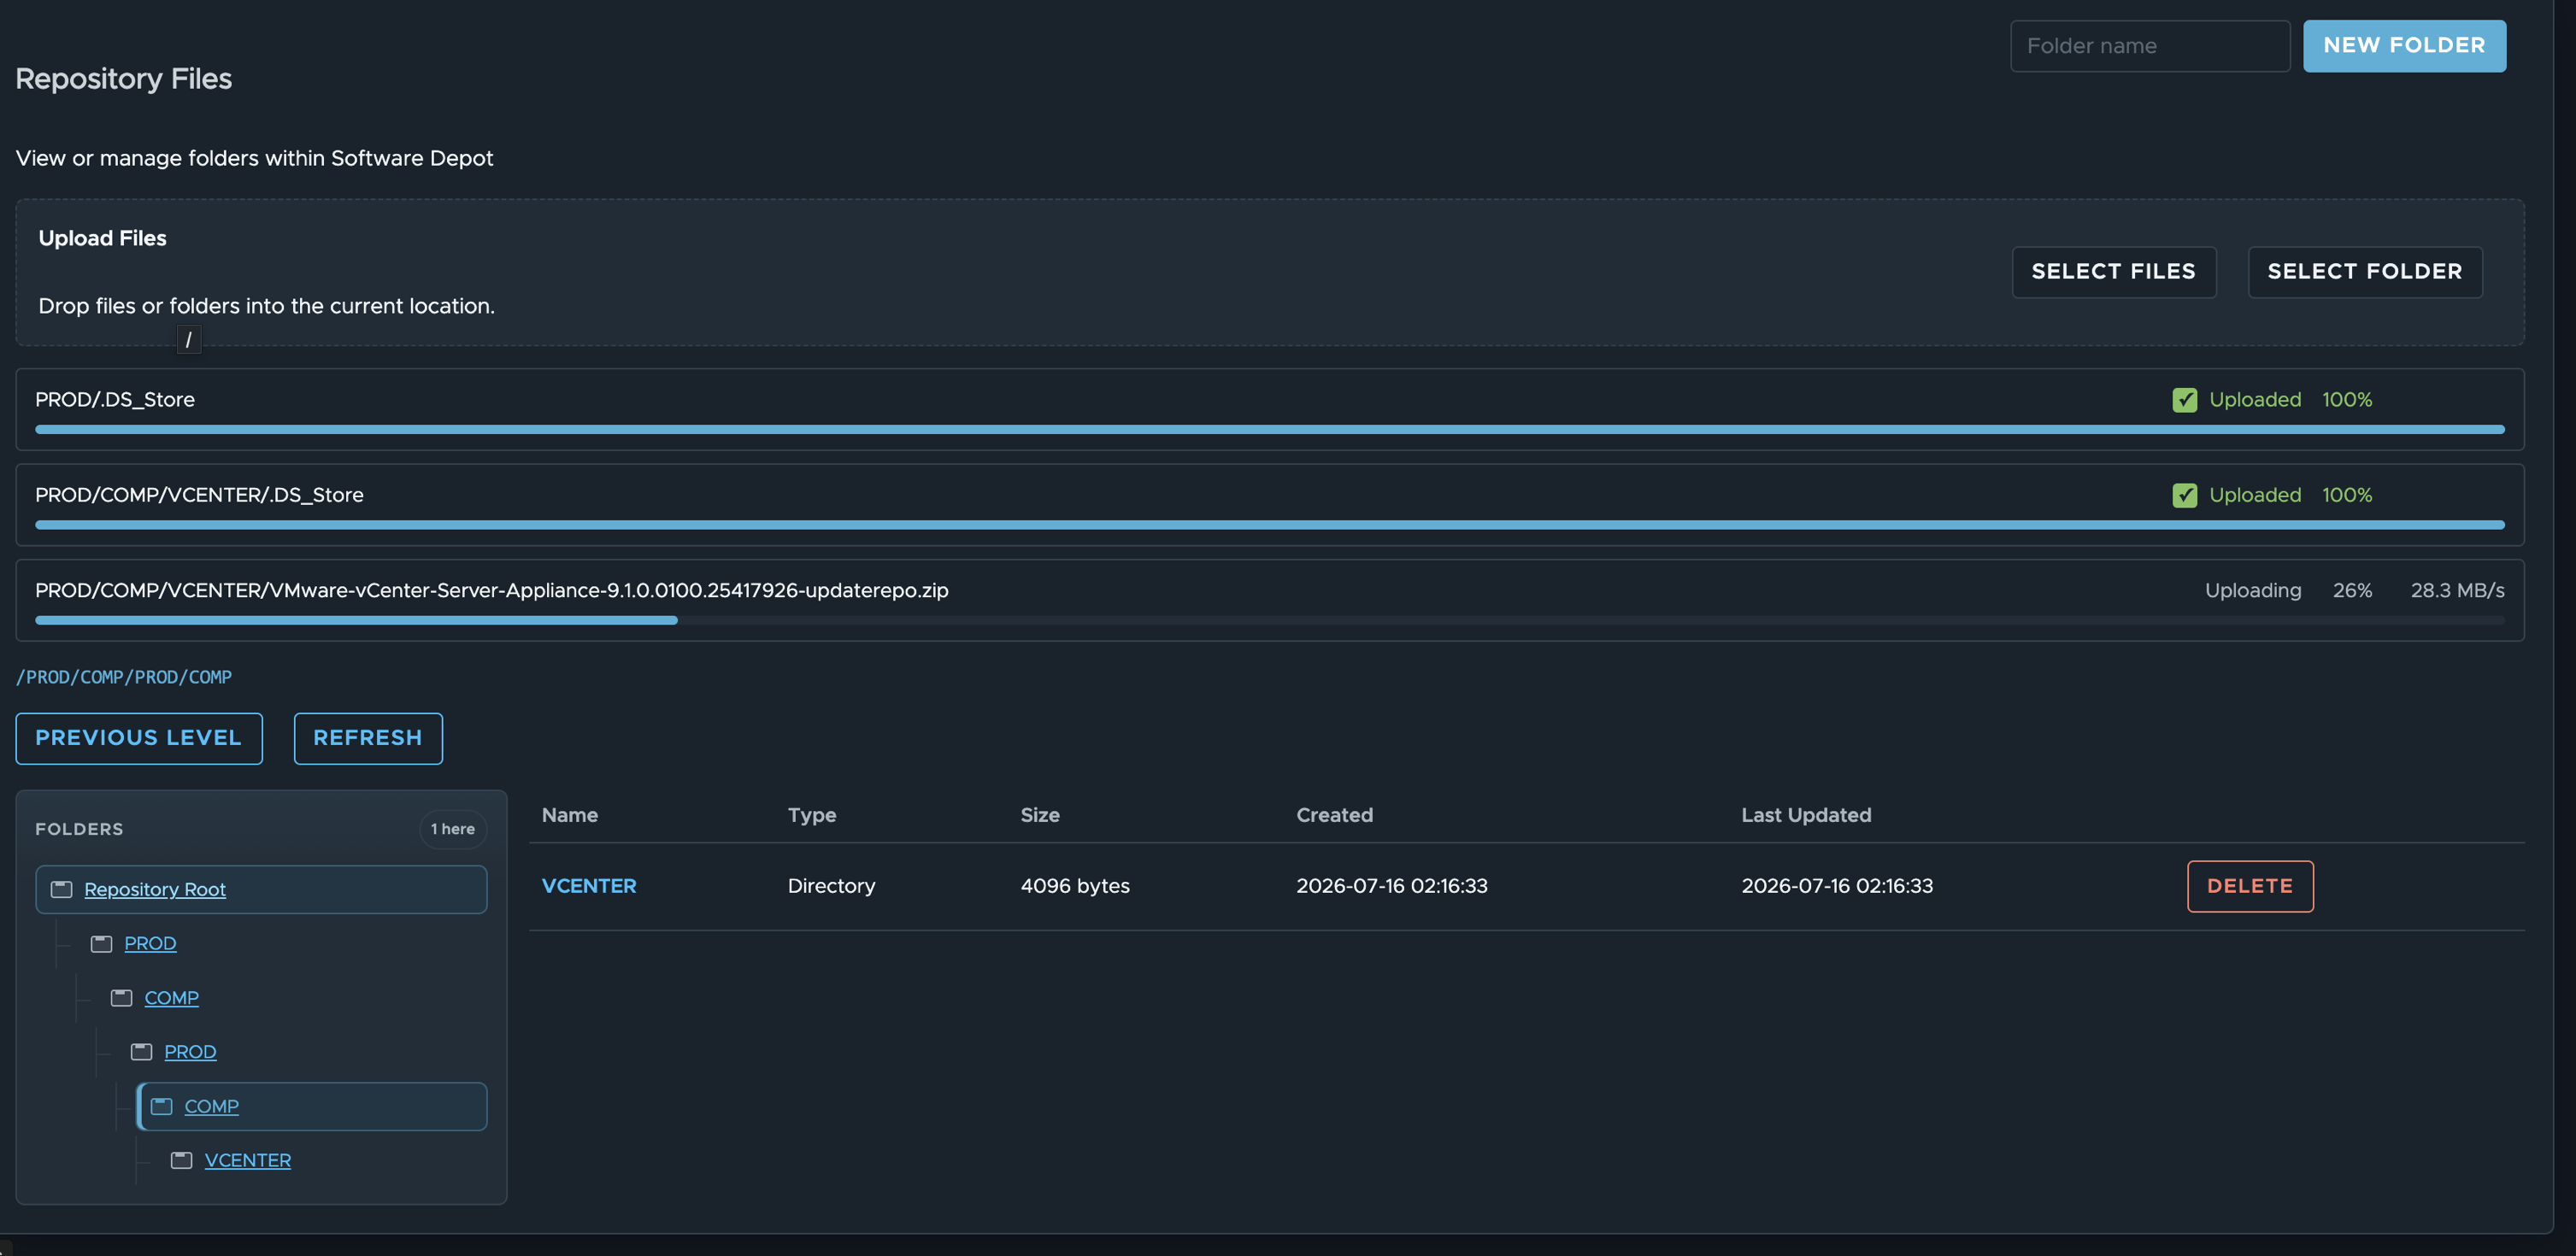
If you have already downloaded the VCF binaries through alternative means, you can simply drag/drop the PROD folder into VIS file explorer at the bottom of the page and once it has completed, you can access your offline depot.
For HTTPS Offline Depot, you will need to add VIS CA certificate into the VCF Installer keystore, so a trust can be established. Navigate to "Certificate Authority" page on VIS and click on "Download Full PEM" certificate and SCP that to your VCF Installer. Switch to root user and then run the following command to add VIS certificate to VCF Installer:
keytool -import -trustcacerts -file vis-full.pem -keystore /etc/alternatives/jre/lib/security/cacerts -alias vis_offline_depot -storepass changeit -noprompt

echo 'y' | /opt/vmware/vcf/operationsmanager/scripts/cli/sddcmanager_restart_services.sh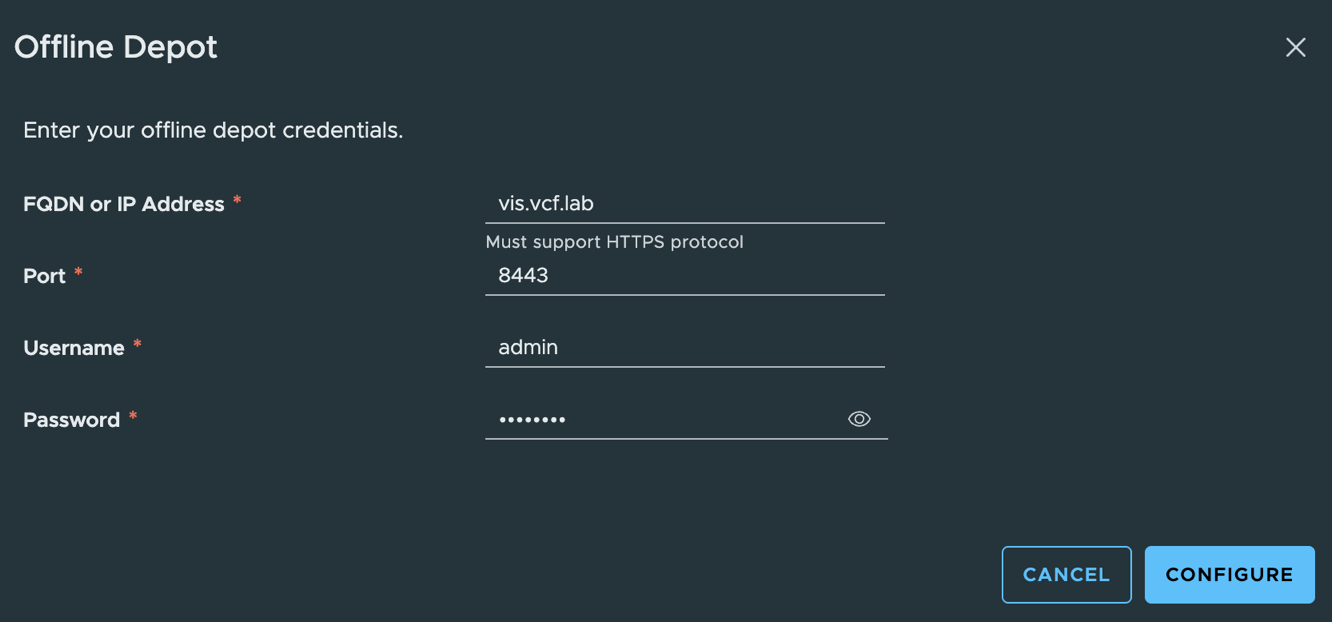
Setup SFTP Server for VCF Offline Depot
Required Input to Initialize Service:
- Username
- Password
Enter your desired username/password and save the configuration to initialize and click Enable service.
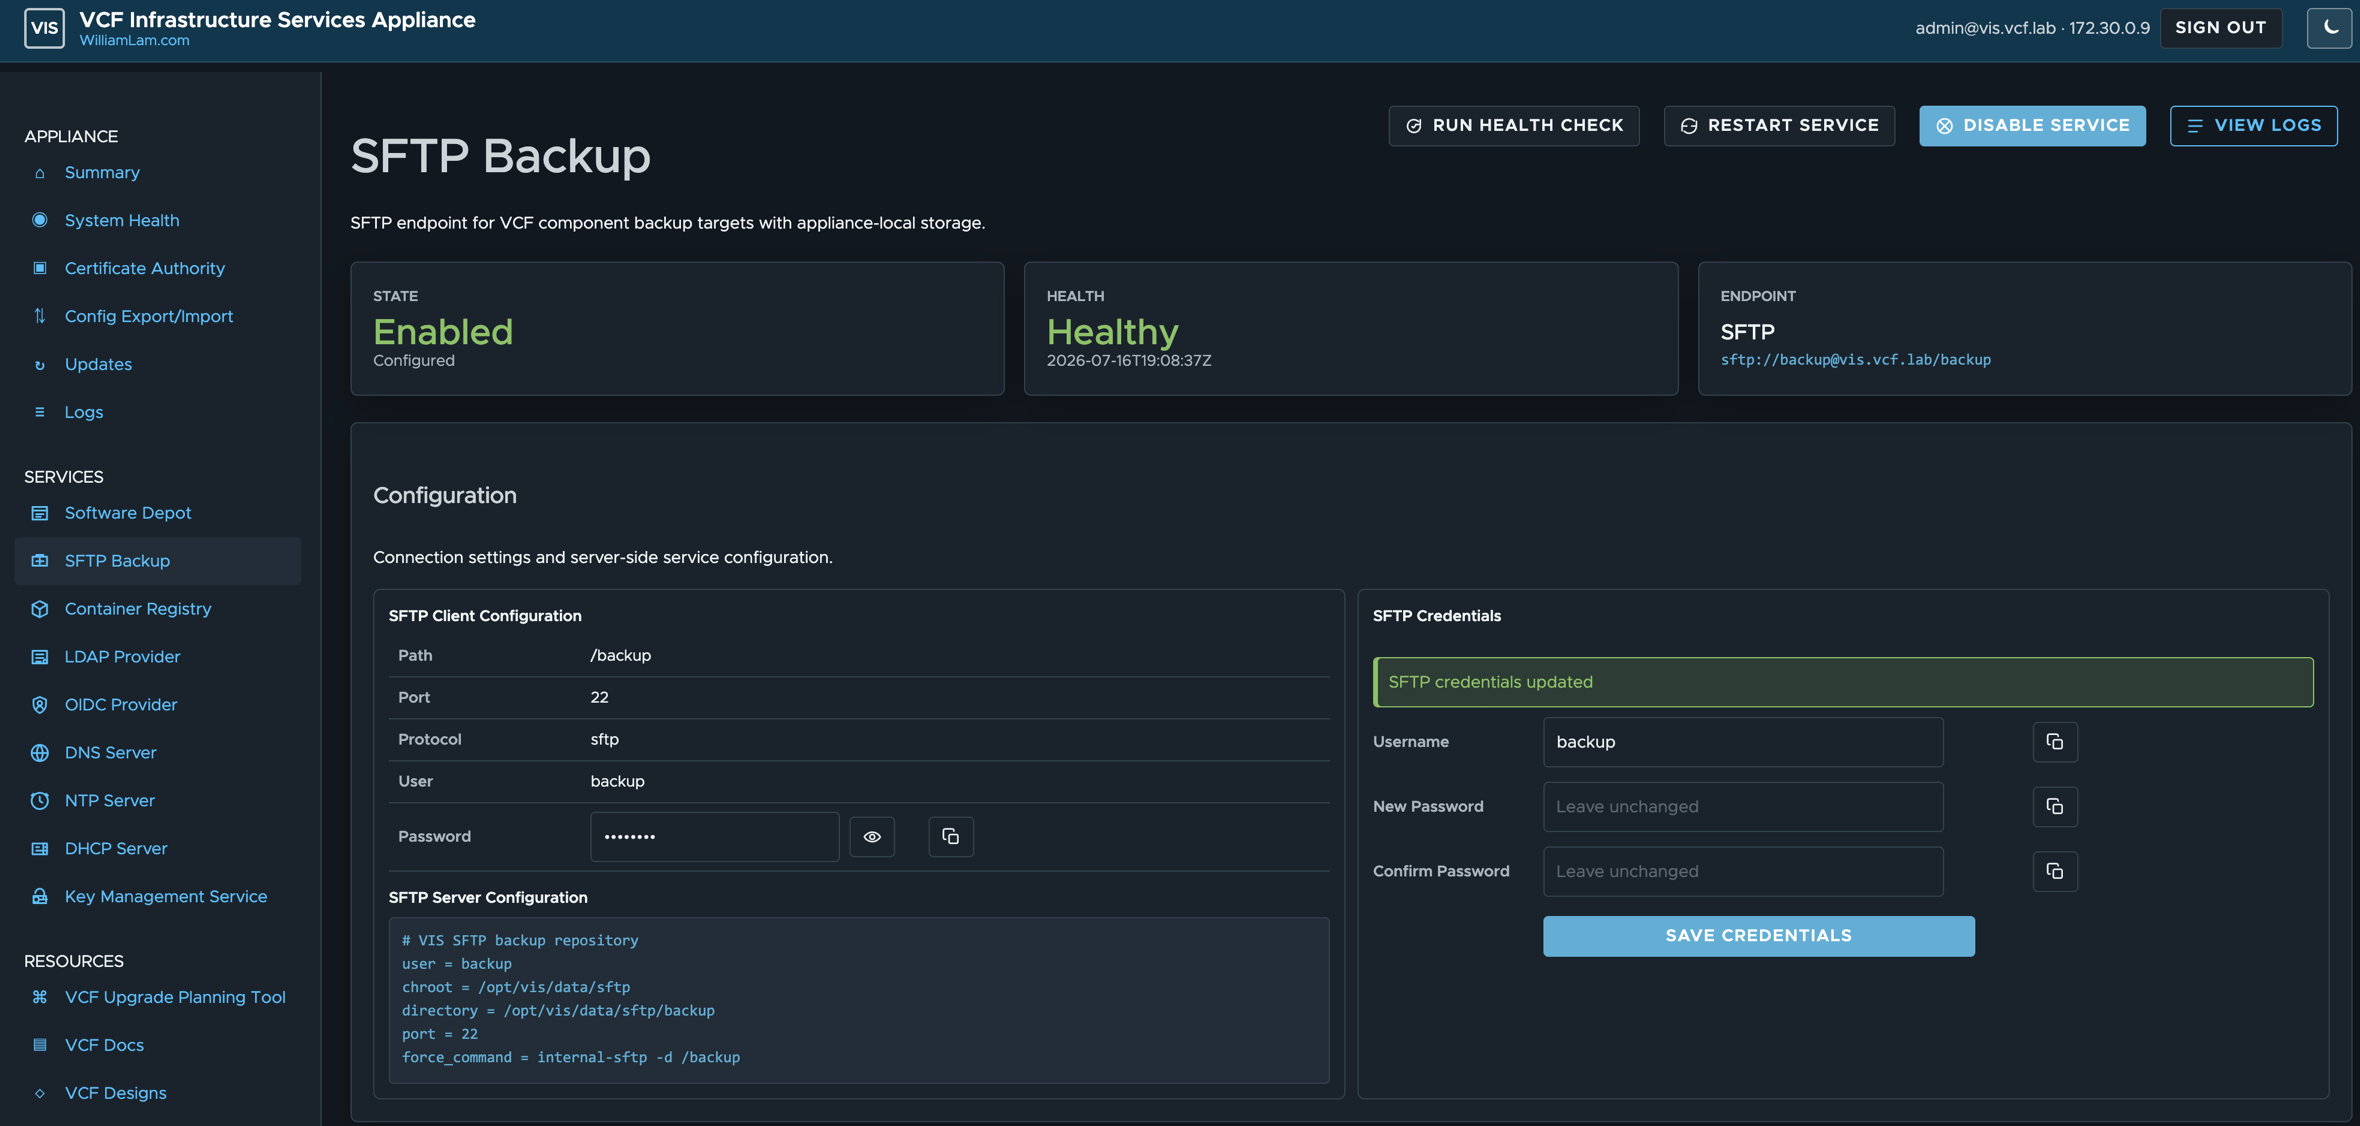
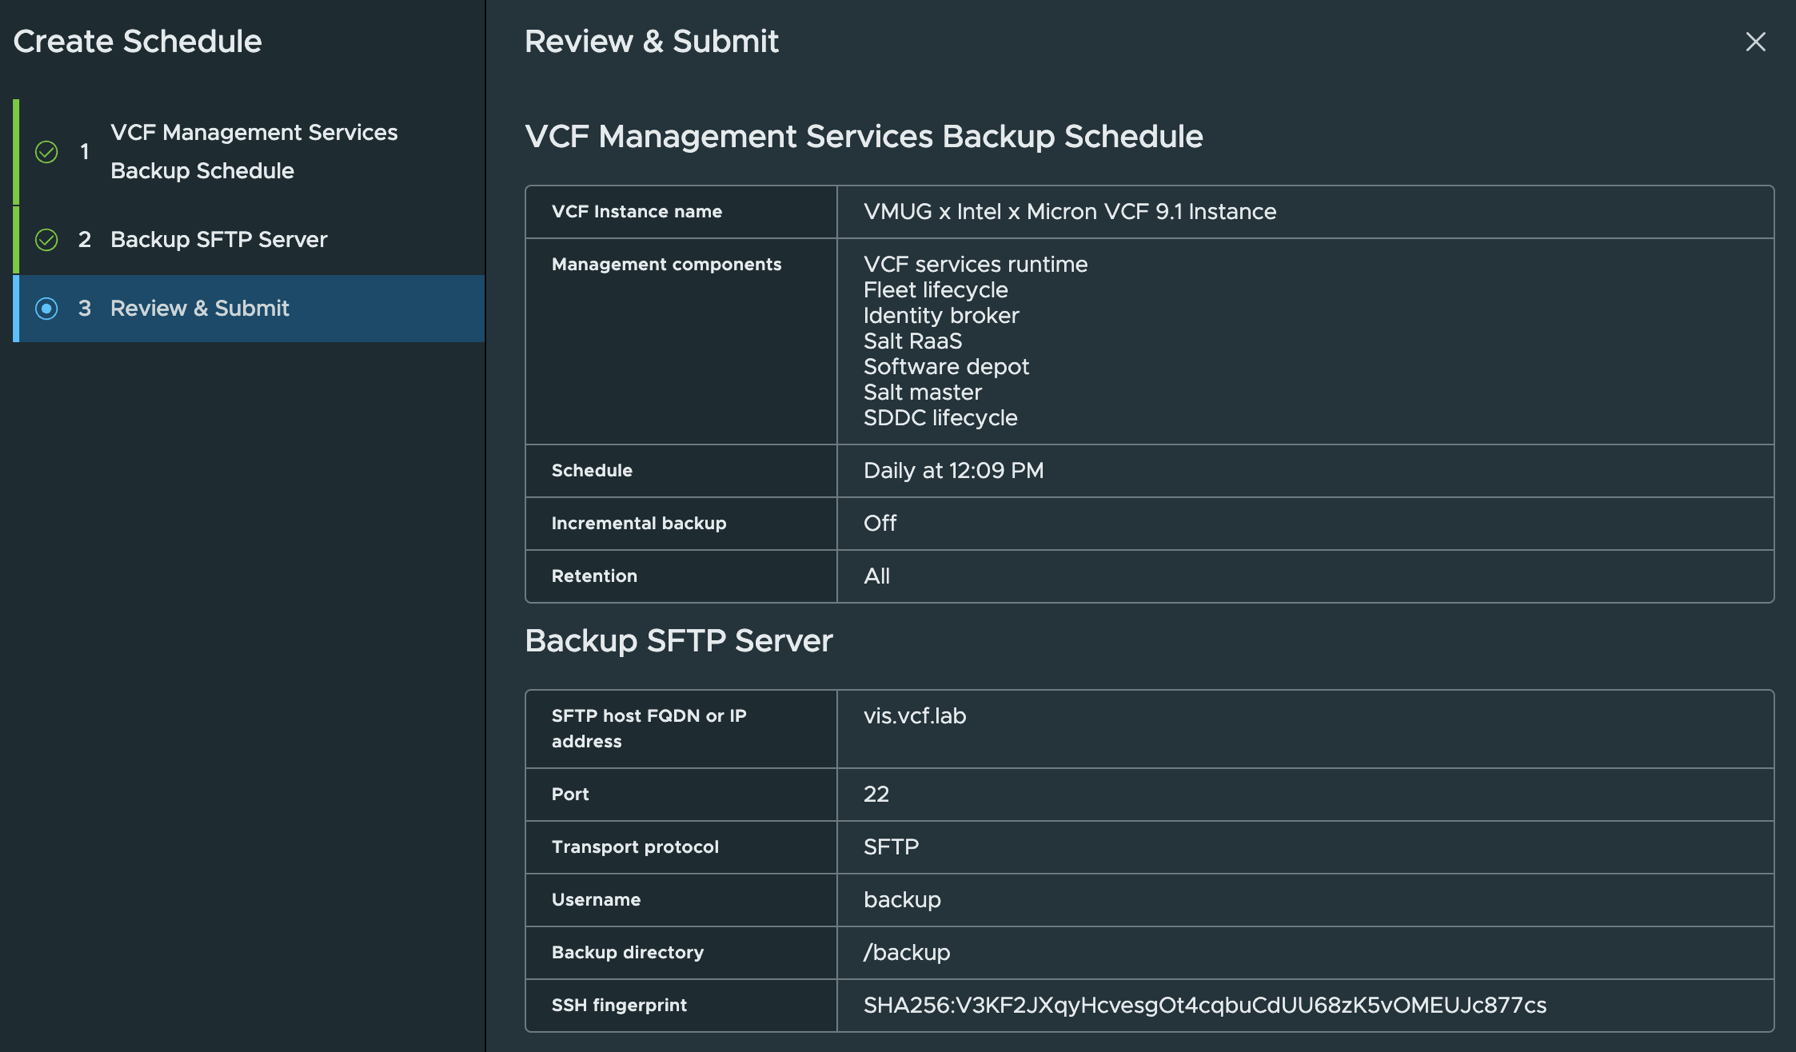
Make a note of the SFTP server configuration and log in to VCF Operations to configure your VCF backup schedule.
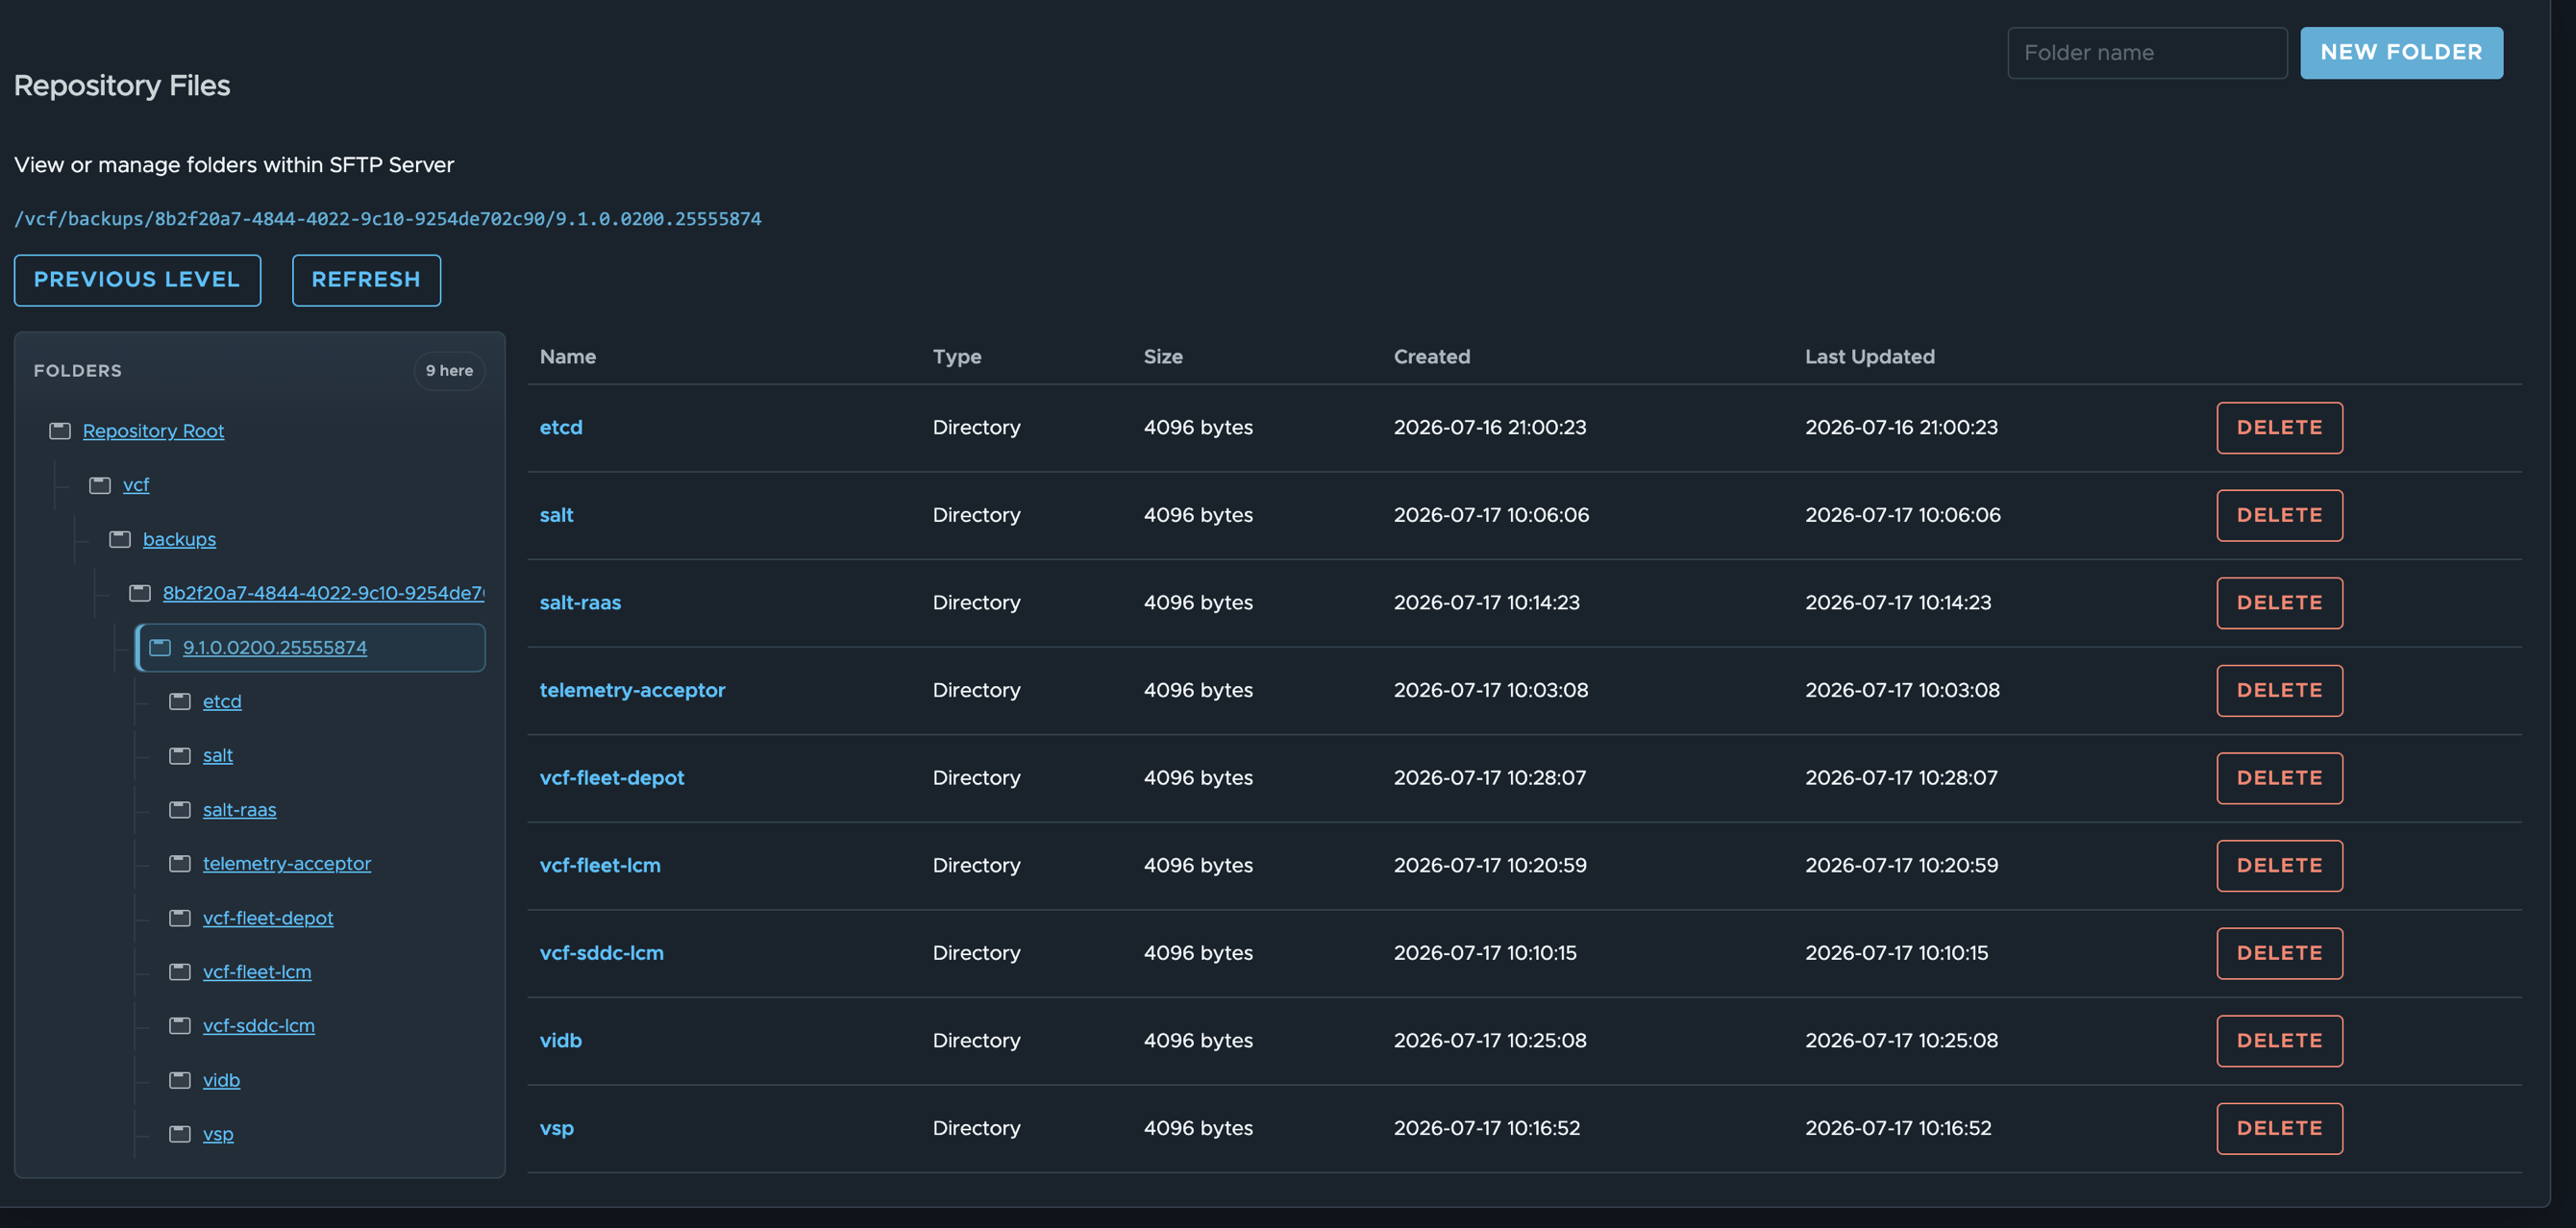
Similar to Software Depot, you can manage files directly from VIS UI or you can SSH to VIS and manage any clean up that you might require.
Setup Container Registry for VCF Supervisor Services & CLI Container Images
In addition to storing your own container images, you may also have a need for private Container Registry for the following:
- Hosting VCF Supervisor Service Container Images with private Container Registry
- Hosting VCF Consumption CLI Plugin Container Images with private Container Registry
Required Input to Initialize Service:
- TLS (Optional)
- Username
- Password
For the VCF specific use case, you will want to select the TLS checkbox and configure your desired credentials before saving configuration to initialize and click on Enable service.
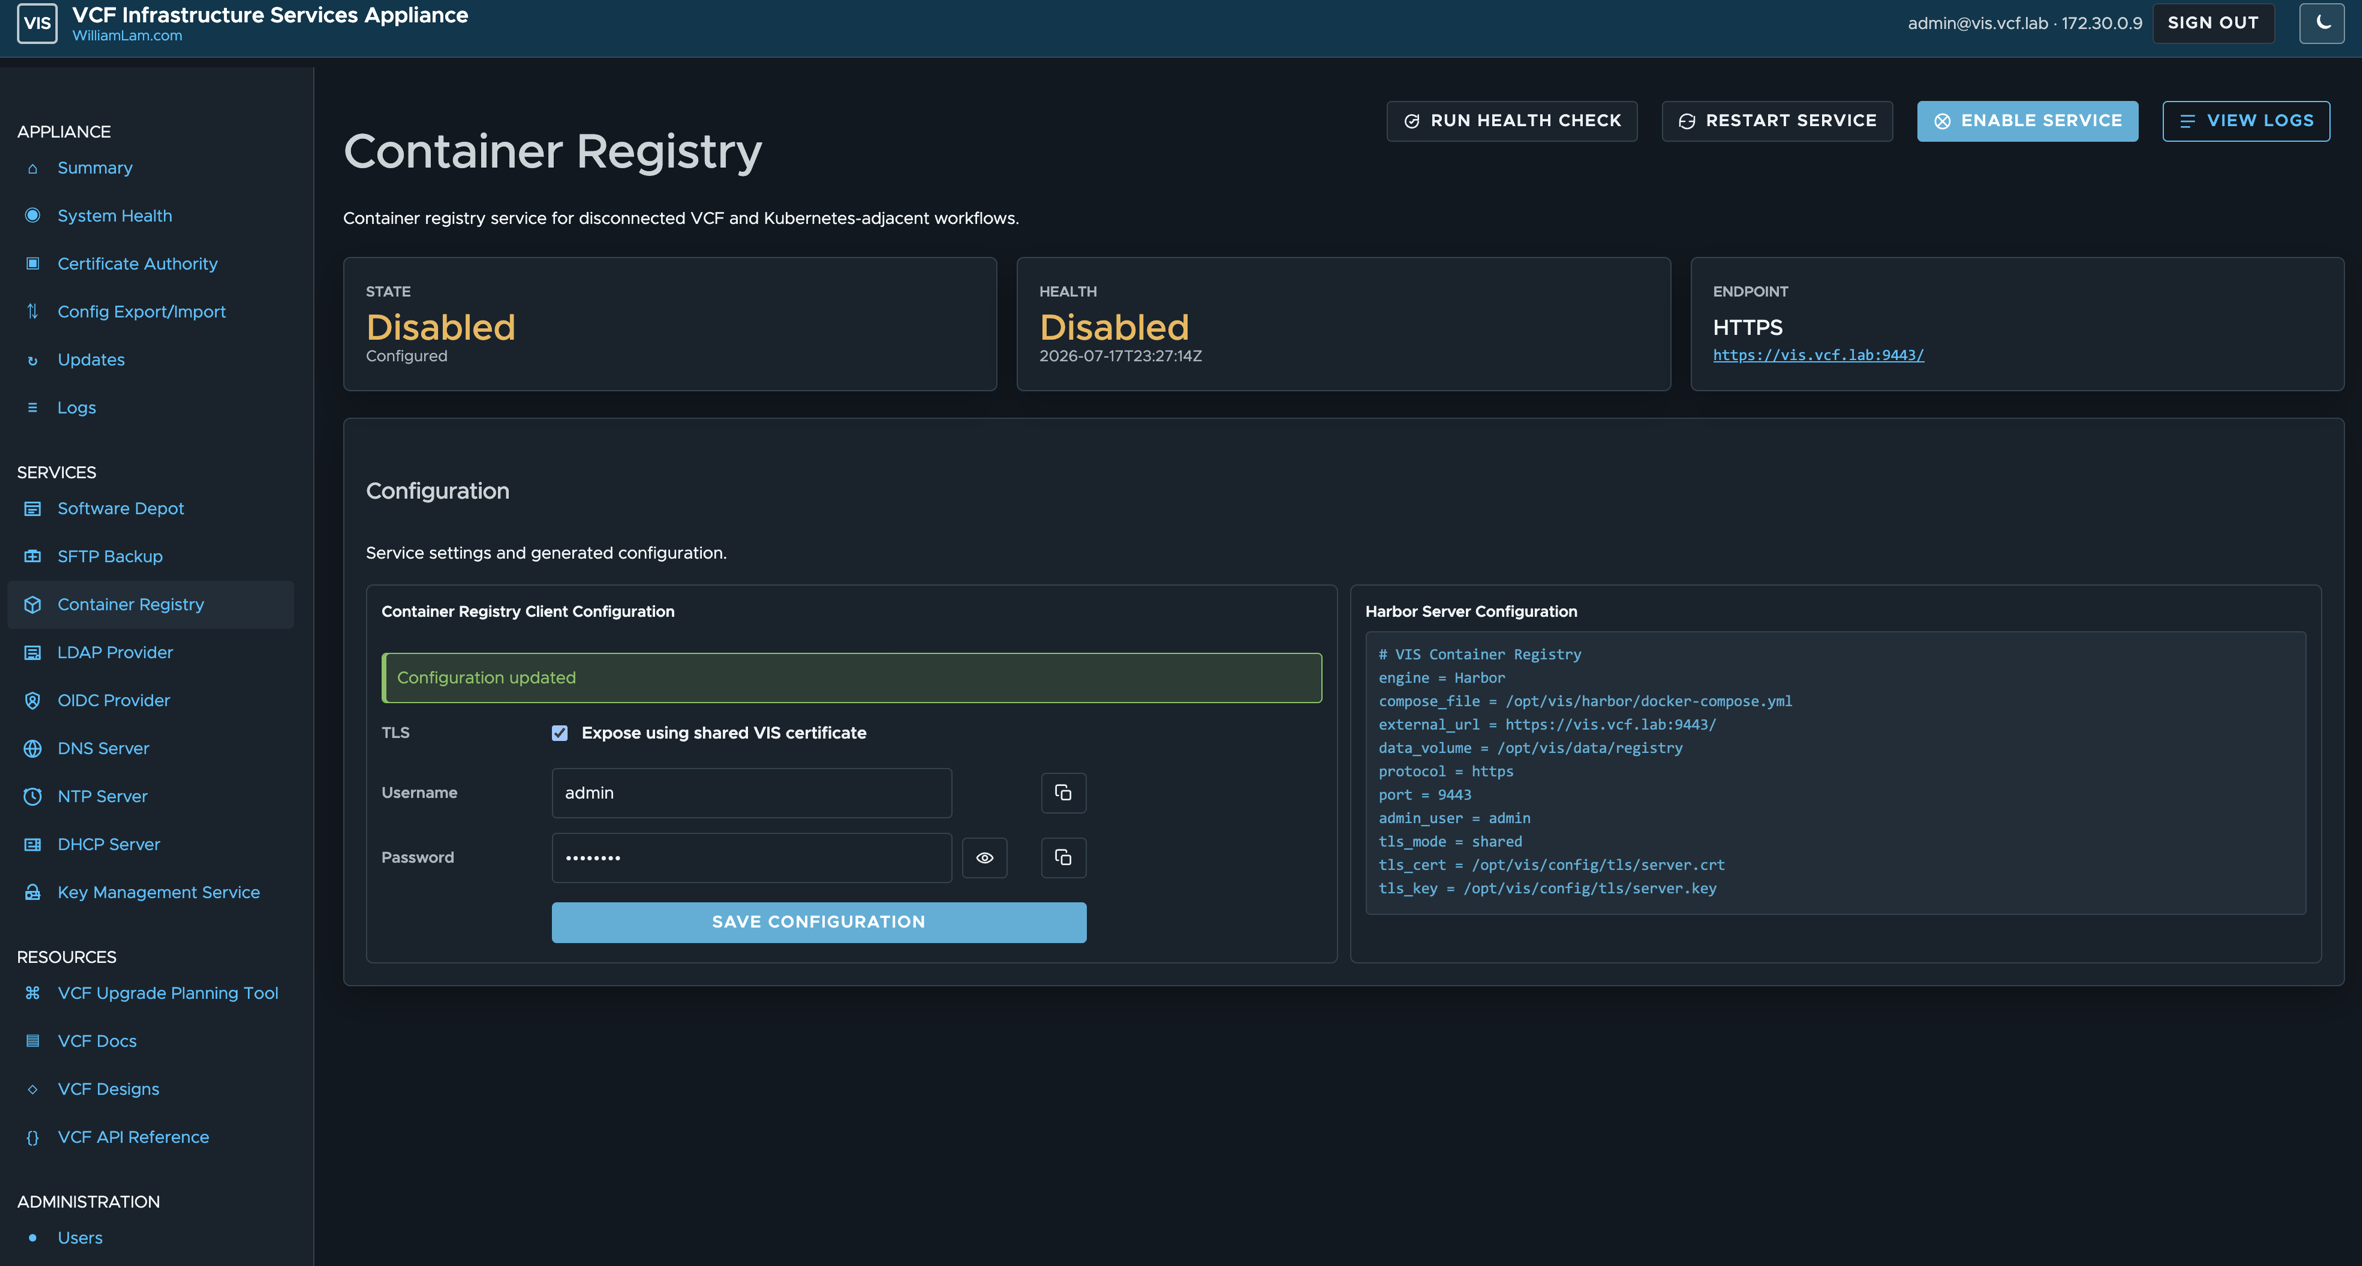
To manage your container images and policies, you can access the Harbor Admin UI. Simply click the URL in the upper-right corner of the service and enter the credentials that you configured.
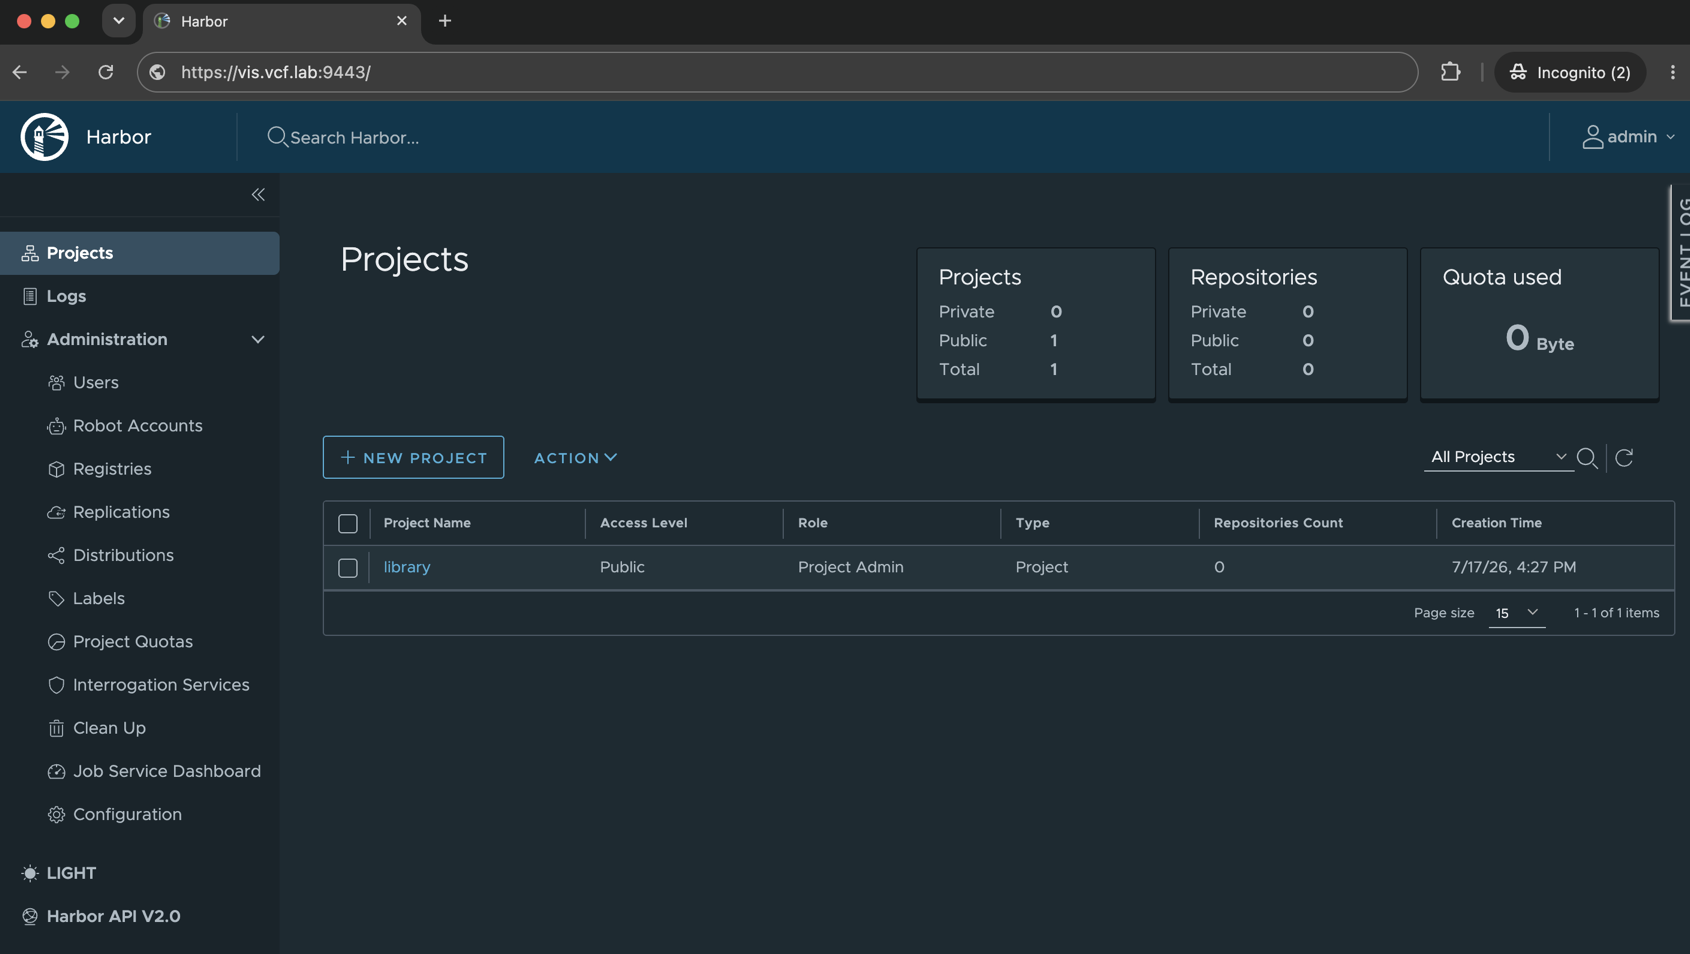
There are several different ways to add self-signed TLS certificate with various Docker clients, please refer to the official Docker documentation for more information.
If you are using the Docker Desktop client UI, you can simply append the Harbor endpoint/port to the insecure registry list and restart the Docker client.
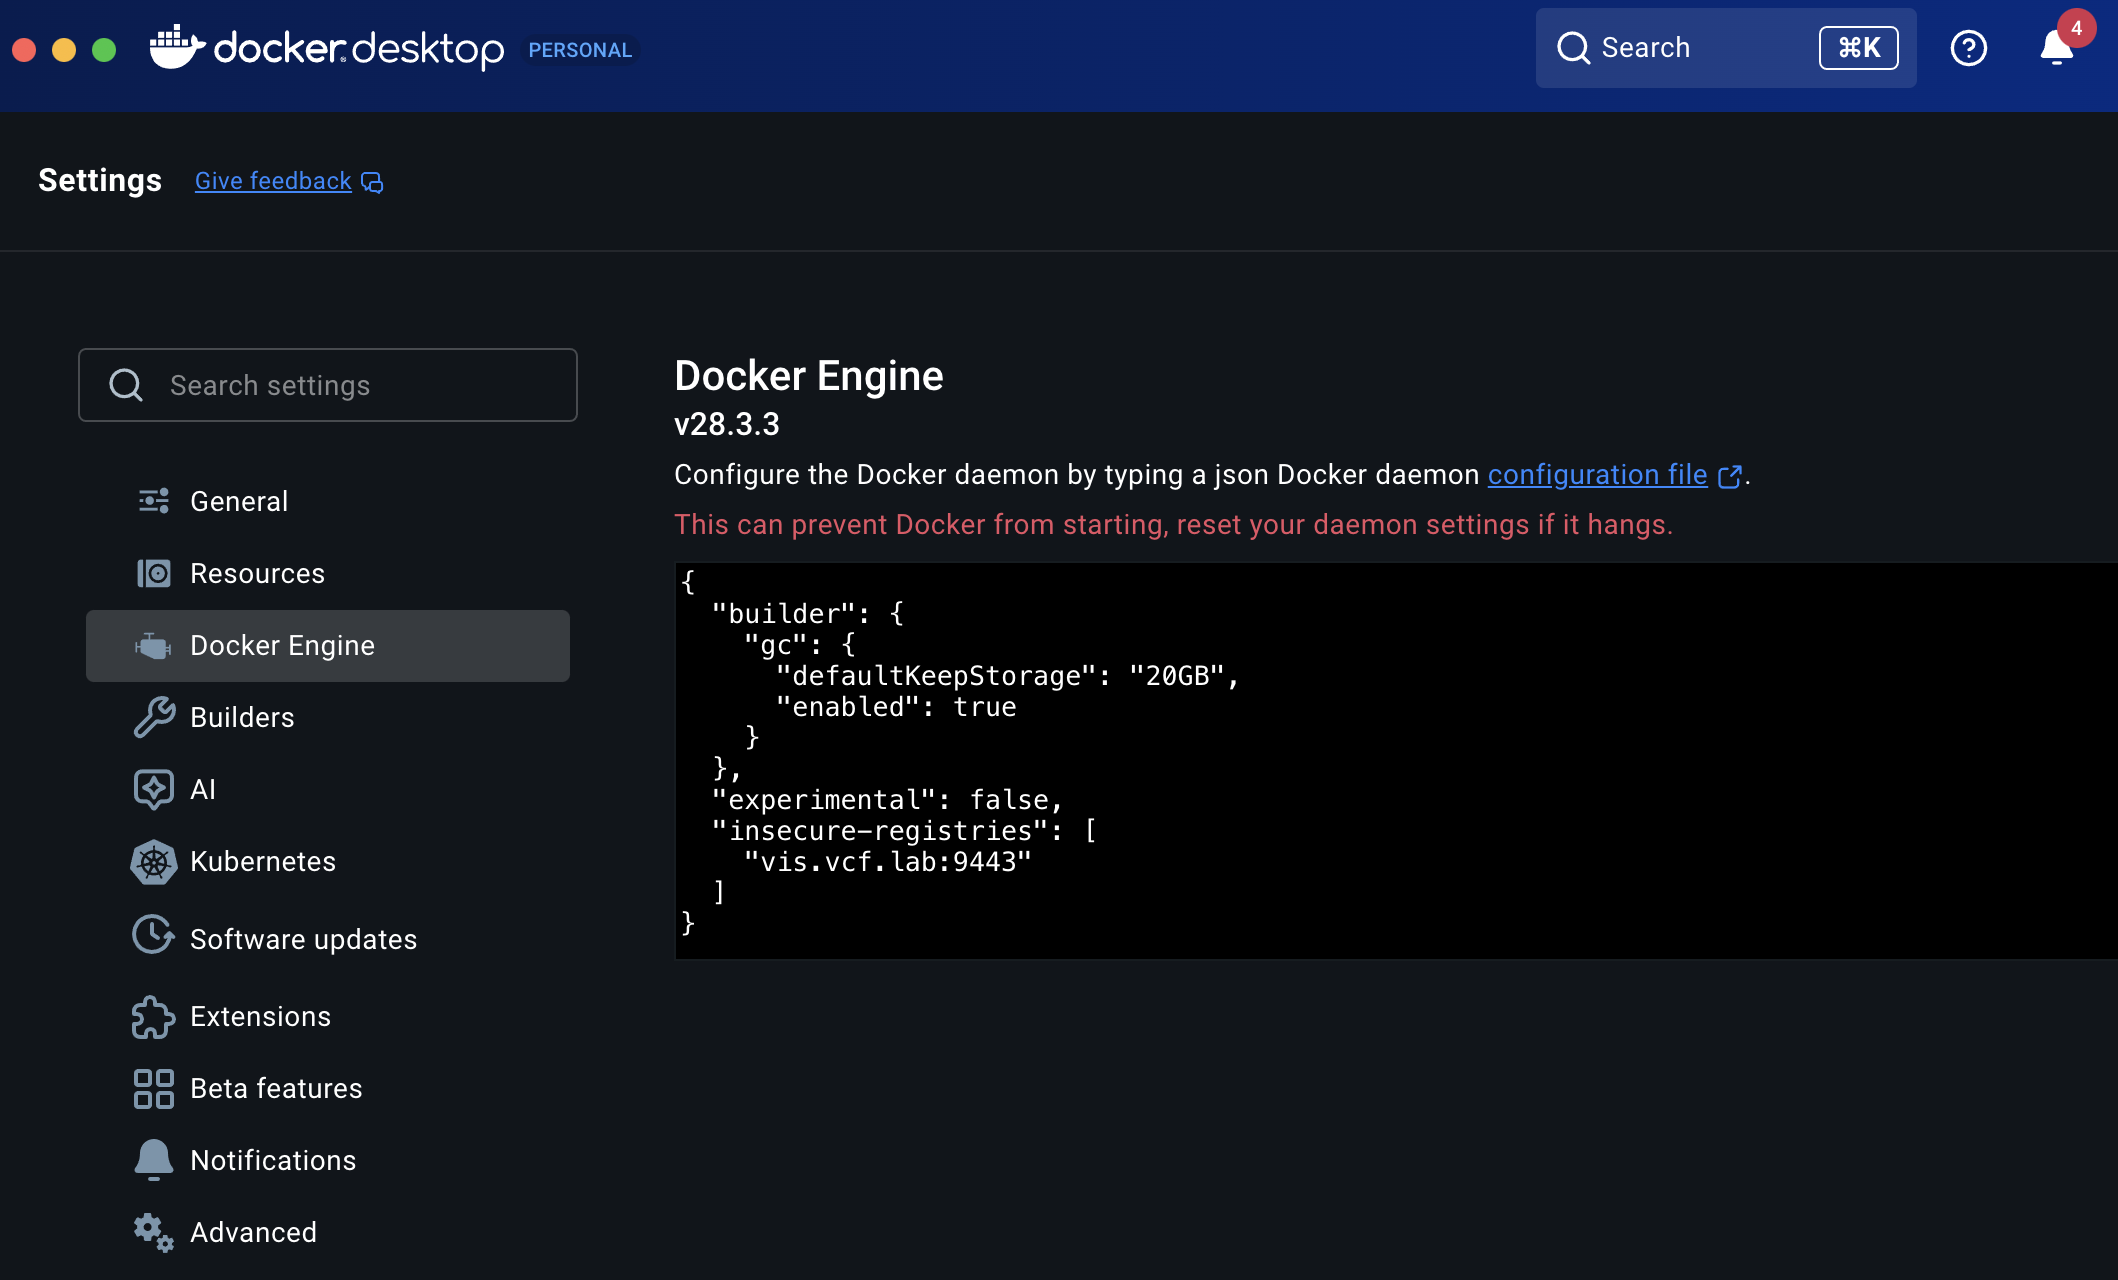
You should now be able to log in to one of your Harbor projects using the Harbor endpoint/port along with credentials:
docker login vis.vcf.lab:9443/demo -u admin -p VMware1!Then you can push an image that has been tagged for your Harbor registry like the following:
docker push vis.vcf.lab:9443/demo/vibauthor:latestHere are some additional blog posts that might be of use for using container registry with self-signed TLS certificate:
- Configuring vSphere Supervisor Services with self-signed container registry
- Configuring vSphere Kubernetes Service (VKS) Cluster with self-signed container registry
Setup LDAP Provider for VCF SSO
Required Input to Initialize Service:
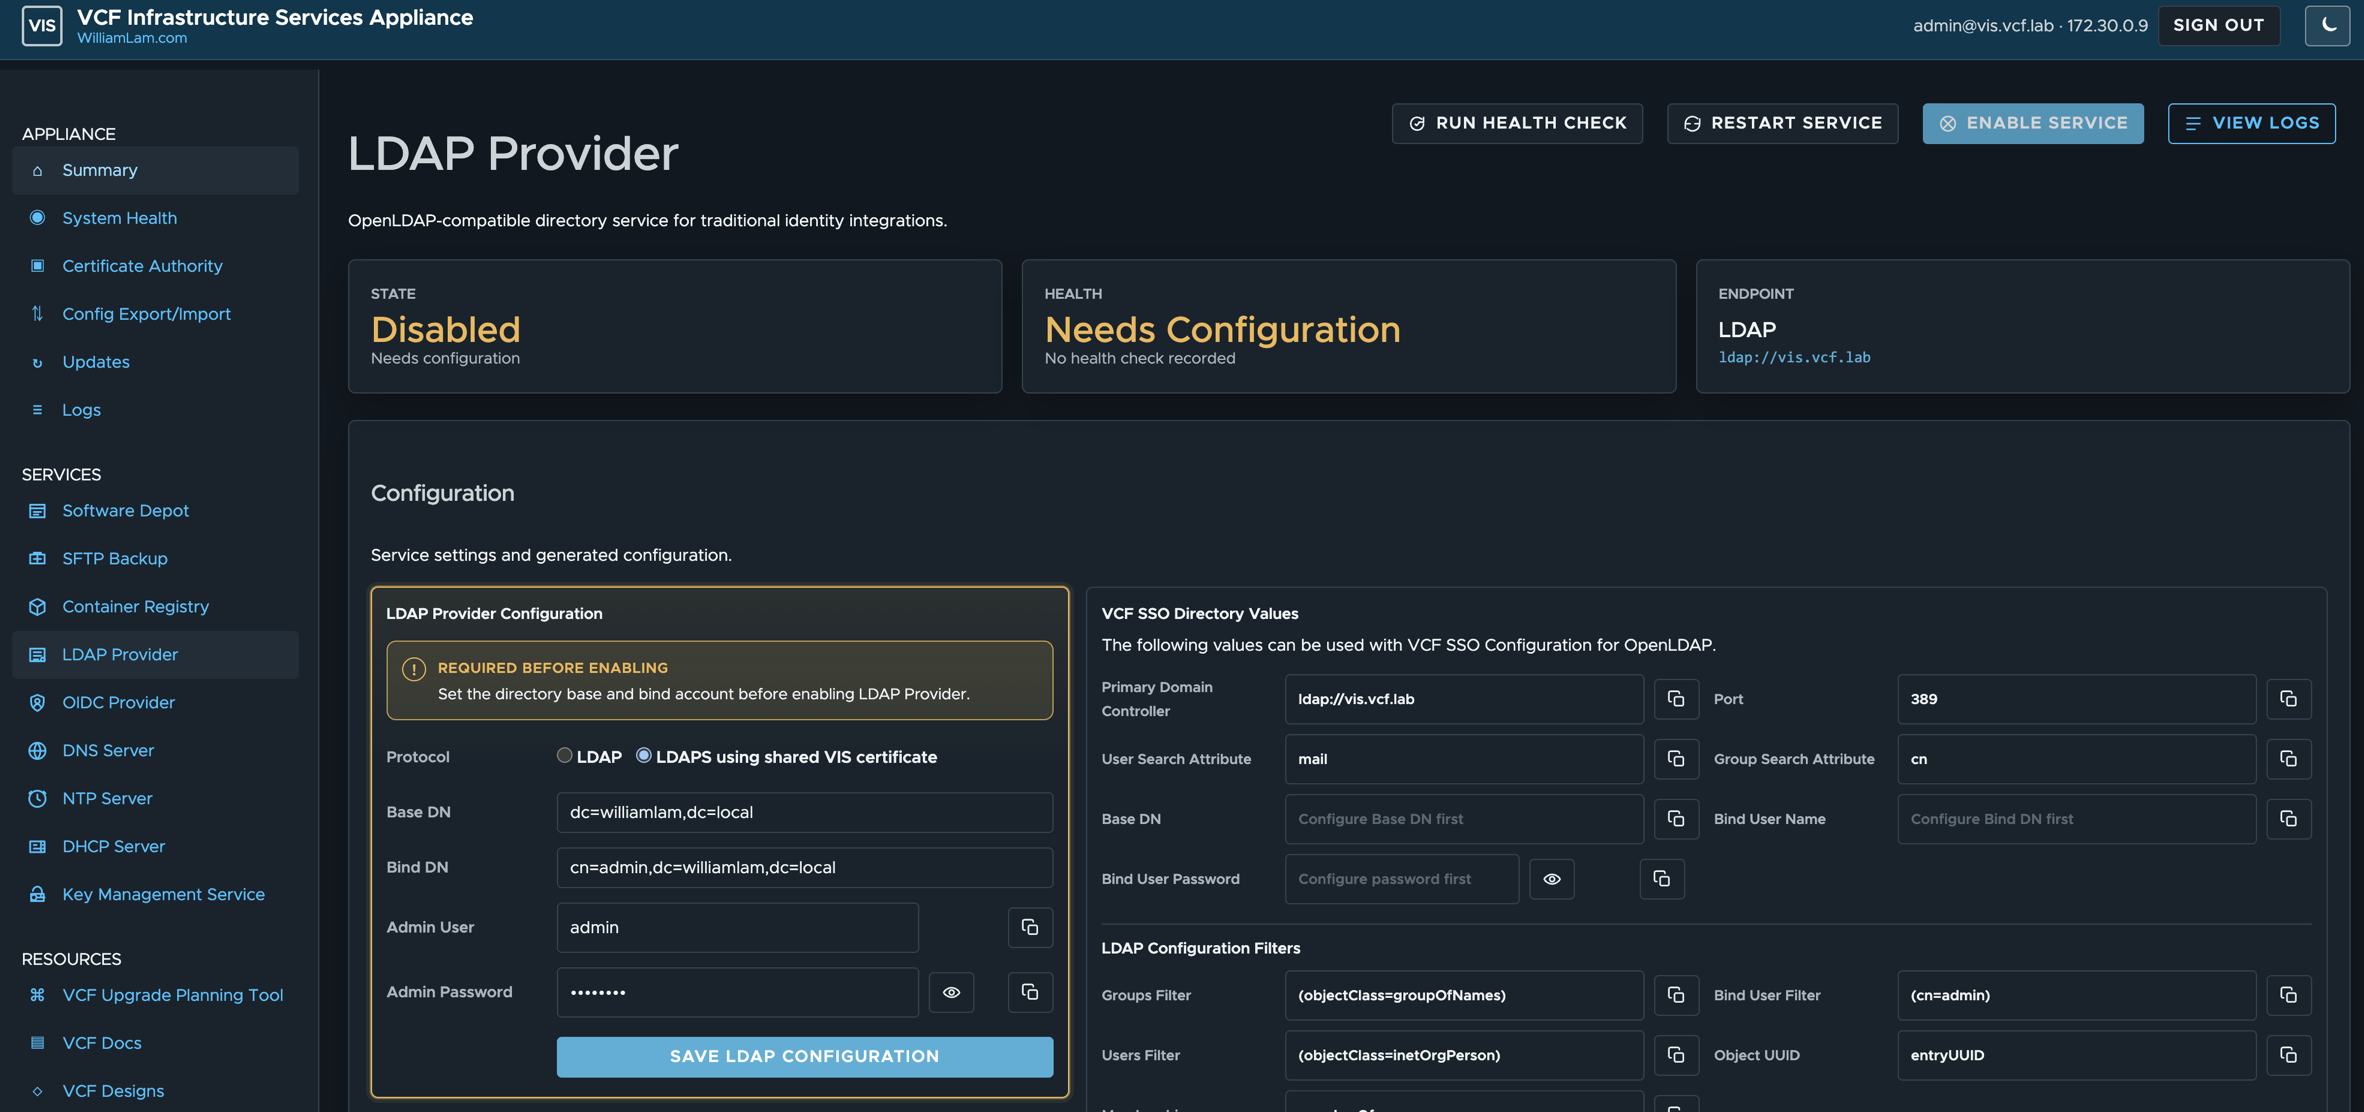
- Protocol (e.g LDAP or LDAPS)
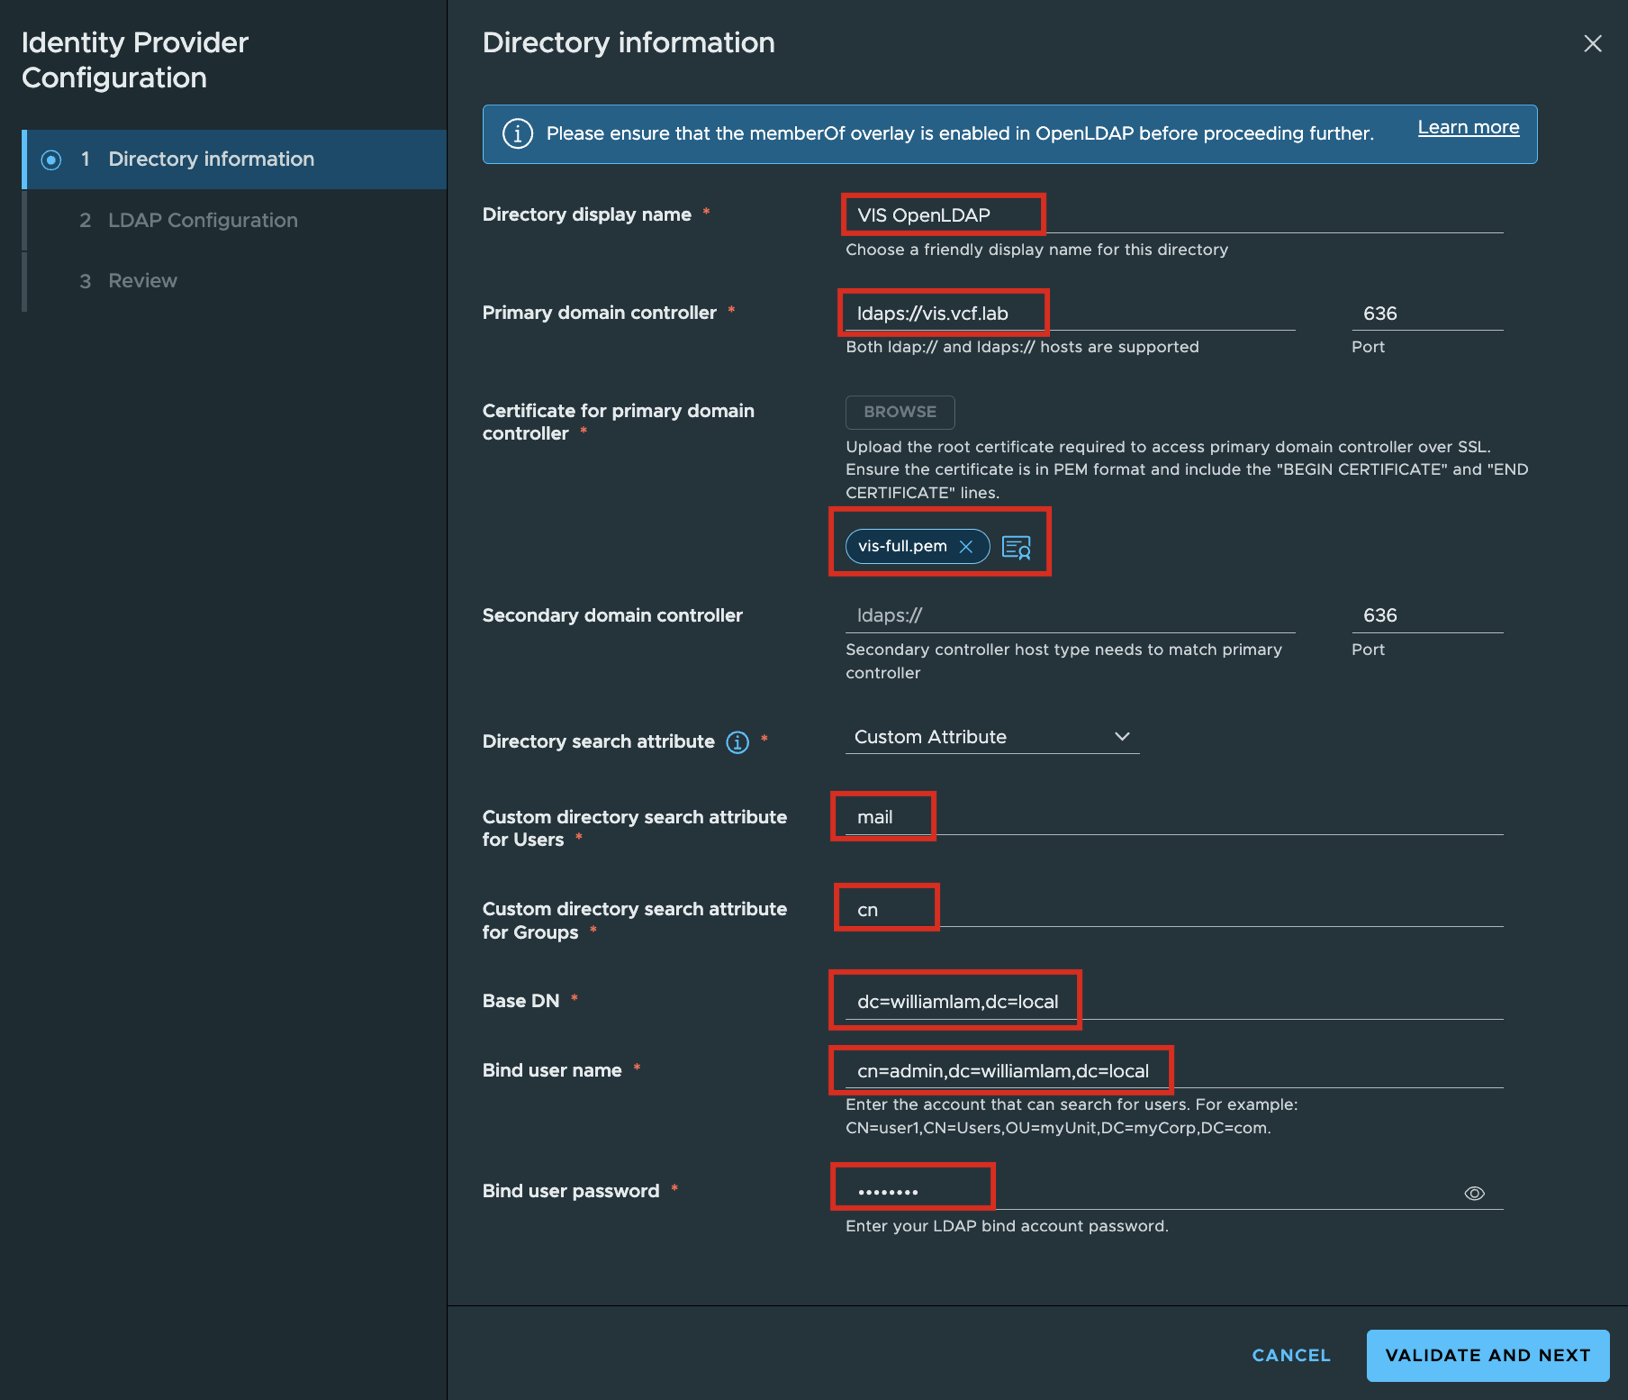
- BaseDN (e.g. dc=williamlam,dc=local)
- BindDN (e.g. cn=admin,dc=williamlam,dc=local)
- Admin User (e.g. admin)
- Admin Password
After saving your configuration to initialize and click Enable service.
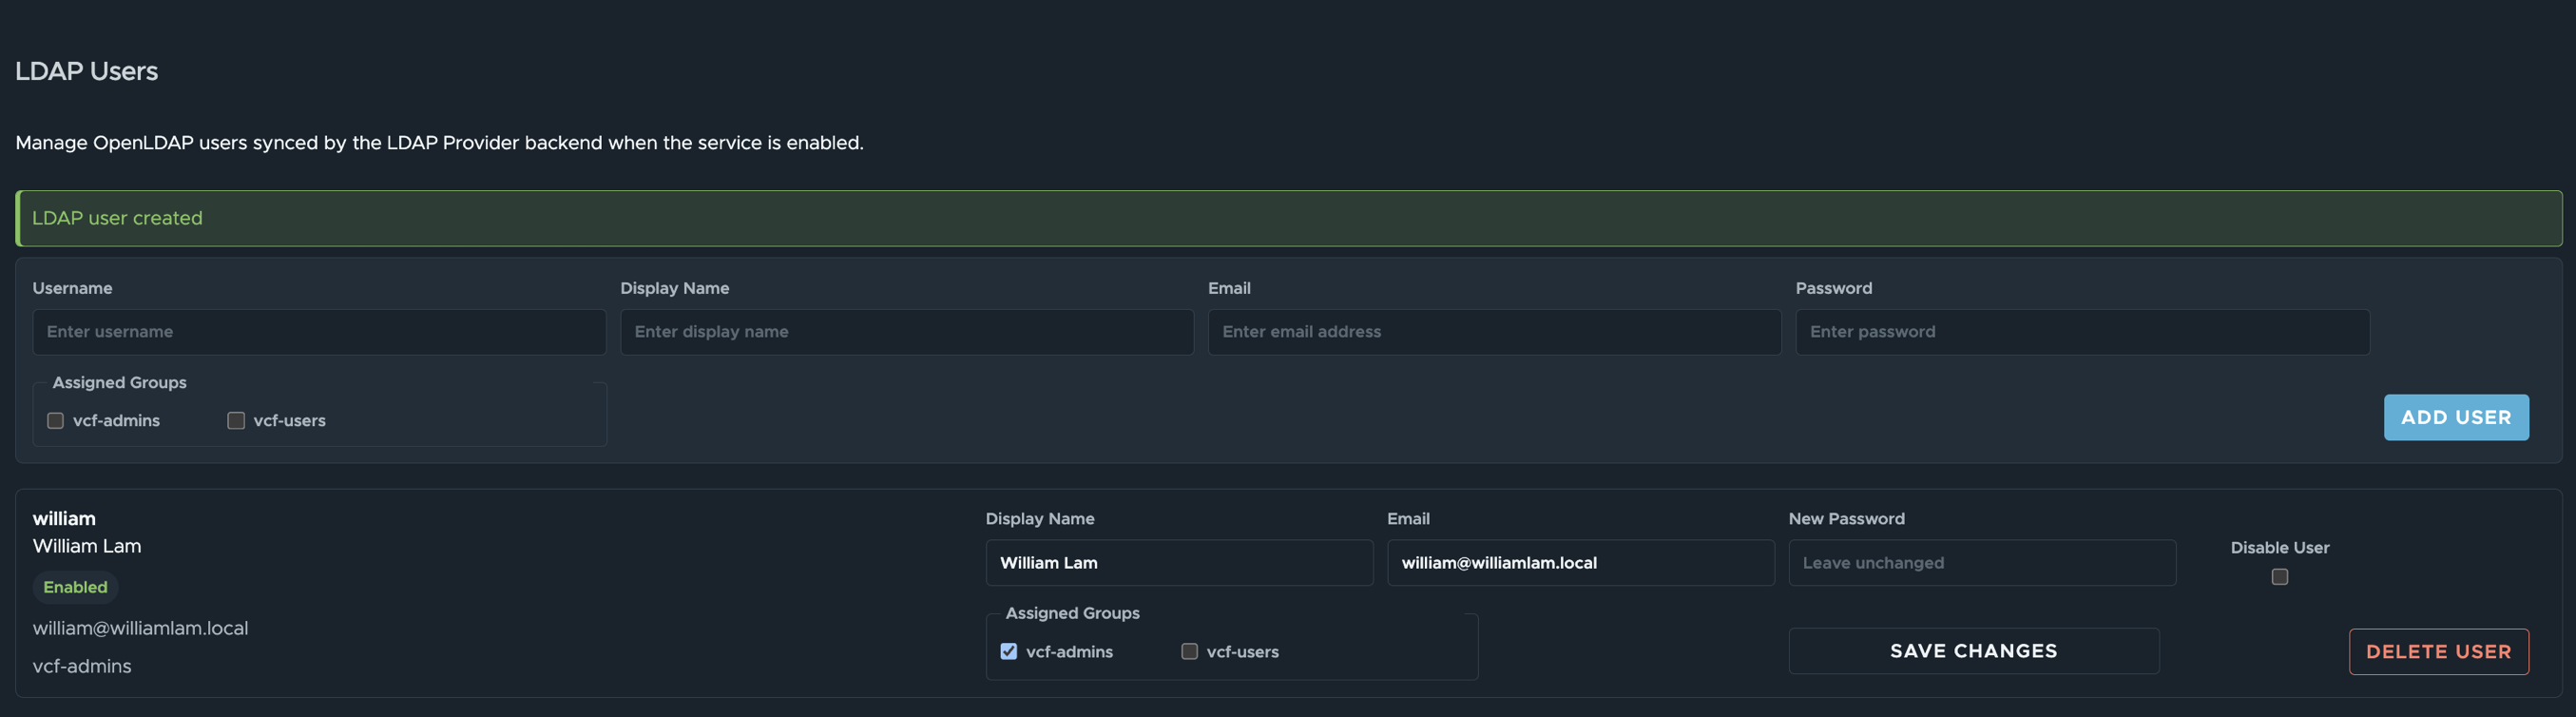
By default, the LDAP provider already contains two pre-created groups: vcf-admins and vcf-users, and you will need to create at least one user in the desired group for use with VCF SSO.
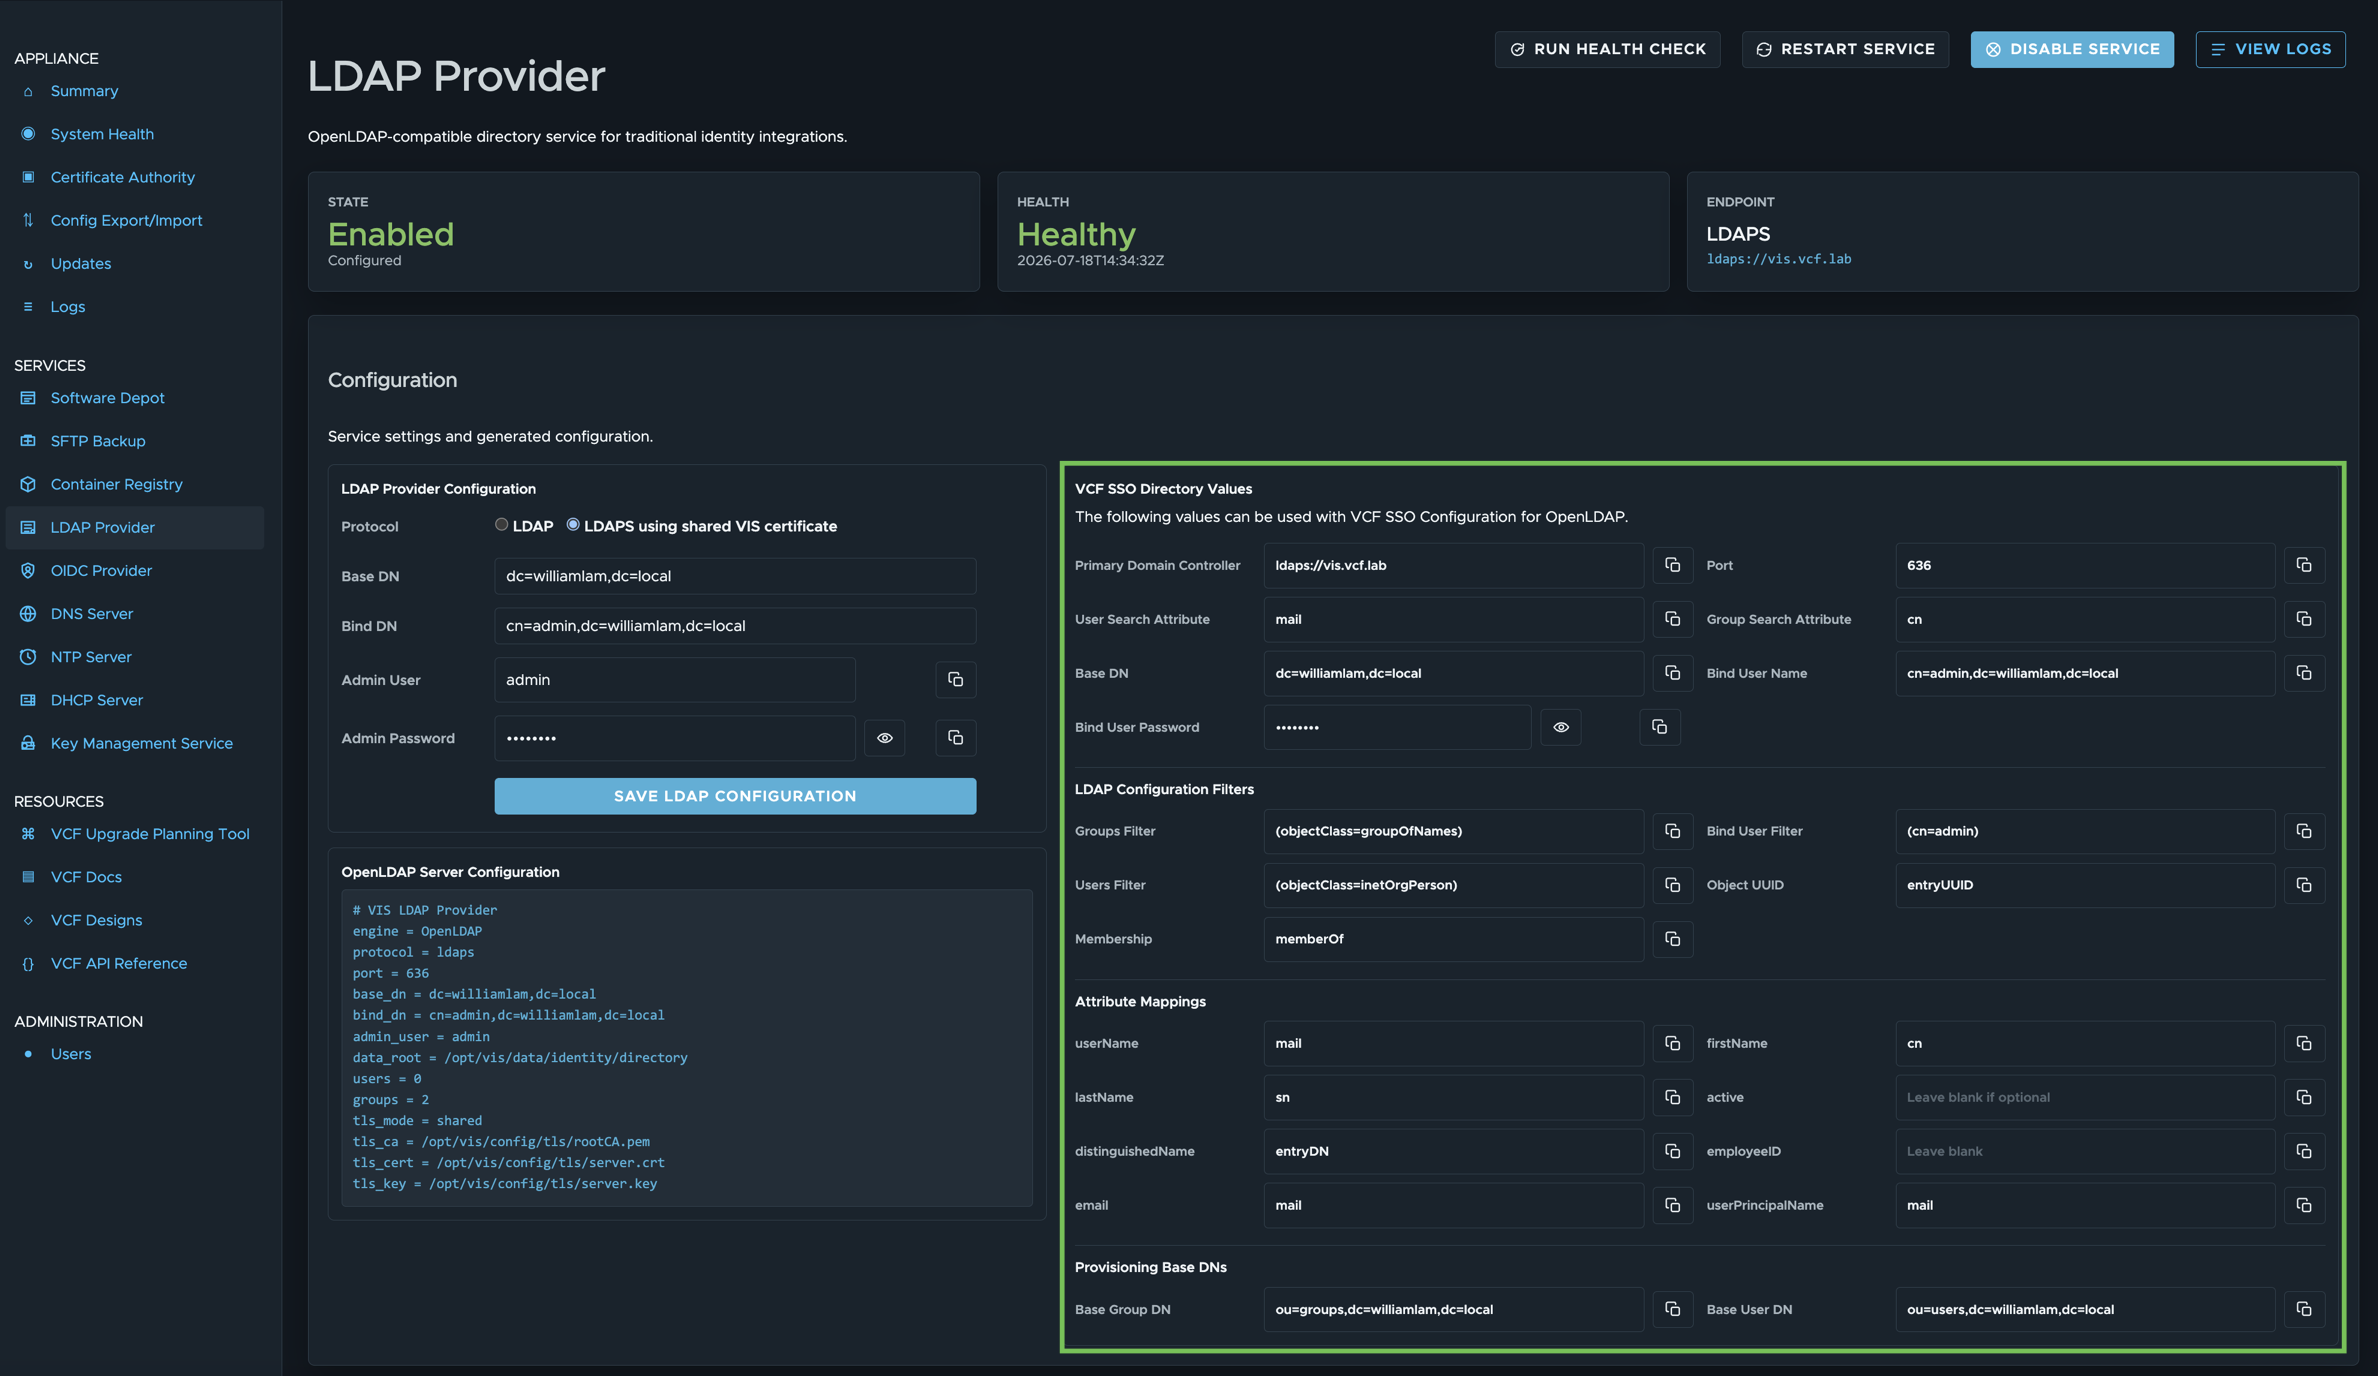
All configuration values required for VCF SSO using the LDAP provider are located in the VCF SSO Directory Values panel for ease of setup.
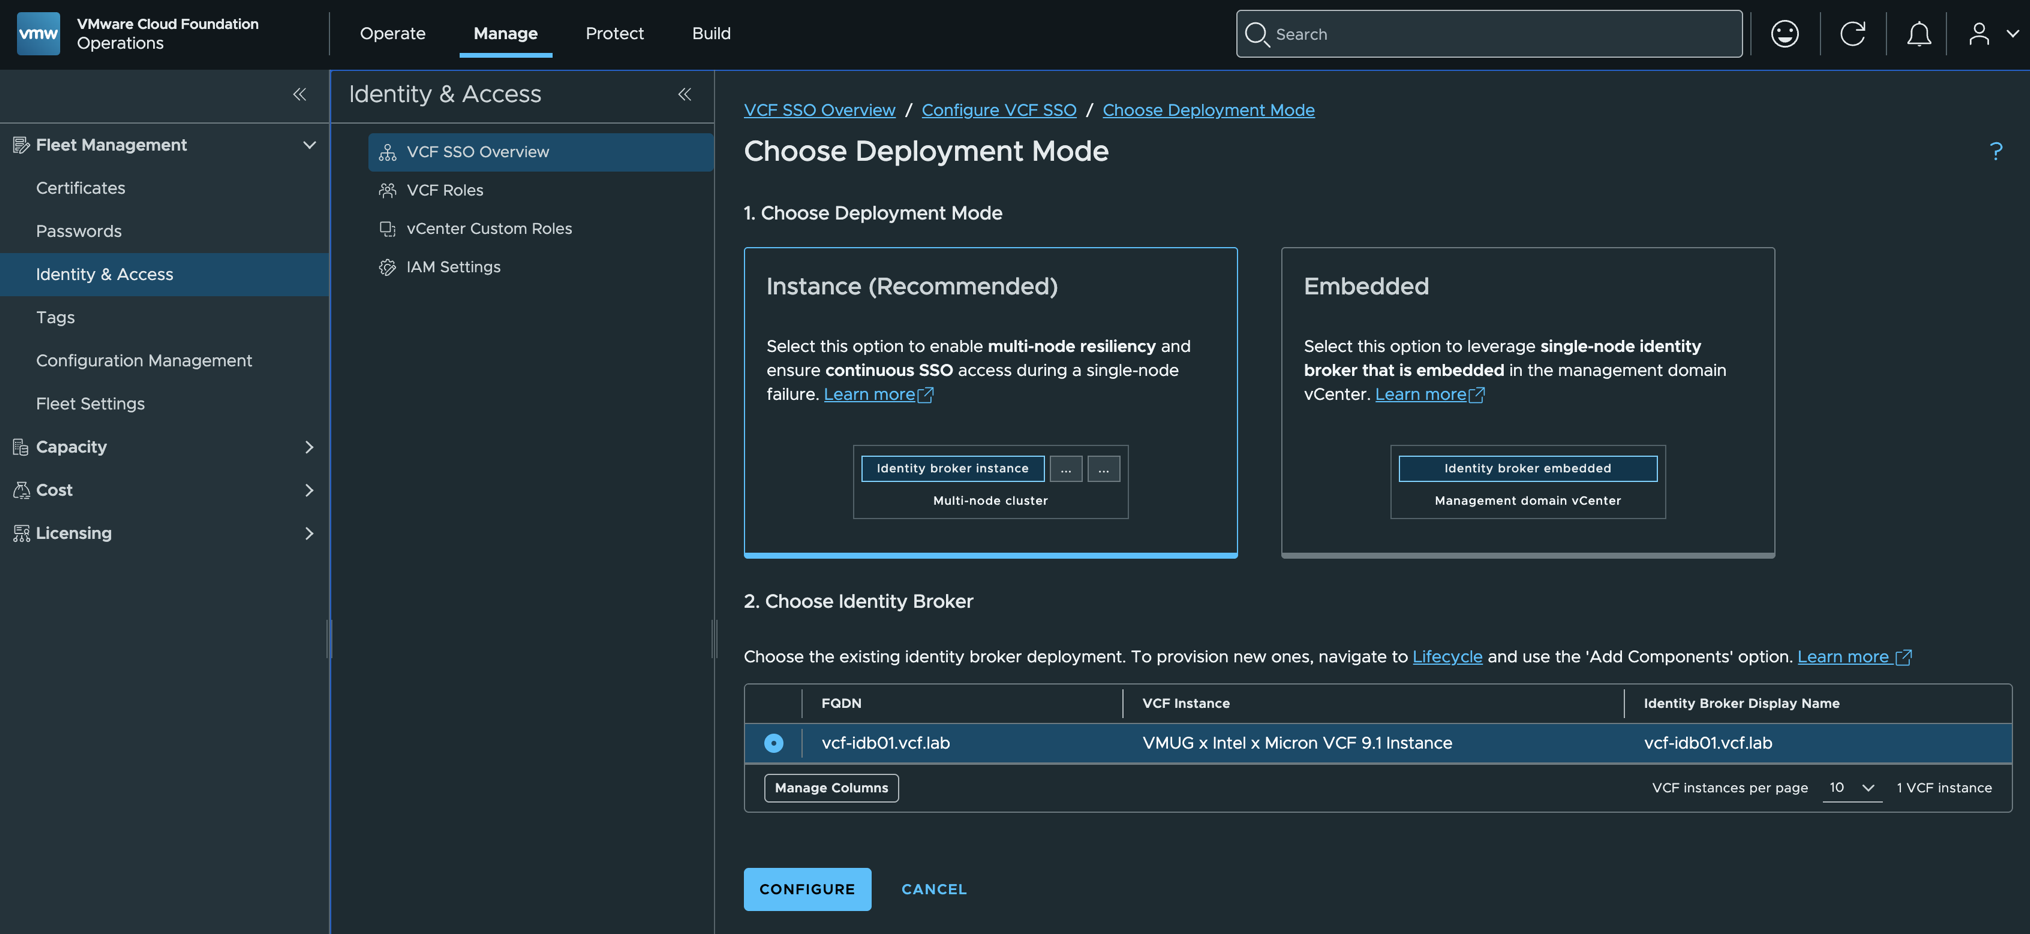
Log in to VCF Operations under Manage > Fleet Management > Identity and Access > Configure SSO to begin the setup after accepting all prerequisites.
Choose your Identity Broker deployment model (recommend using Instance).
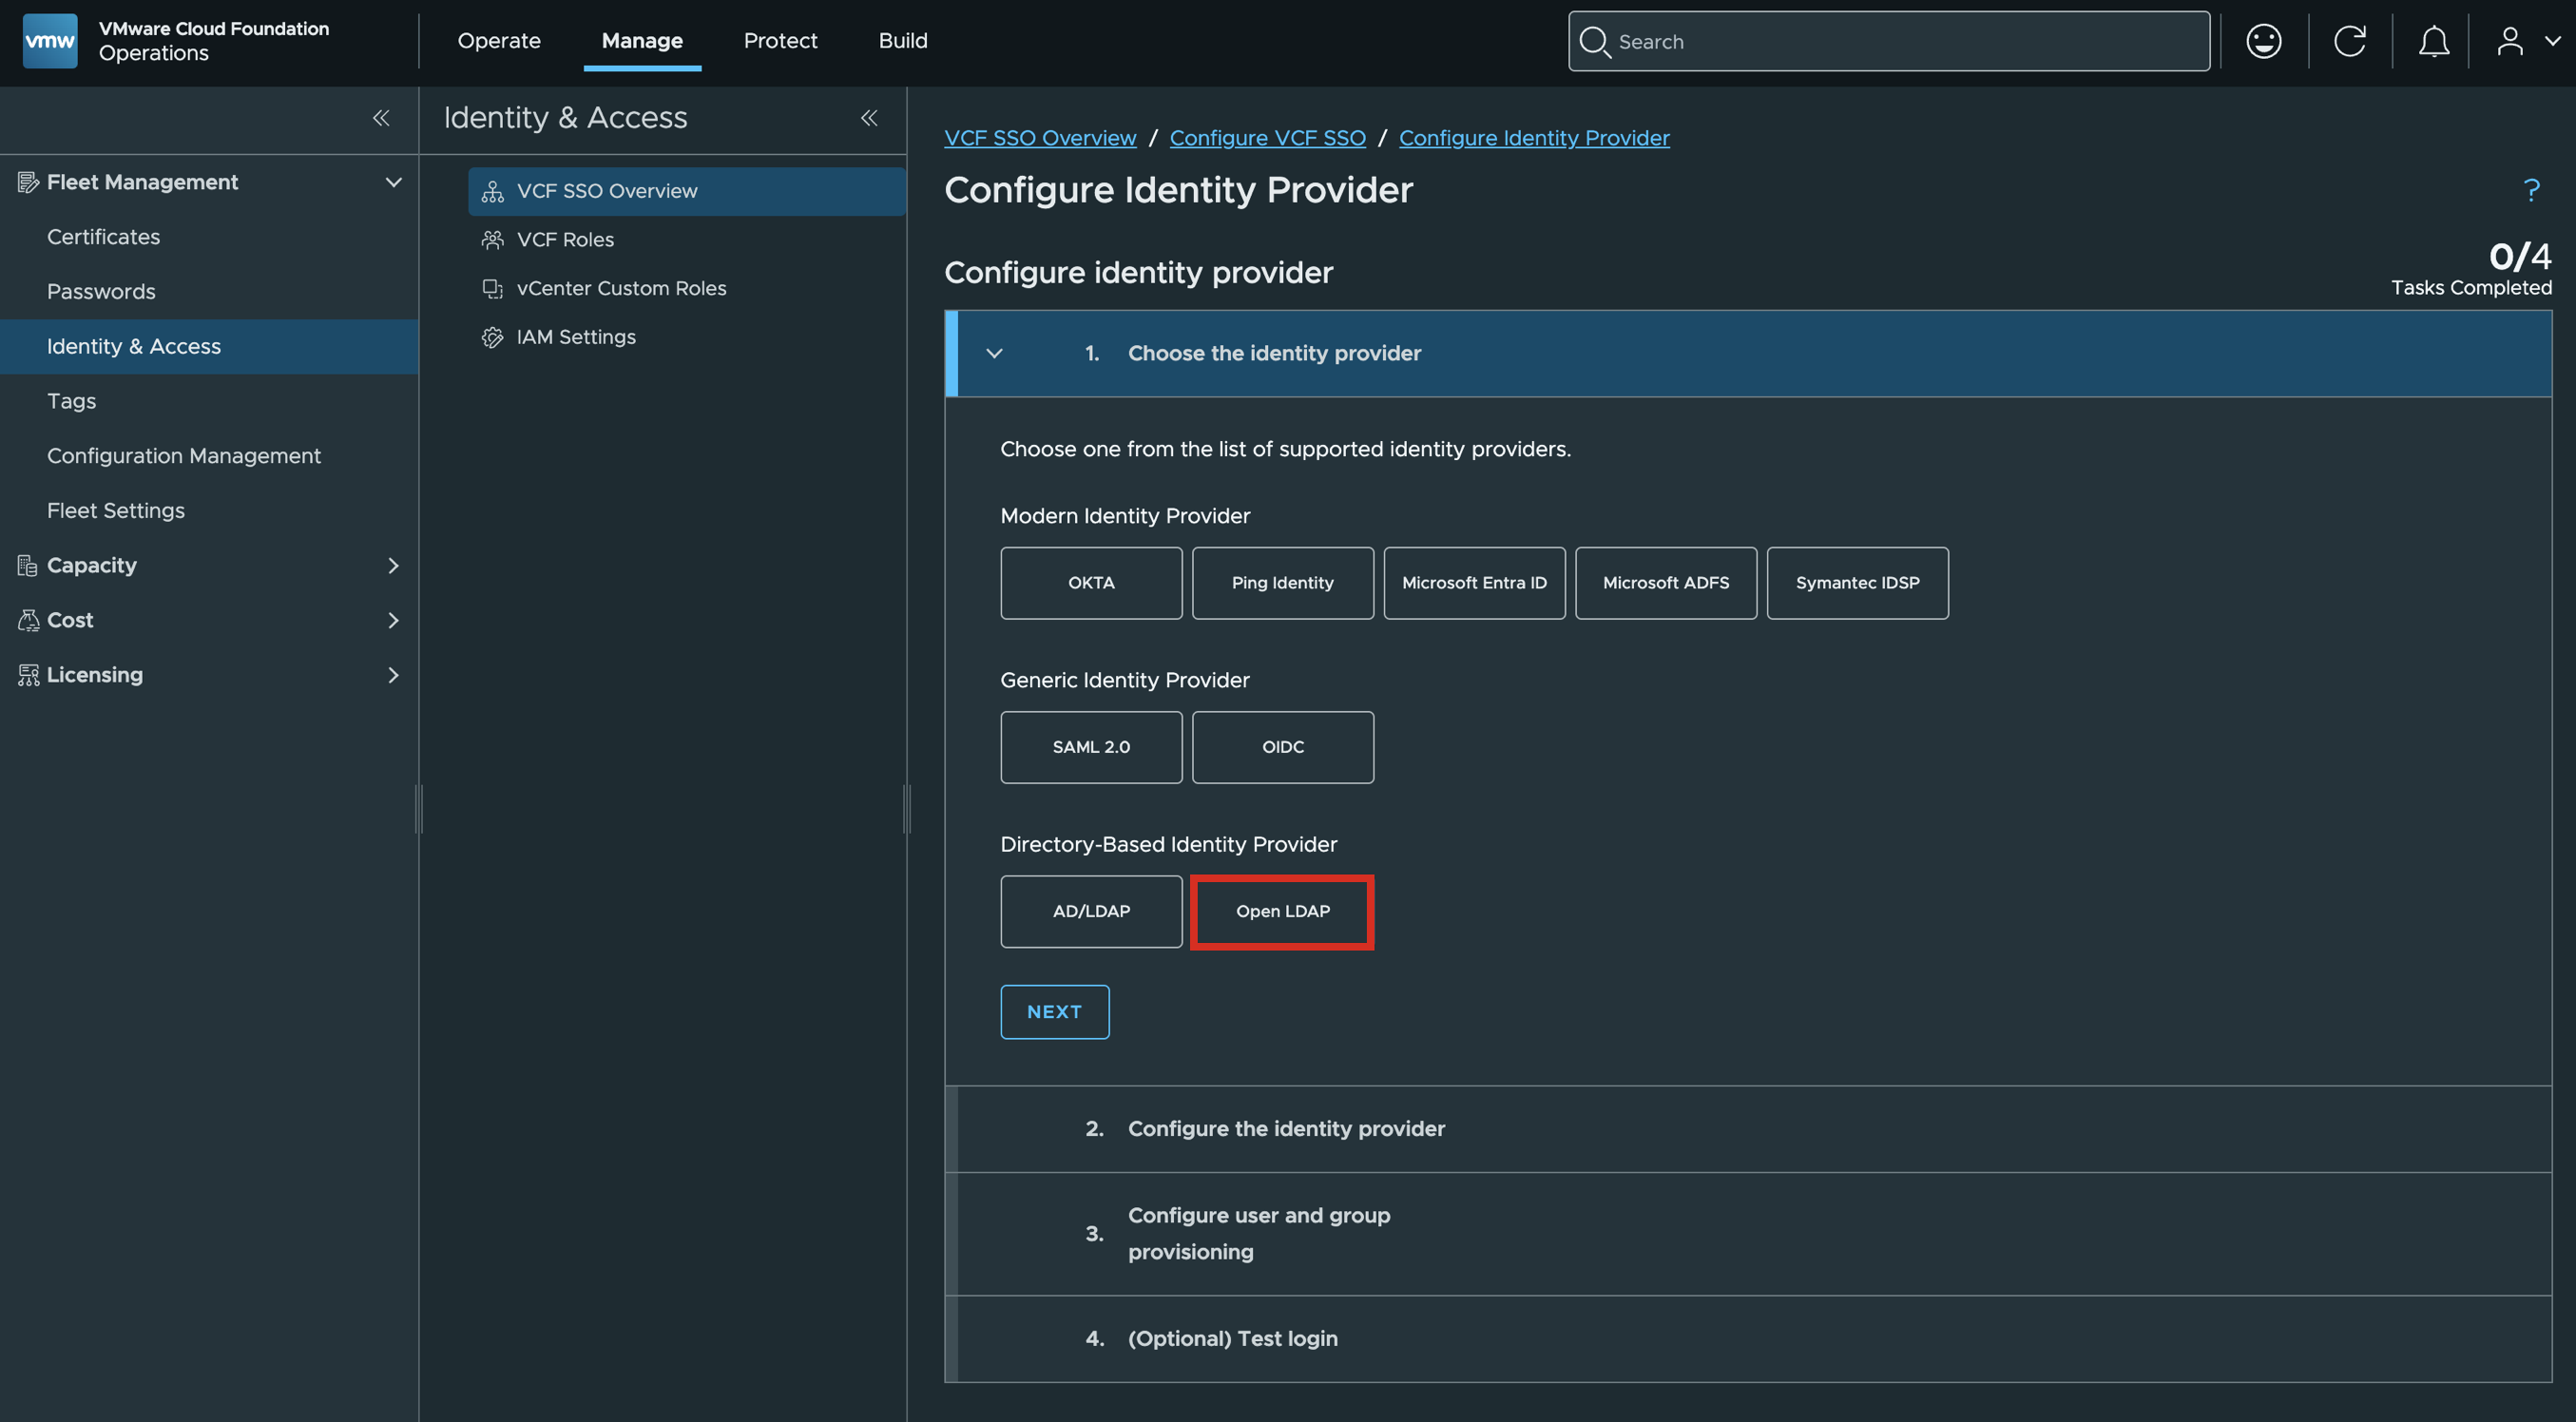
Select OpenLDAP for your Identity Provider
Configure the highlighted section for the Directory Information
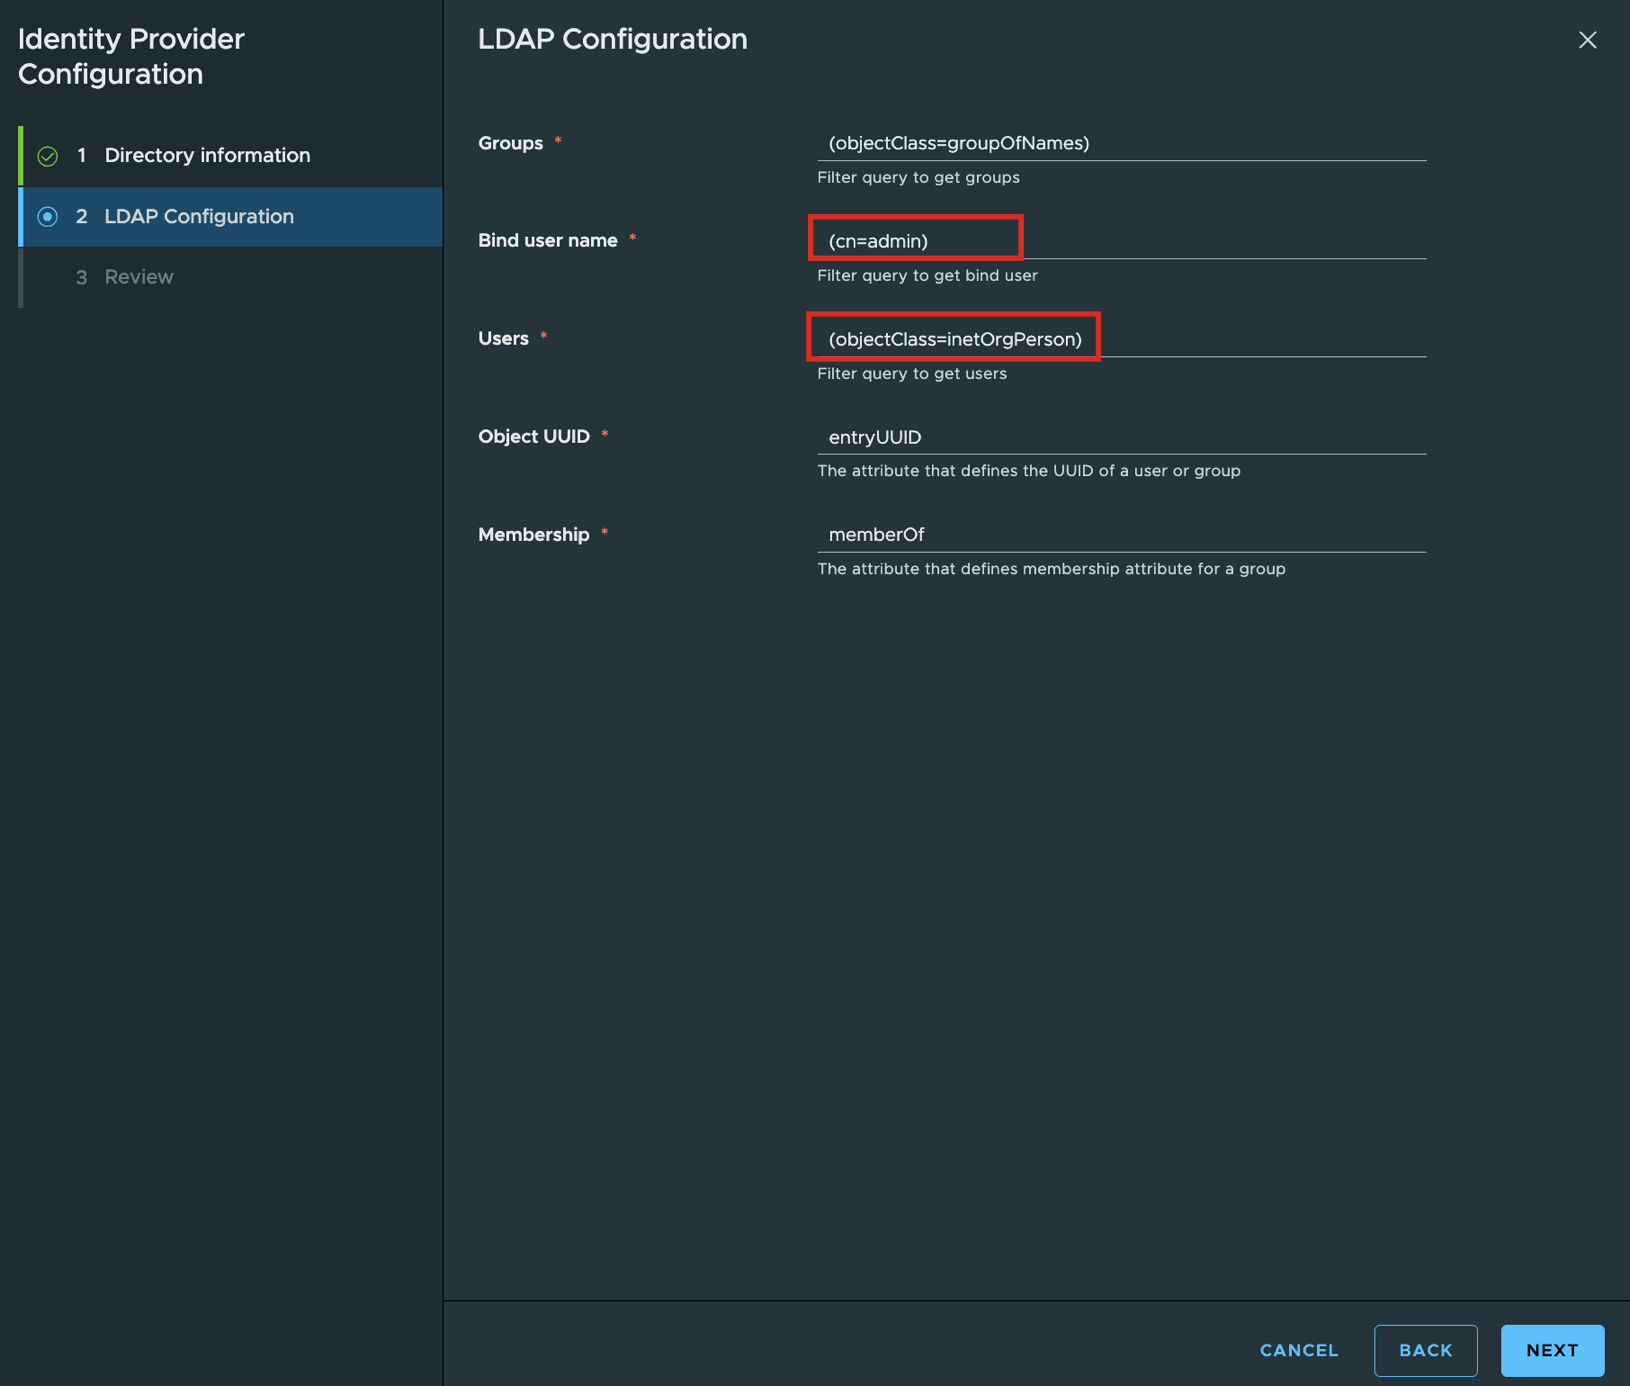
Configure the highlighted section for the LDAP Configuration
Configure the highlighted section for the Attribute Mappings
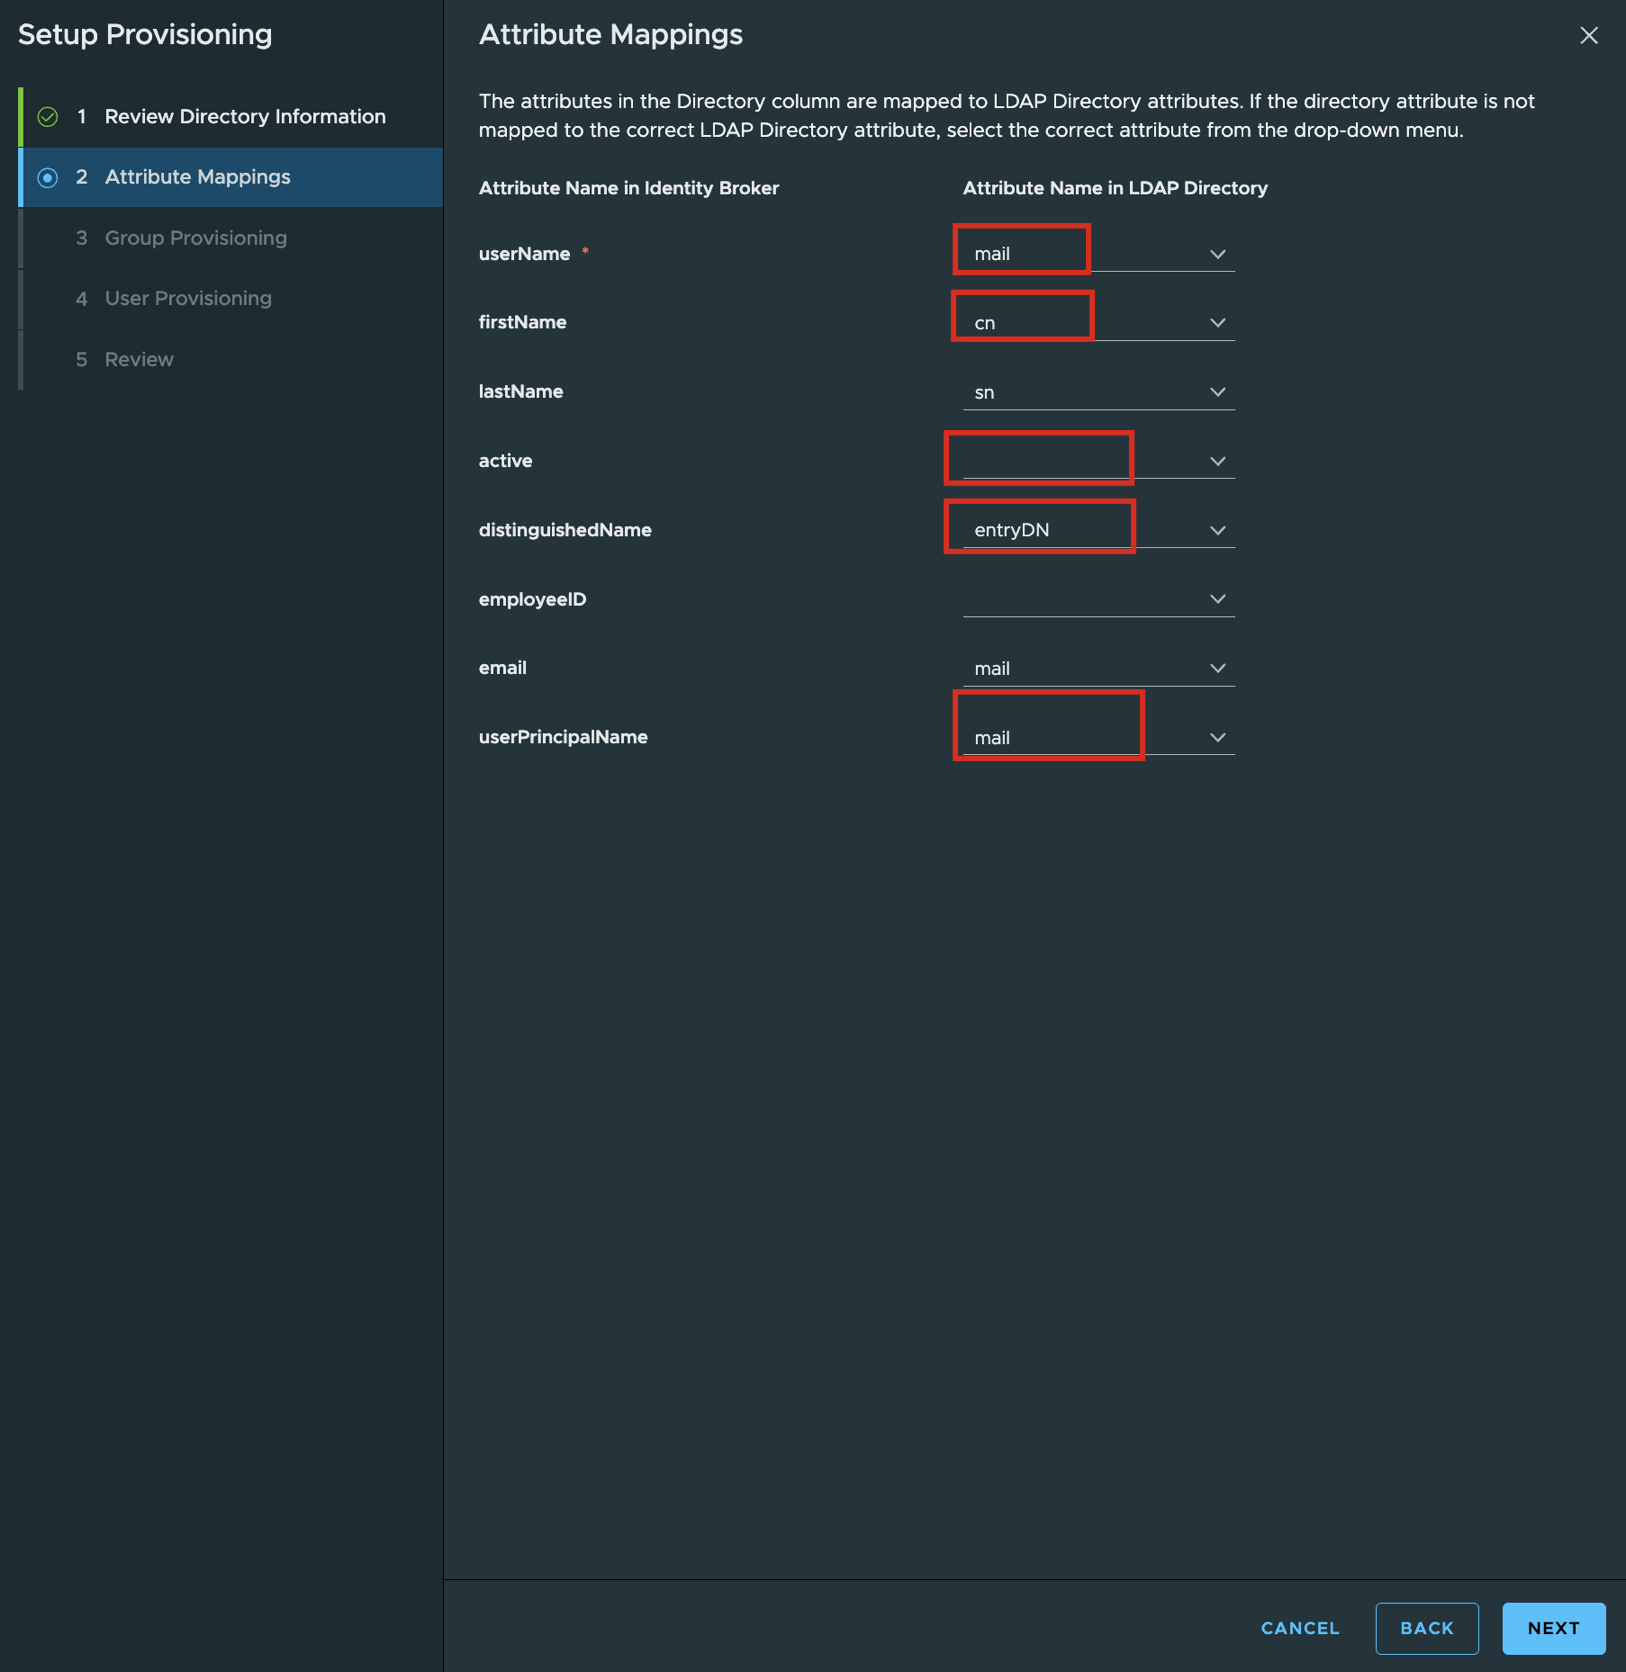
Configure the highlighted section for the Group Provisioning
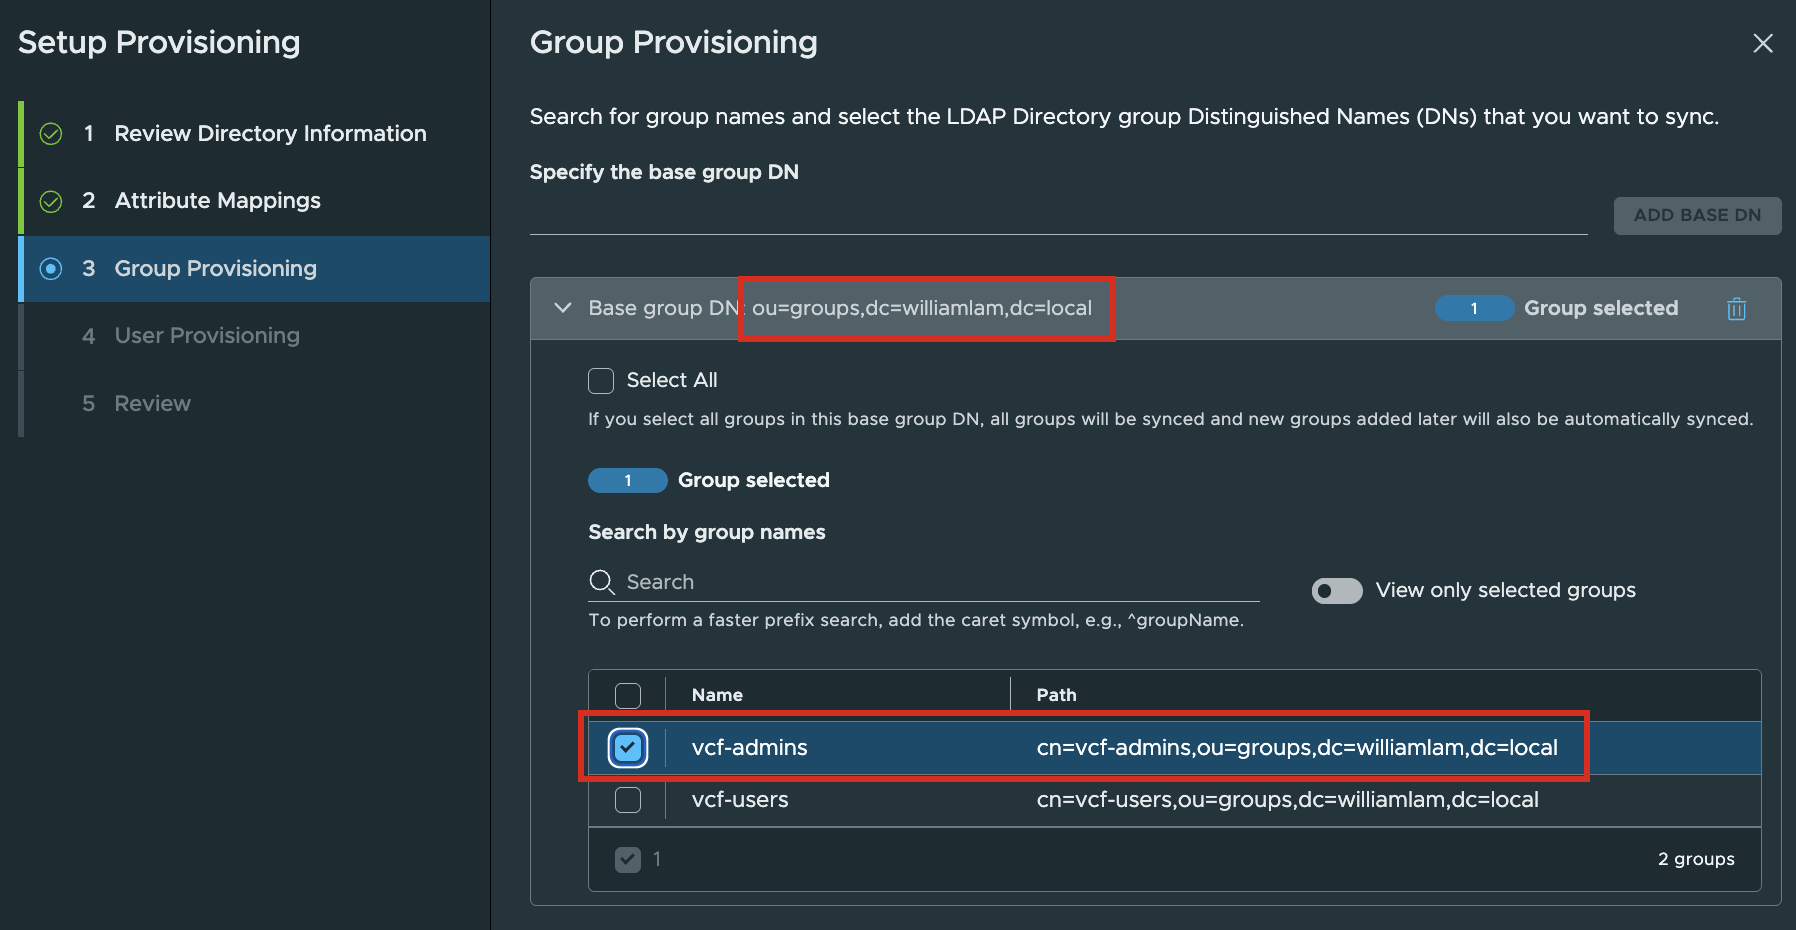
Configure the highlighted section for the User Provisioning and select the user(s) you had created earlier
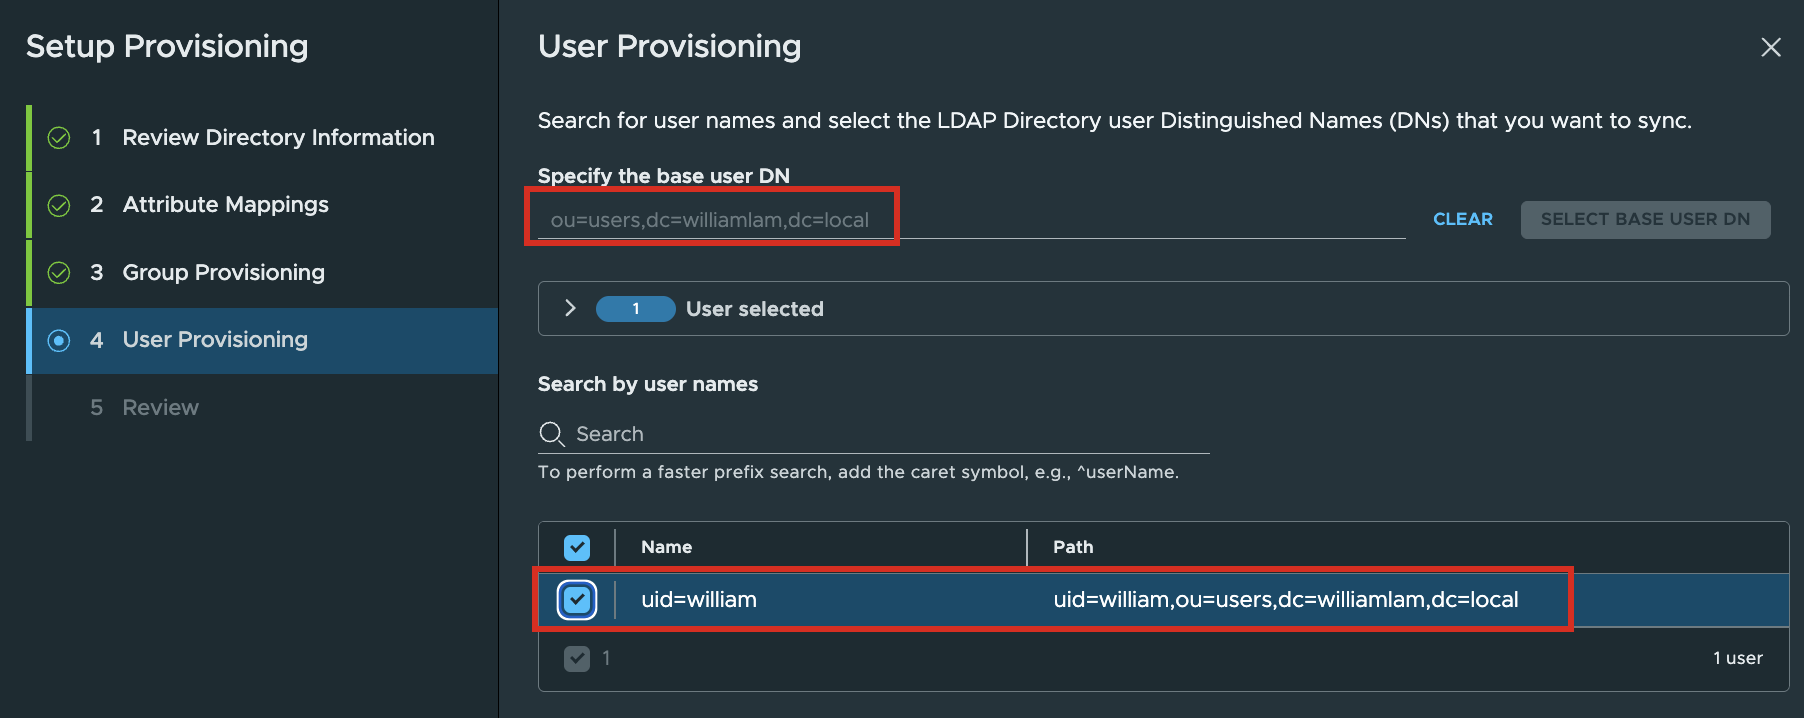
To confirm everything was configured correctly, click on the Test Login and enter the full username@domain and password you had configured earlier
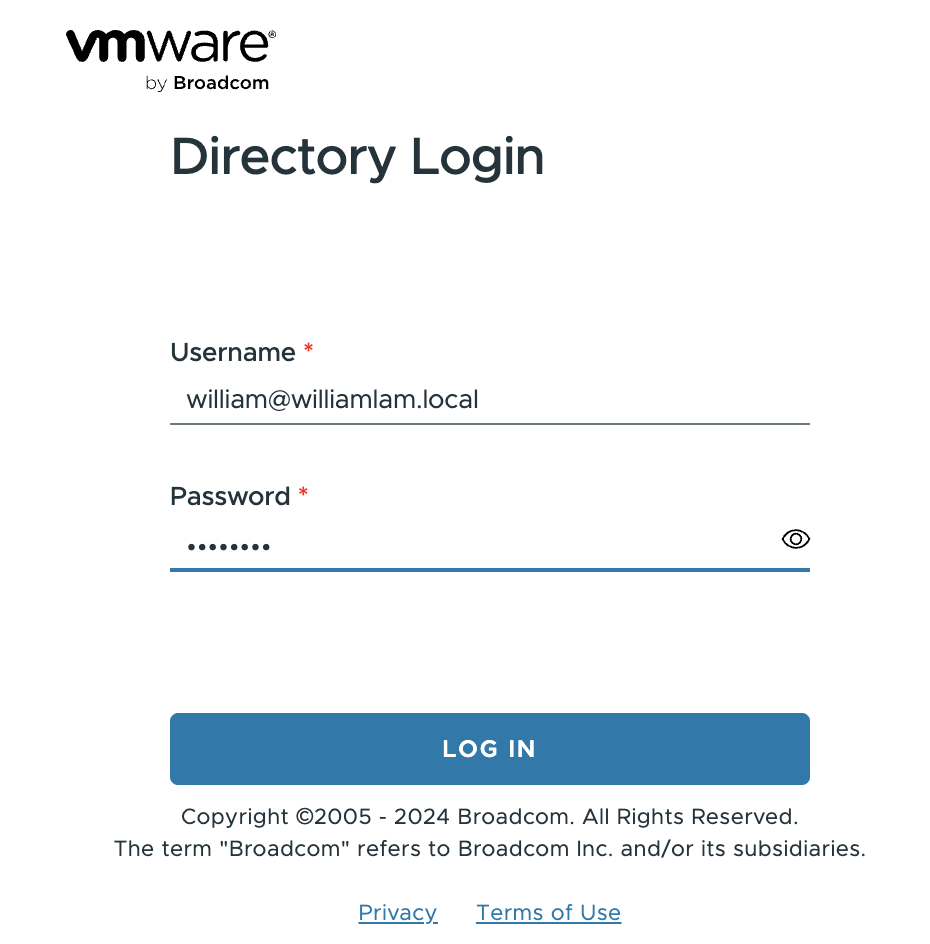
You should see a successful login, which confirms VCF SSO has been properly configured with the LDAP provider.
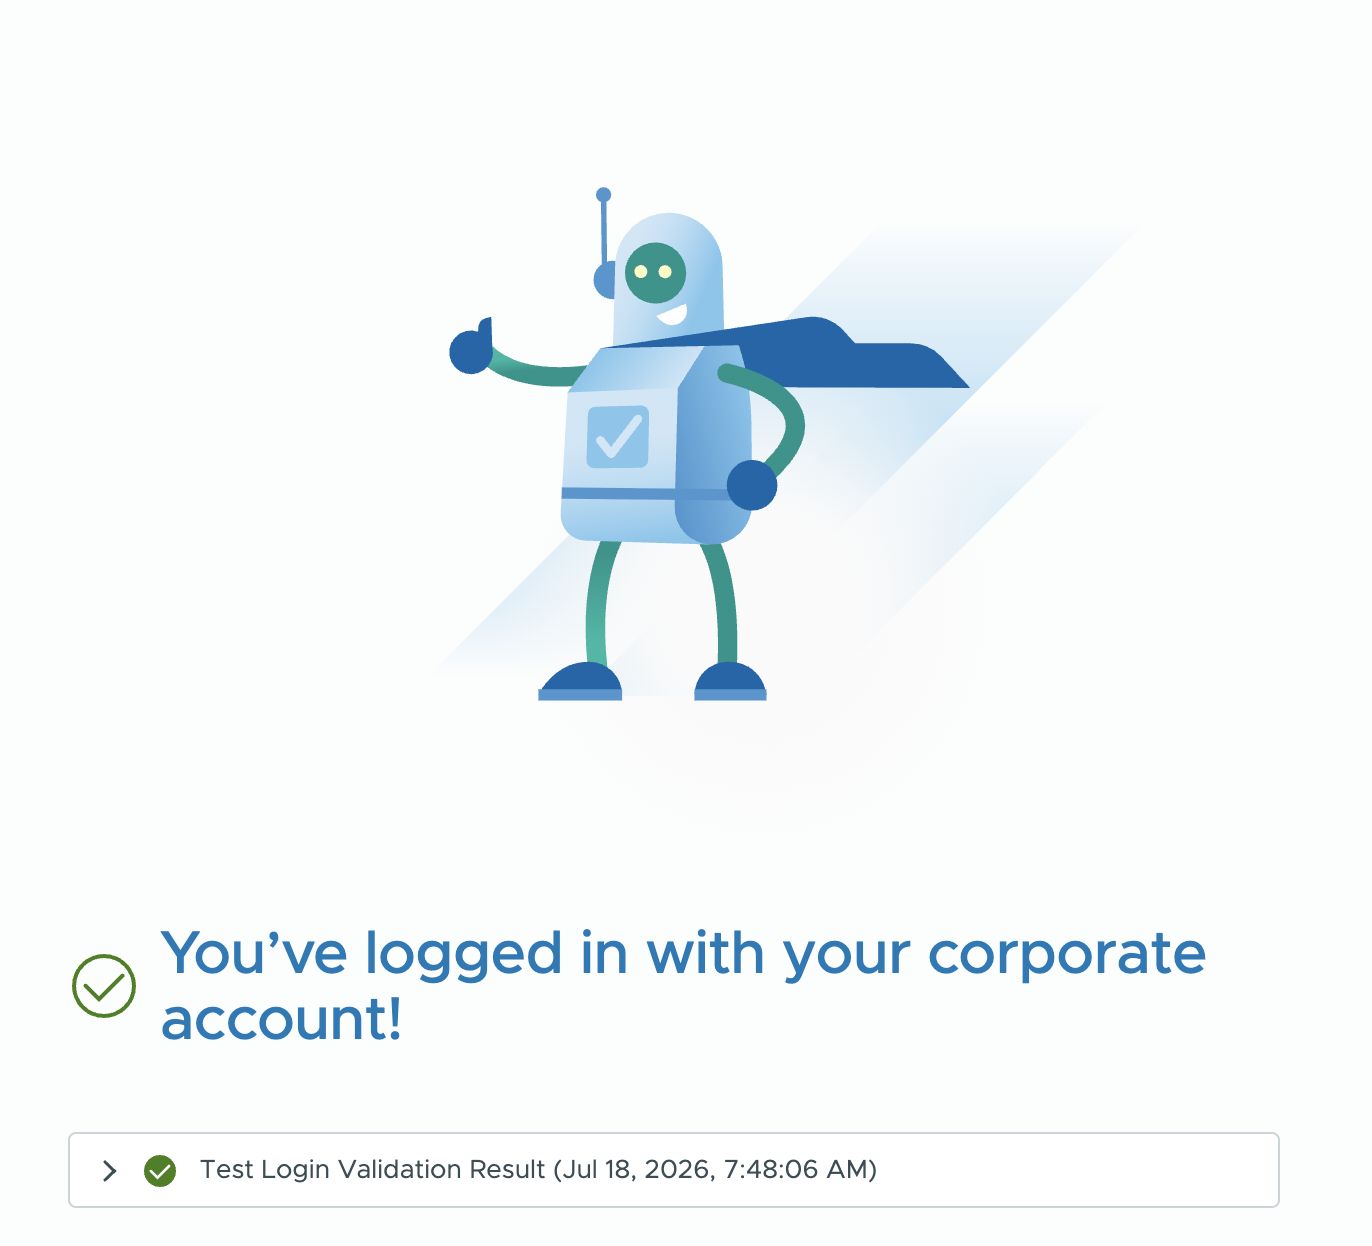
You can complete the remainder of the VCF SSO workflow to configure VCF components as well as assign a VCF-level role.
Setup OIDC Provider for VCF SSO
Required Input to Initialize Service:
- TLS (required for VCF SSO)
- Admin Password
After saving your configuration to initialize and click Enable service.
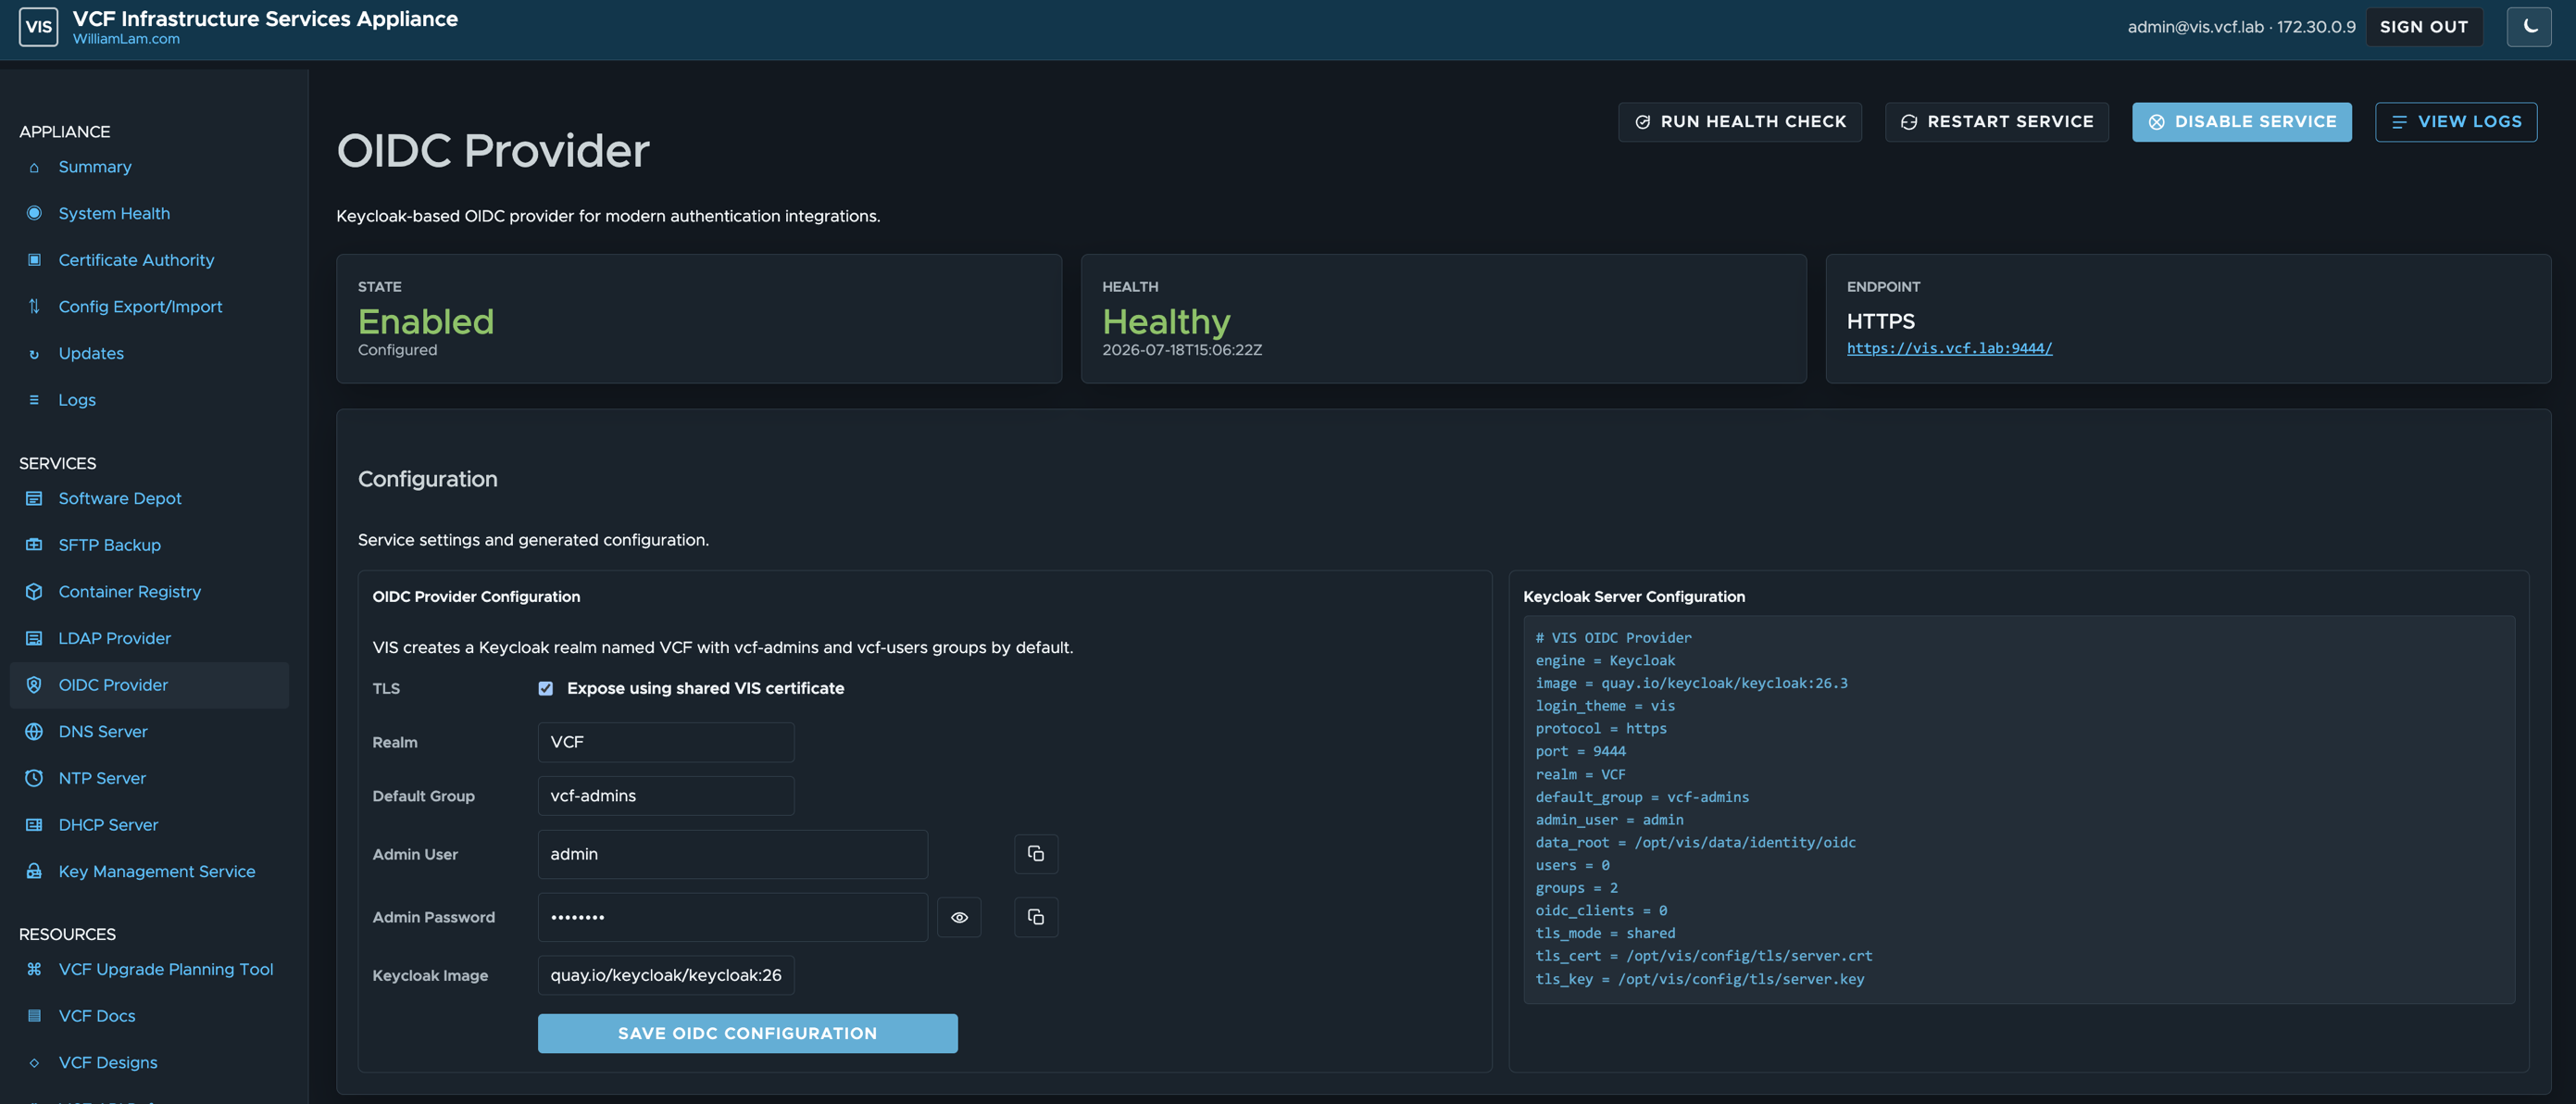
> Note: The OIDC Provider uses Keycloak. To manage advanced configurations, access the Keycloak Admin UI by clicking the URL in the upper-right corner of the service and entering the credentials you configured.
By default, the OIDC provider already contains two pre-created groups: vcf-admins and vcf-users and you will need to create at least one user in the desired group for use with VCF SSO
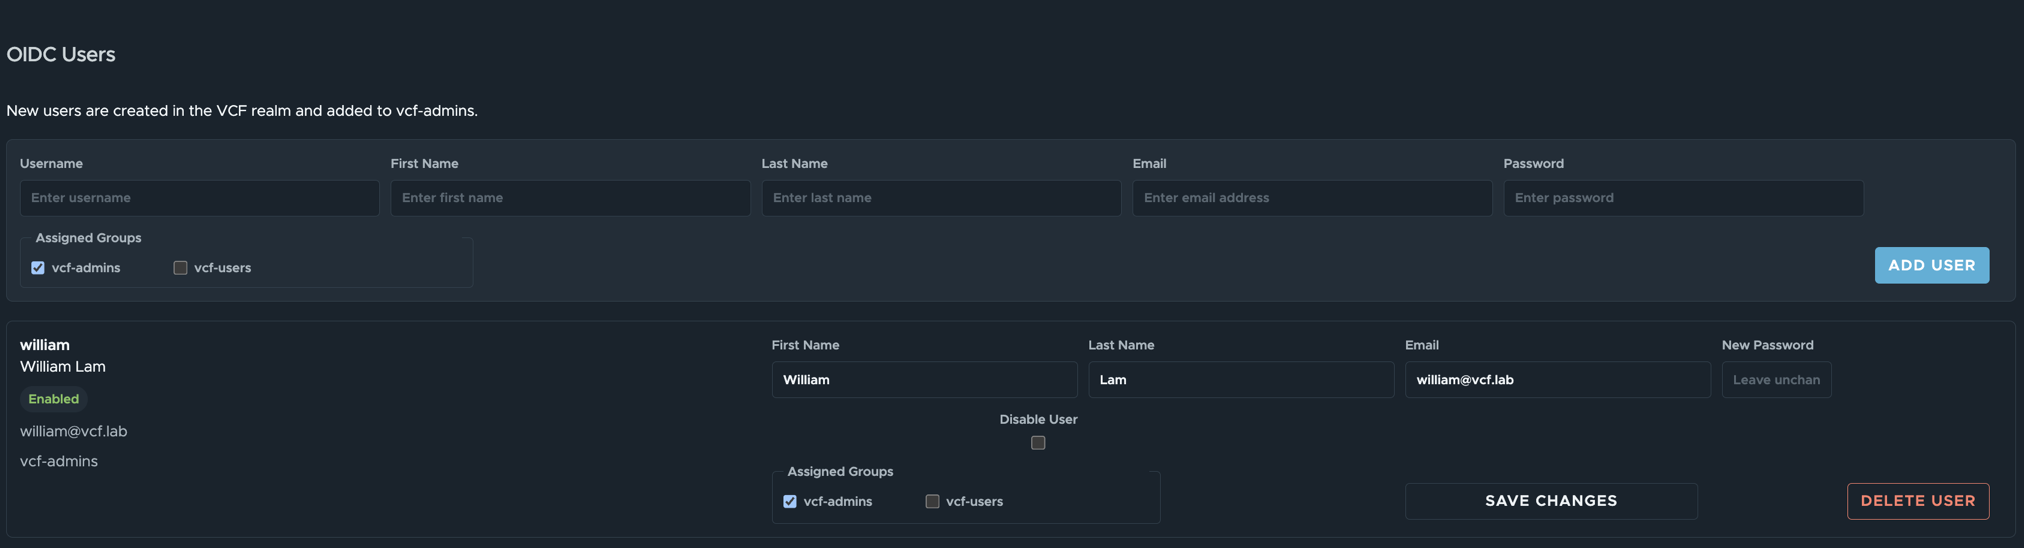
Choose your Identity Broker deployment model (recommend using Instance).
Select OIDC for your Identity Provider
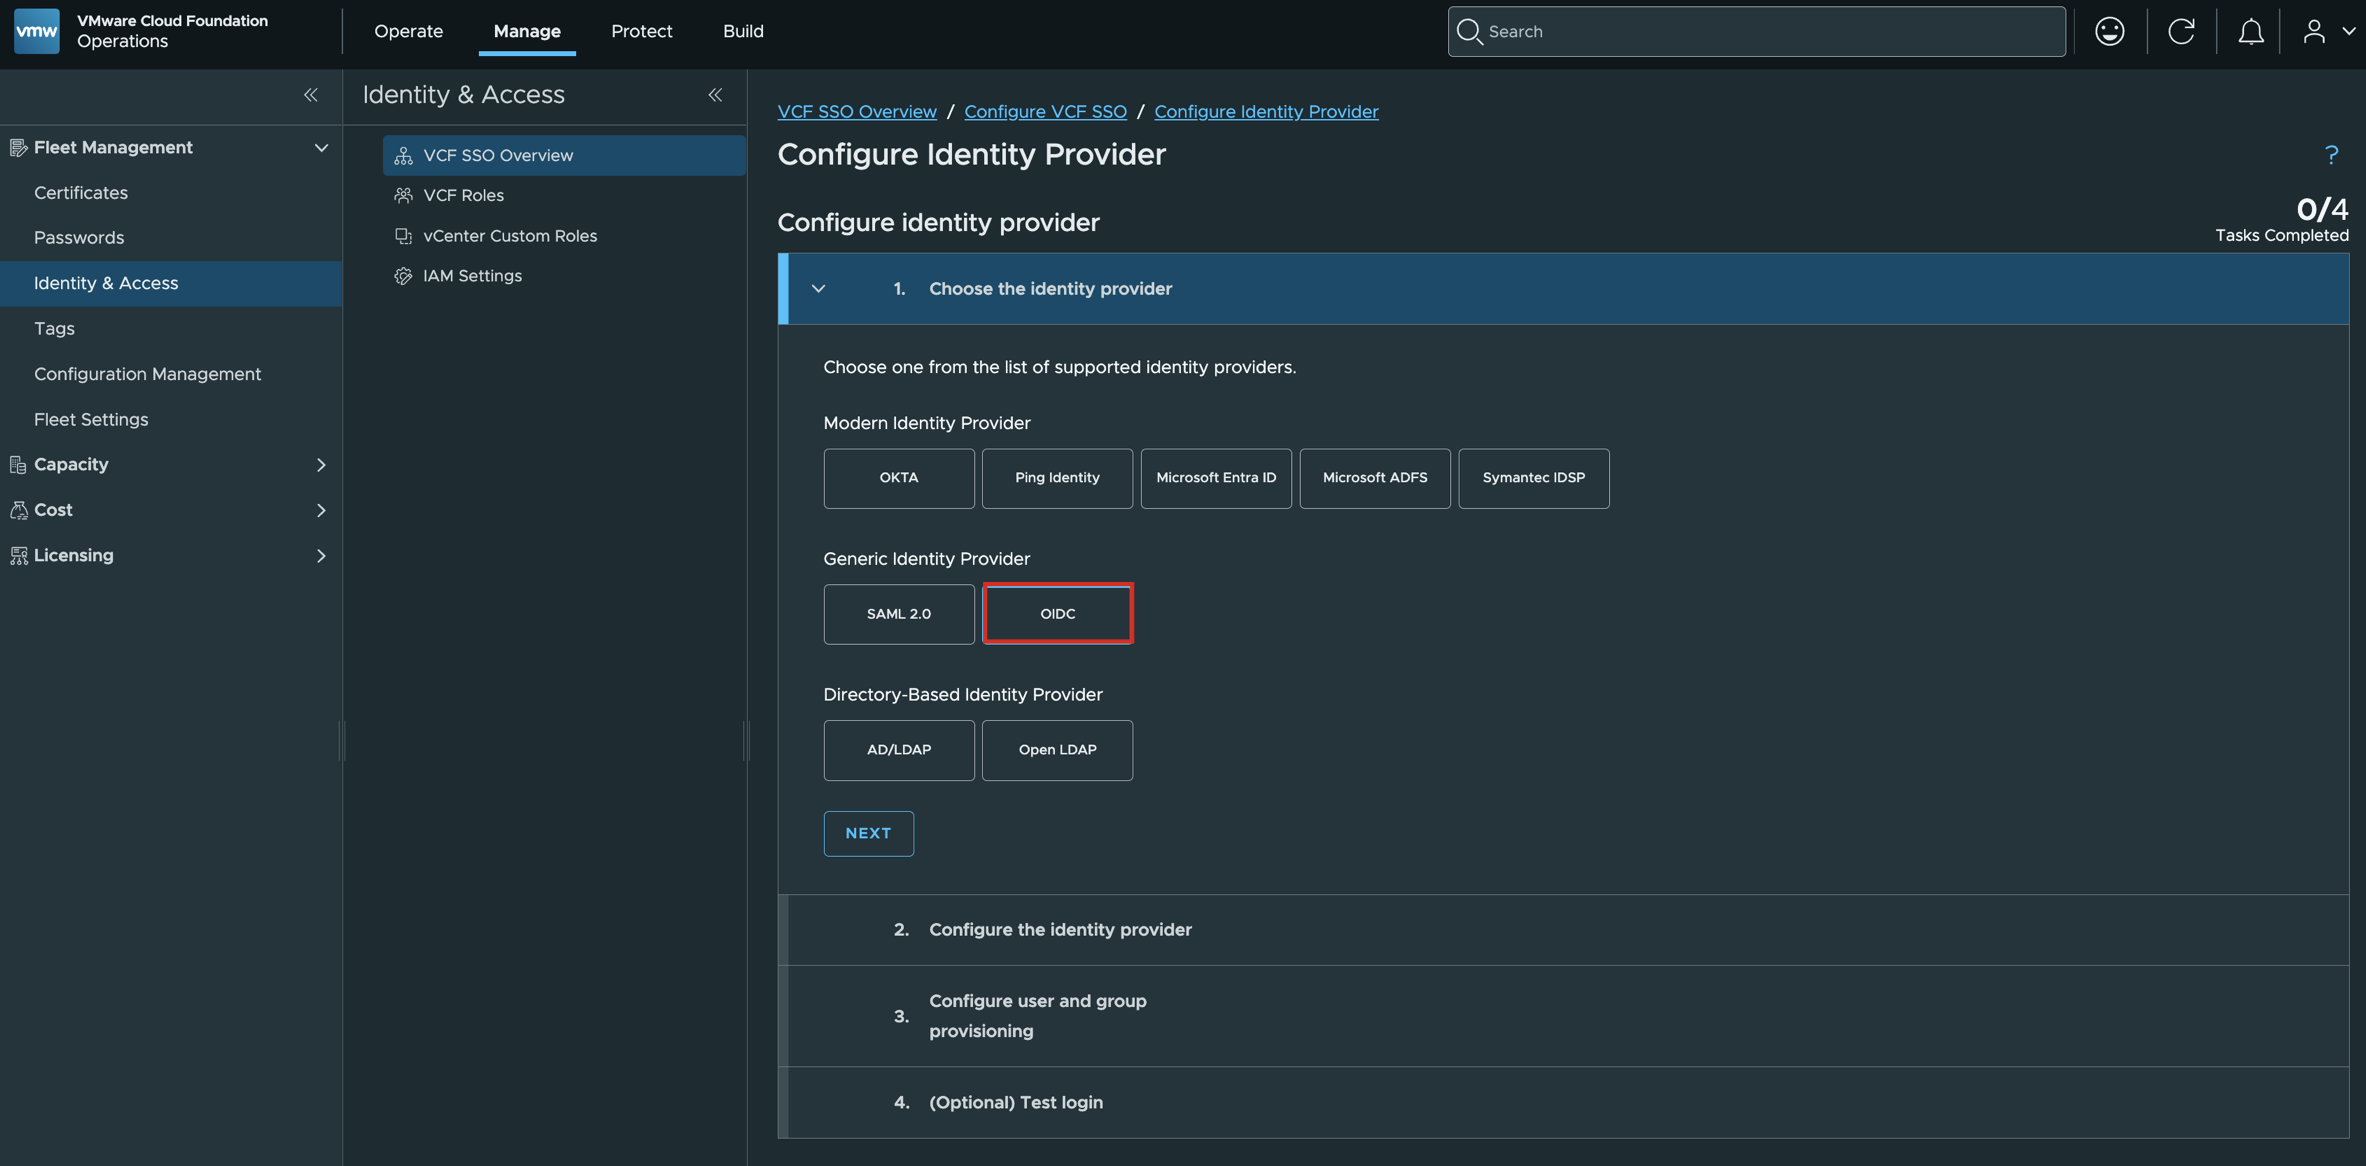
Configure the highlighted section for the Identity Provider Configuration, which will require copying information between the VCF SSO wizard and VIS OIDC Provider
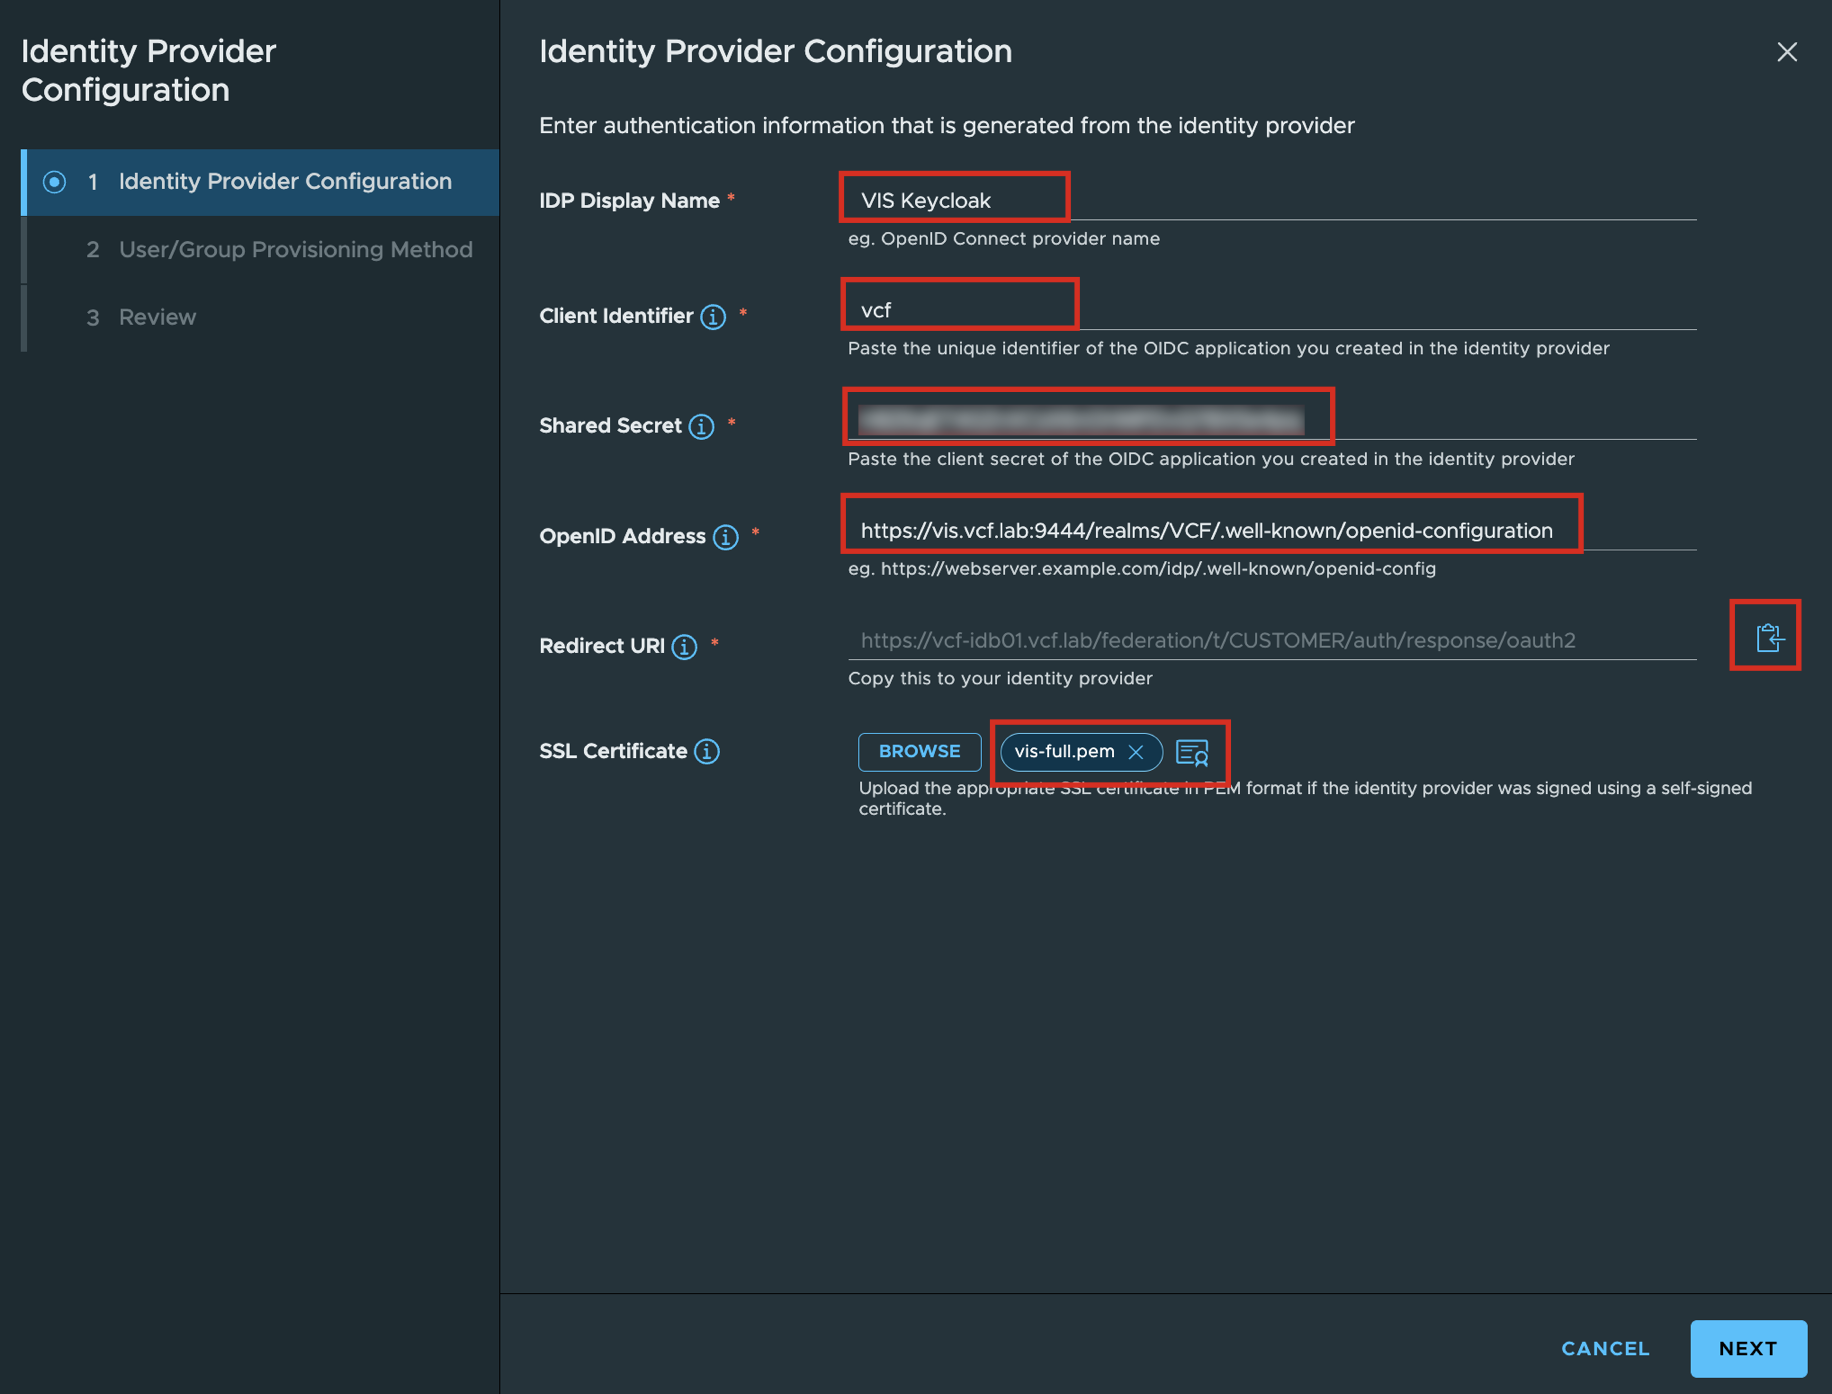
Copy the Redirect URI and navigate to your OIDC Provider to create a new OIDC Client, where you will get your OIDC Client ID/Secret along with the OIDC Discovery URL required by the VCF SSO wizard.
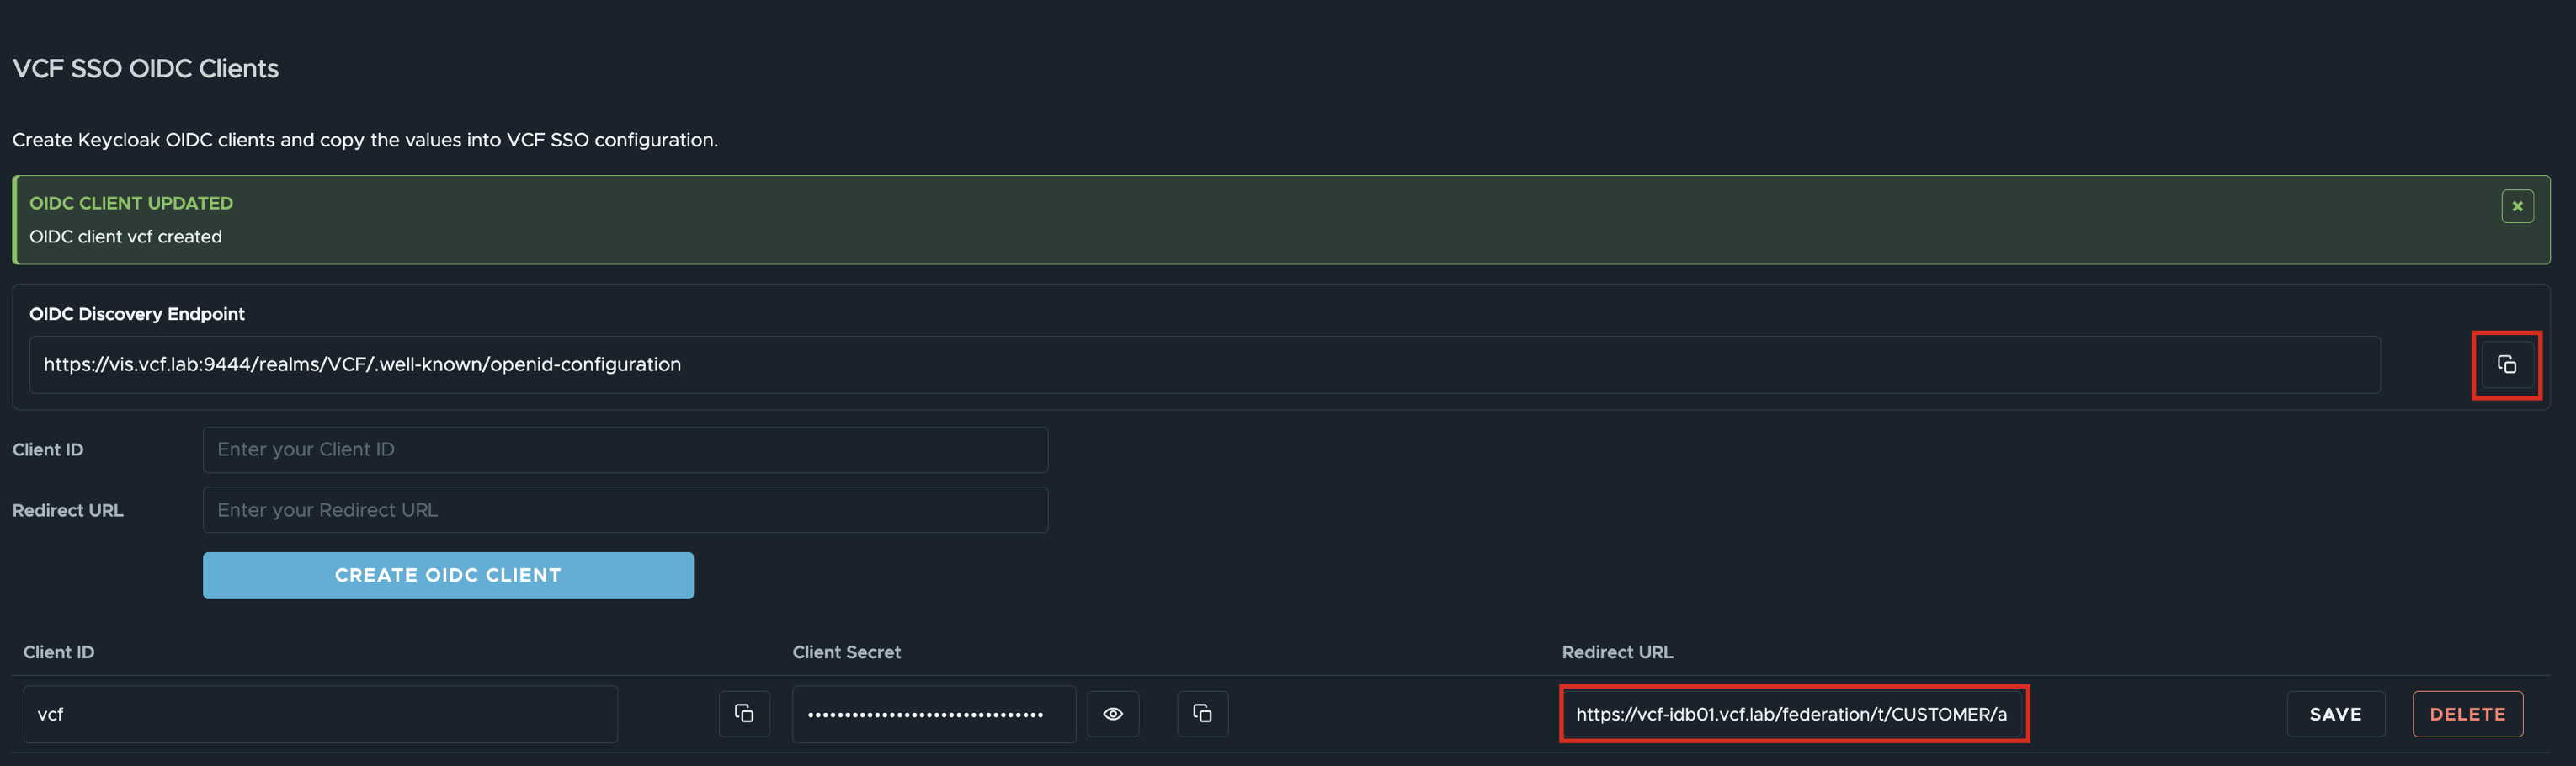
Return to the VCF SSO wizard and populate the values along with the VIS Full PEM certificate which is required to ensure a trust can be established.
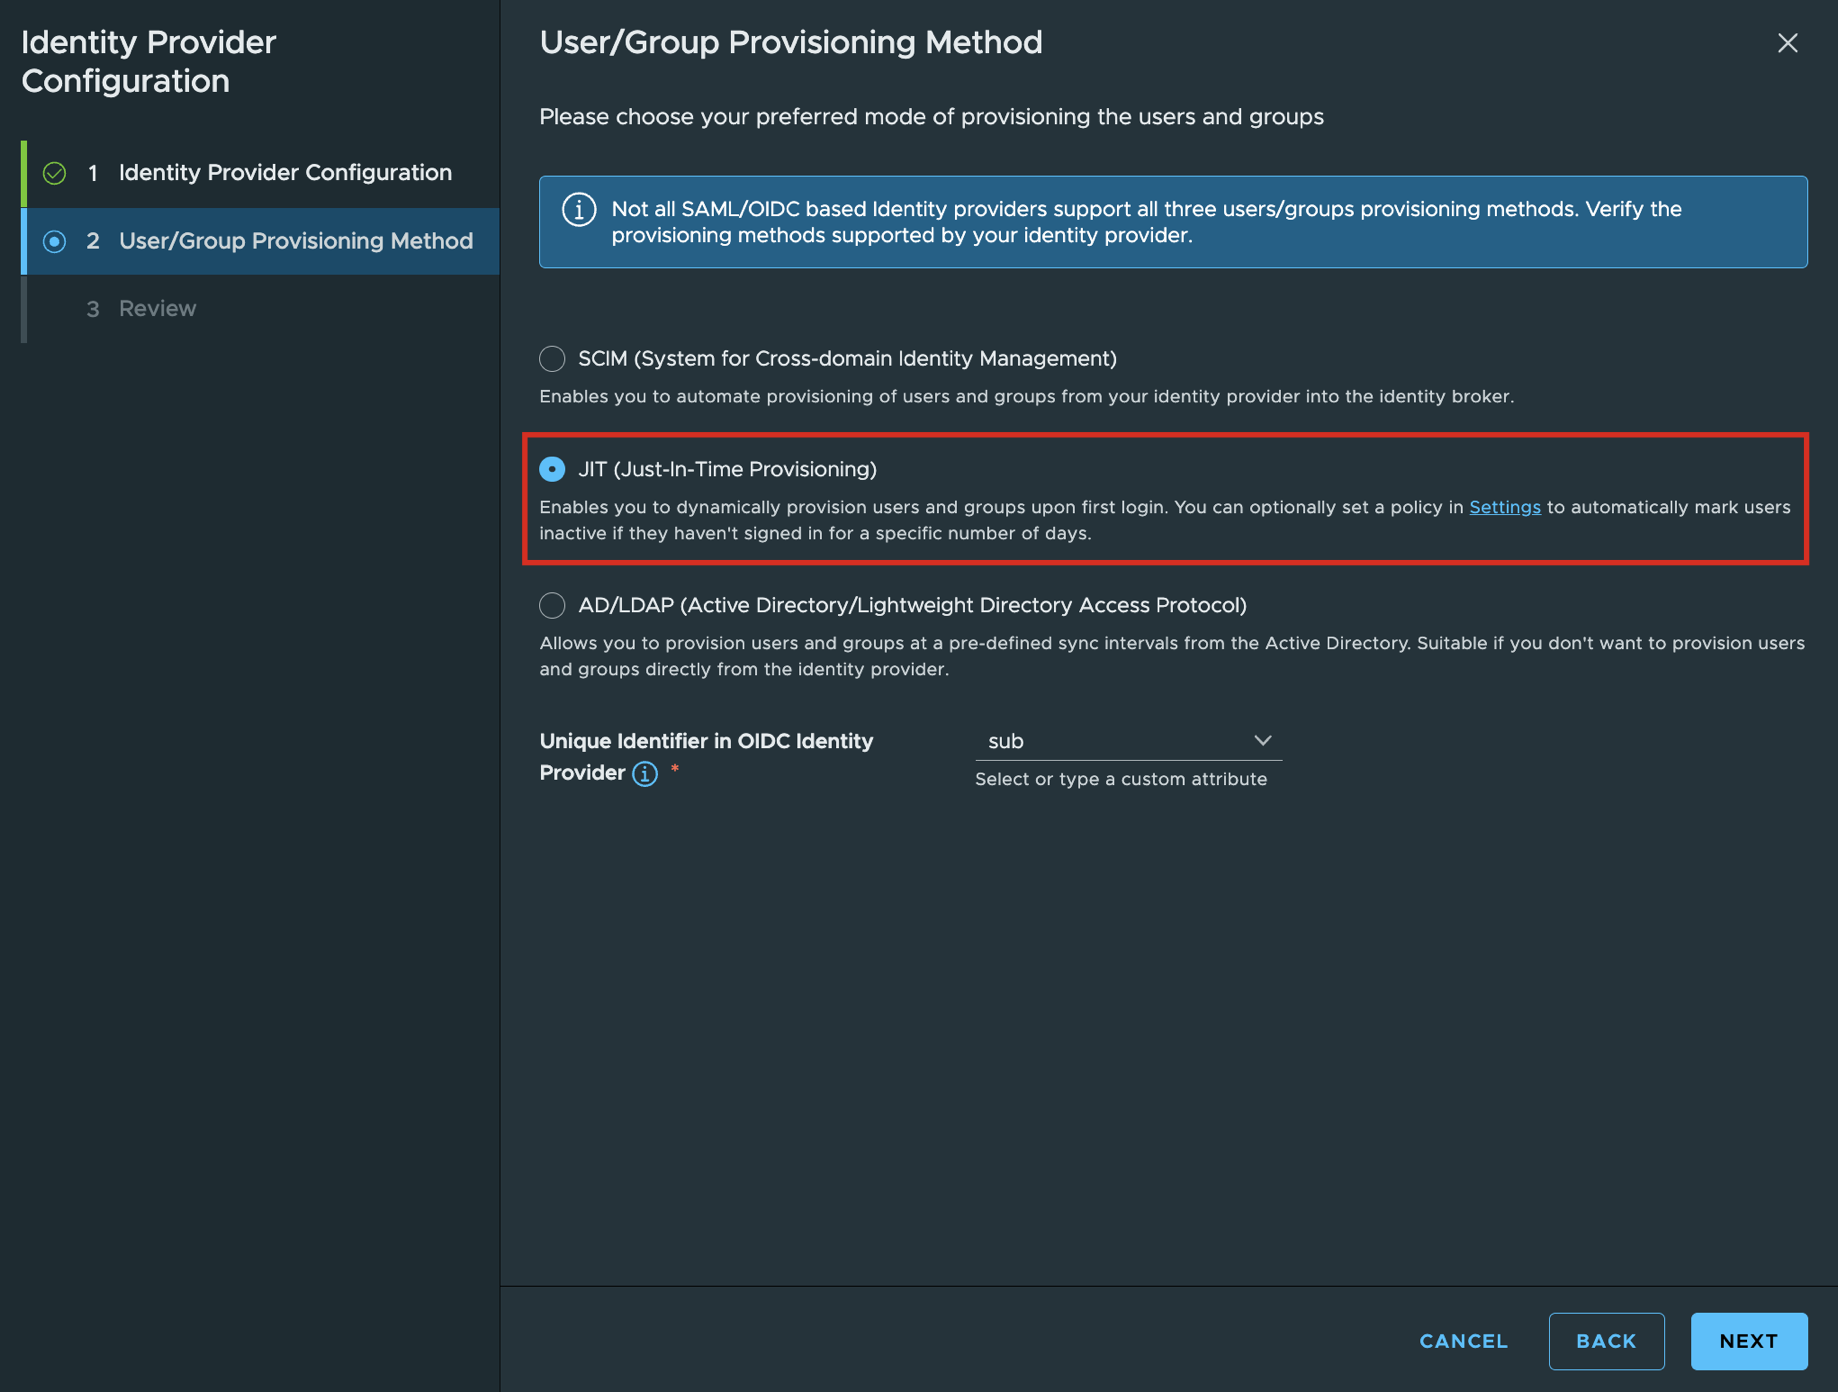
Configure the highlighted section for the User/Group Provisioning
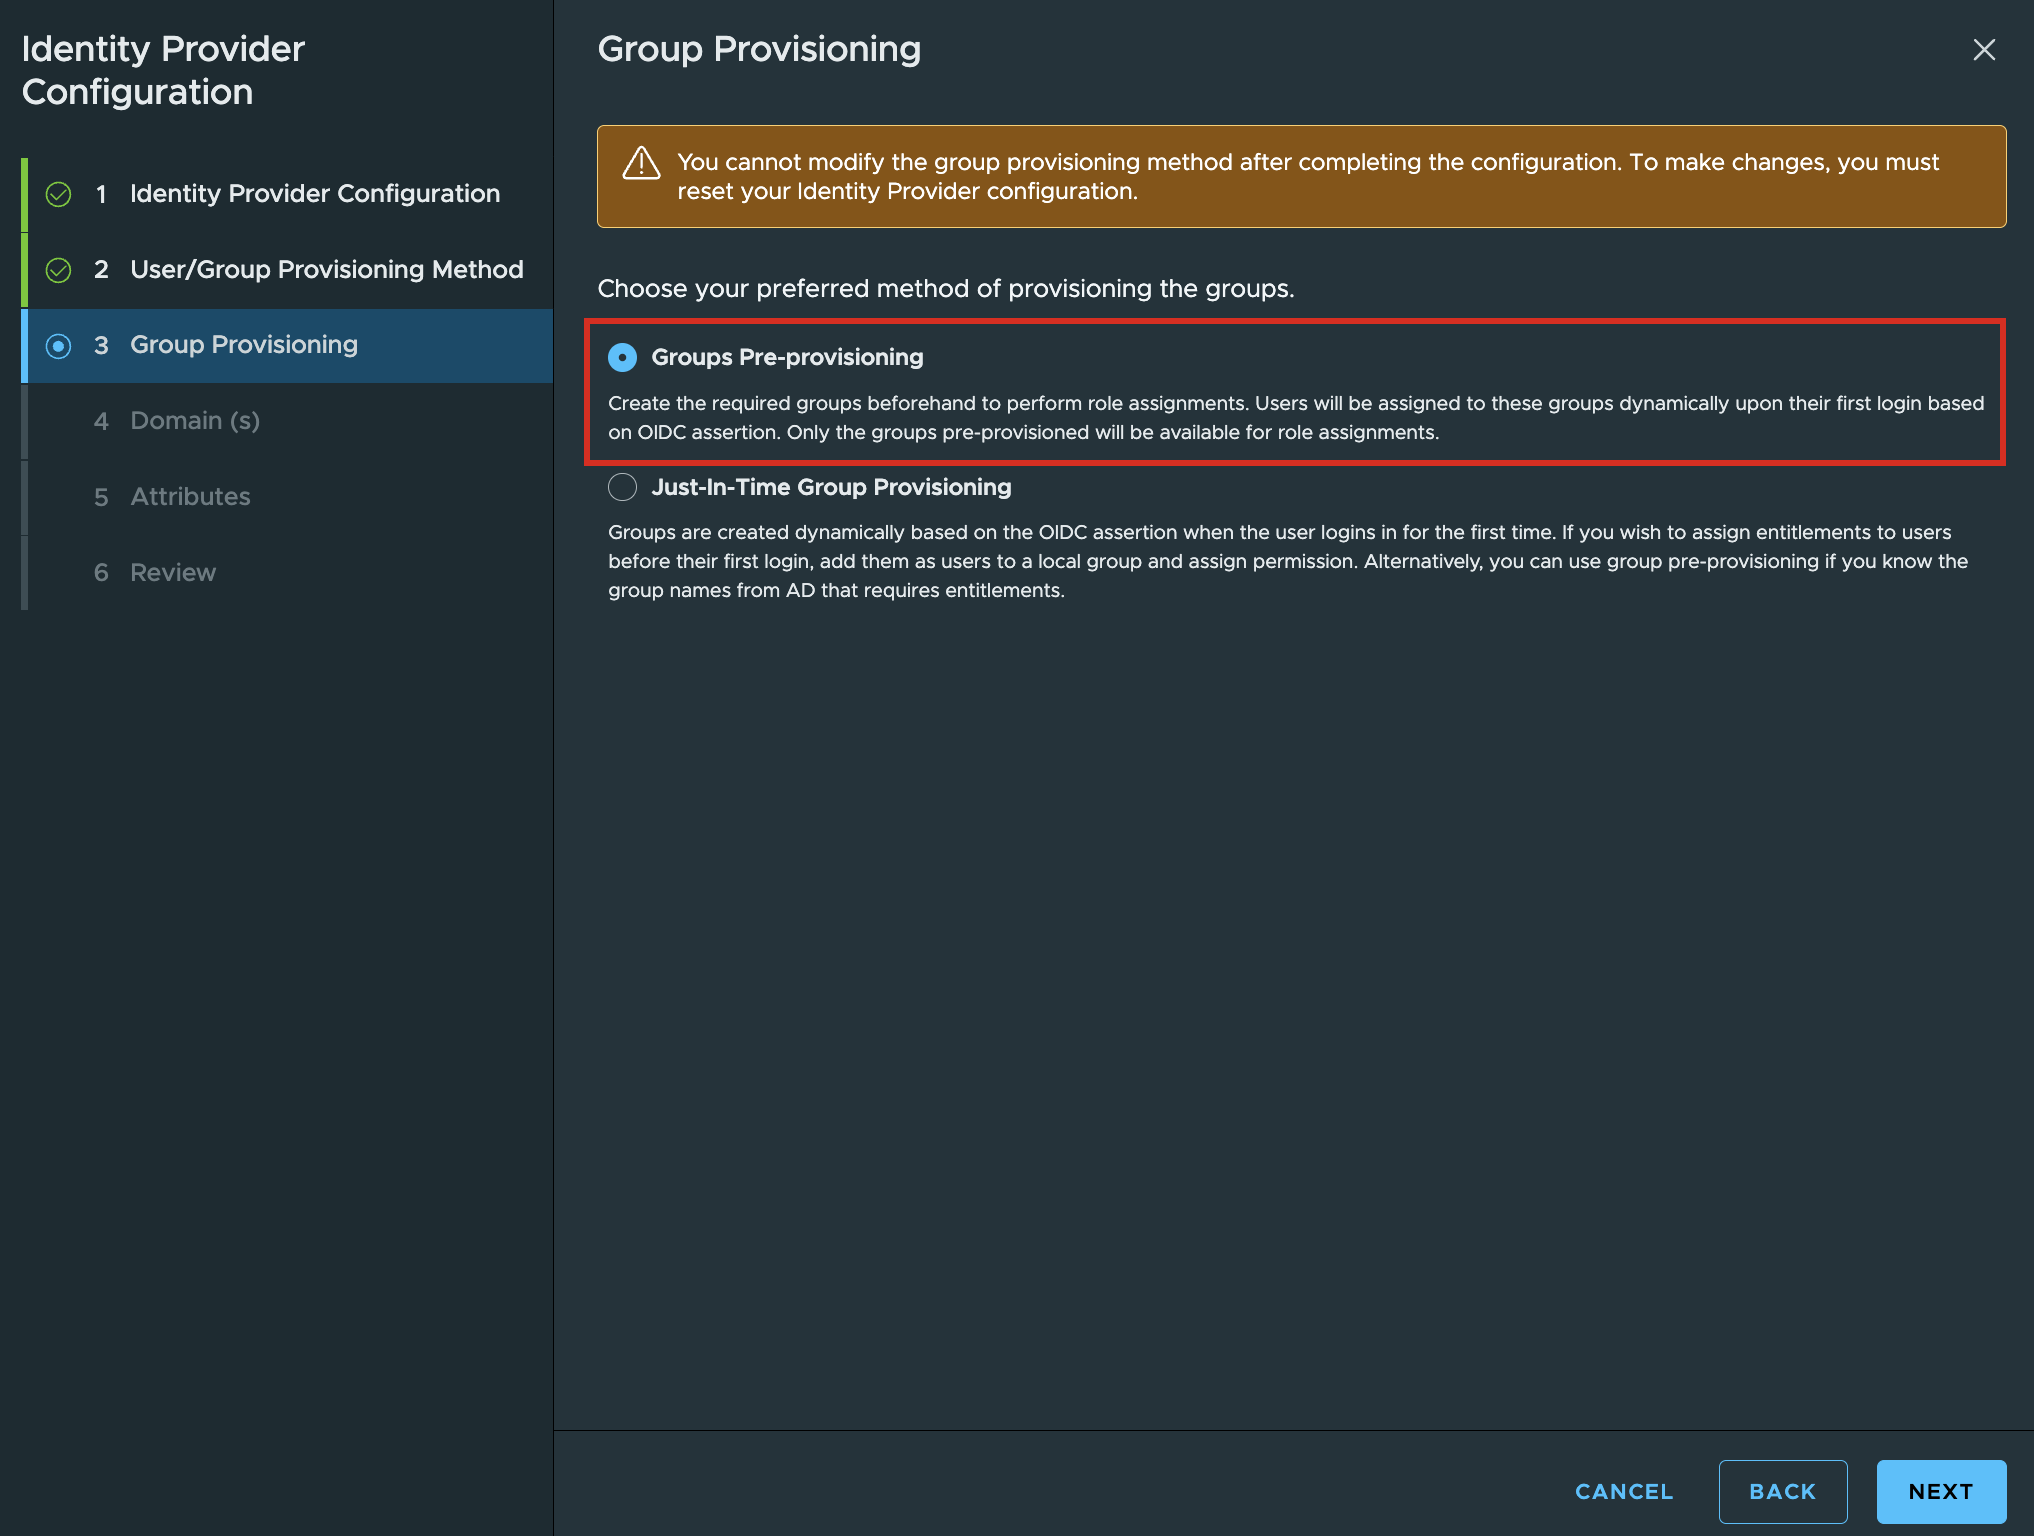
Configure the highlighted section for the Group Provisioning
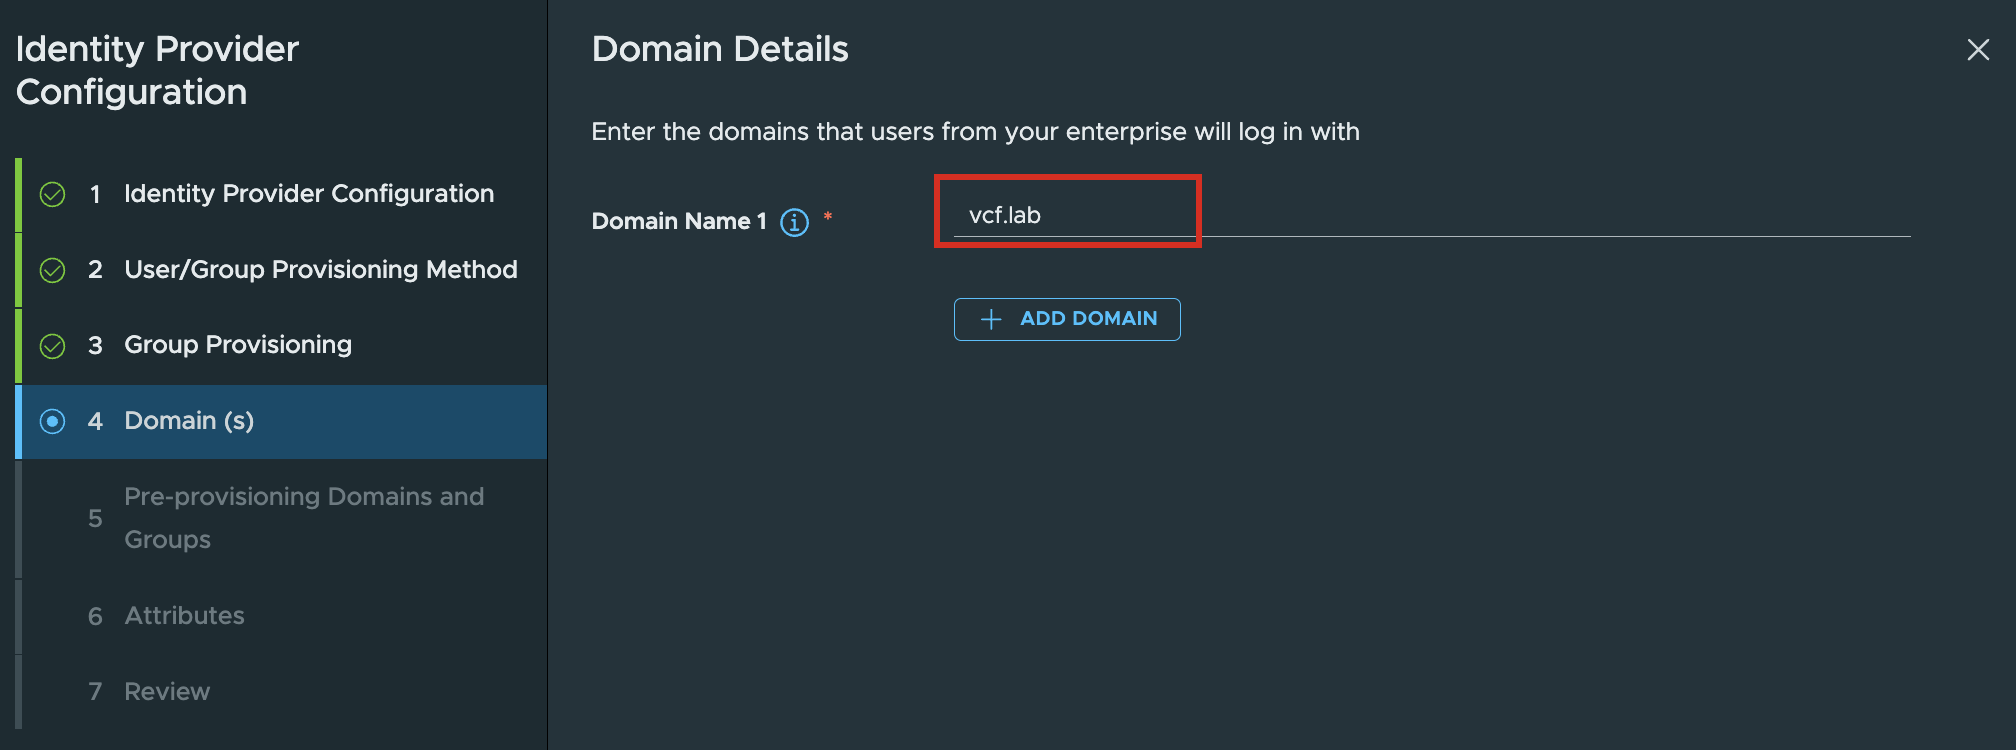
Configure the highlighted section for the OIDC Domain (e.g. your DNS domain)
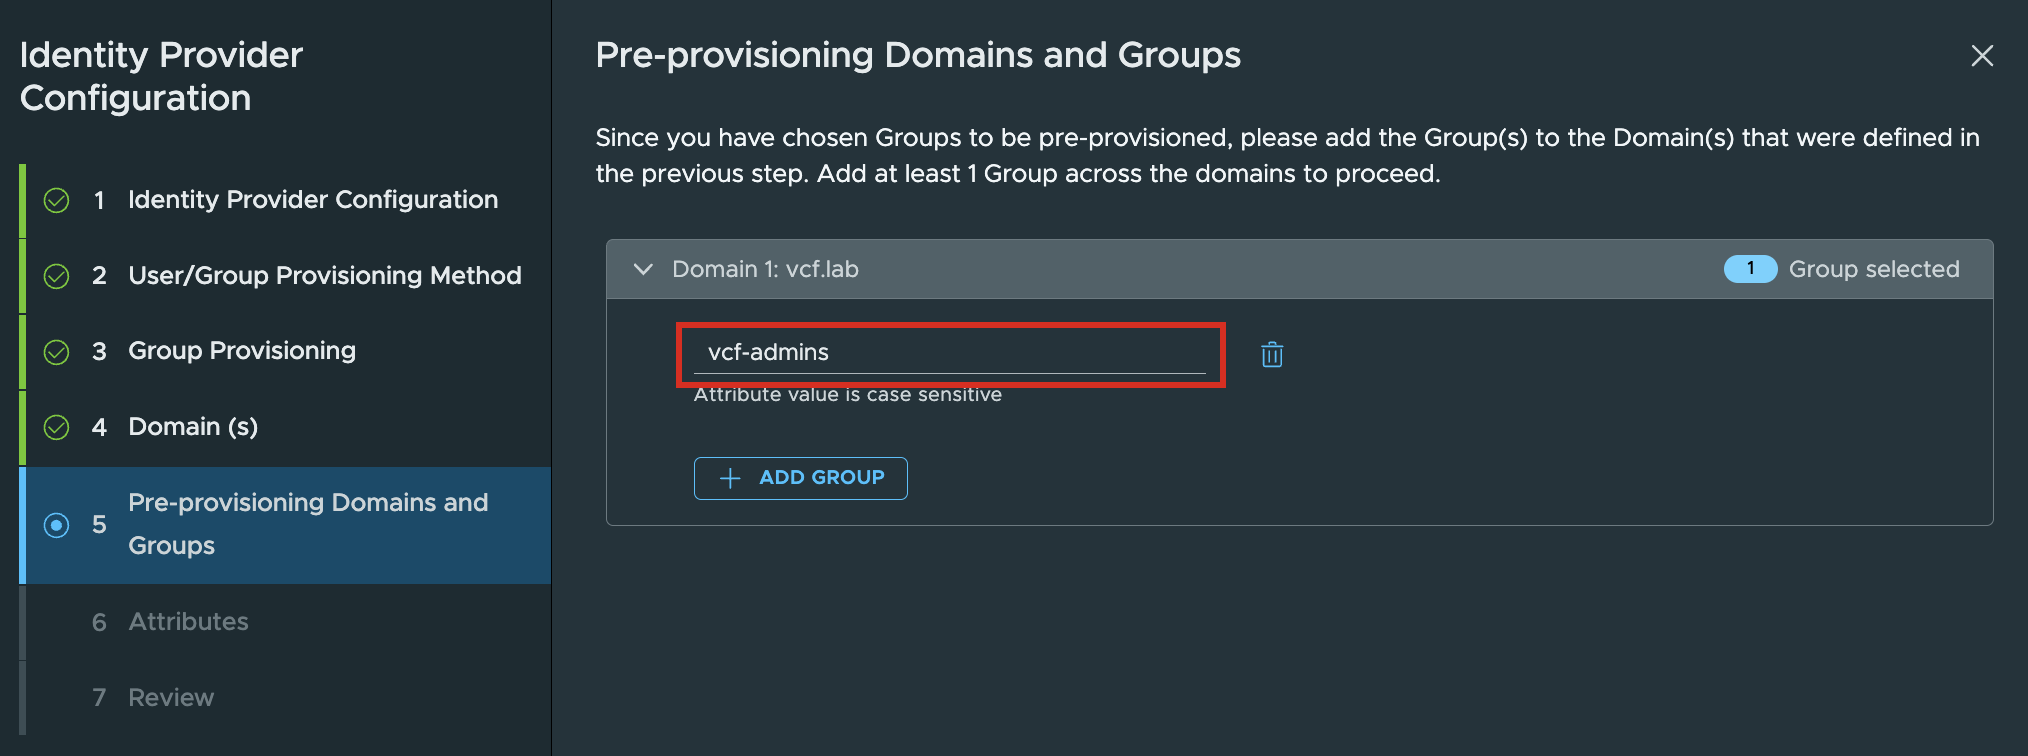
Configure the highlighted section for the OIDC Provider Group (e.g. vcf-admins)
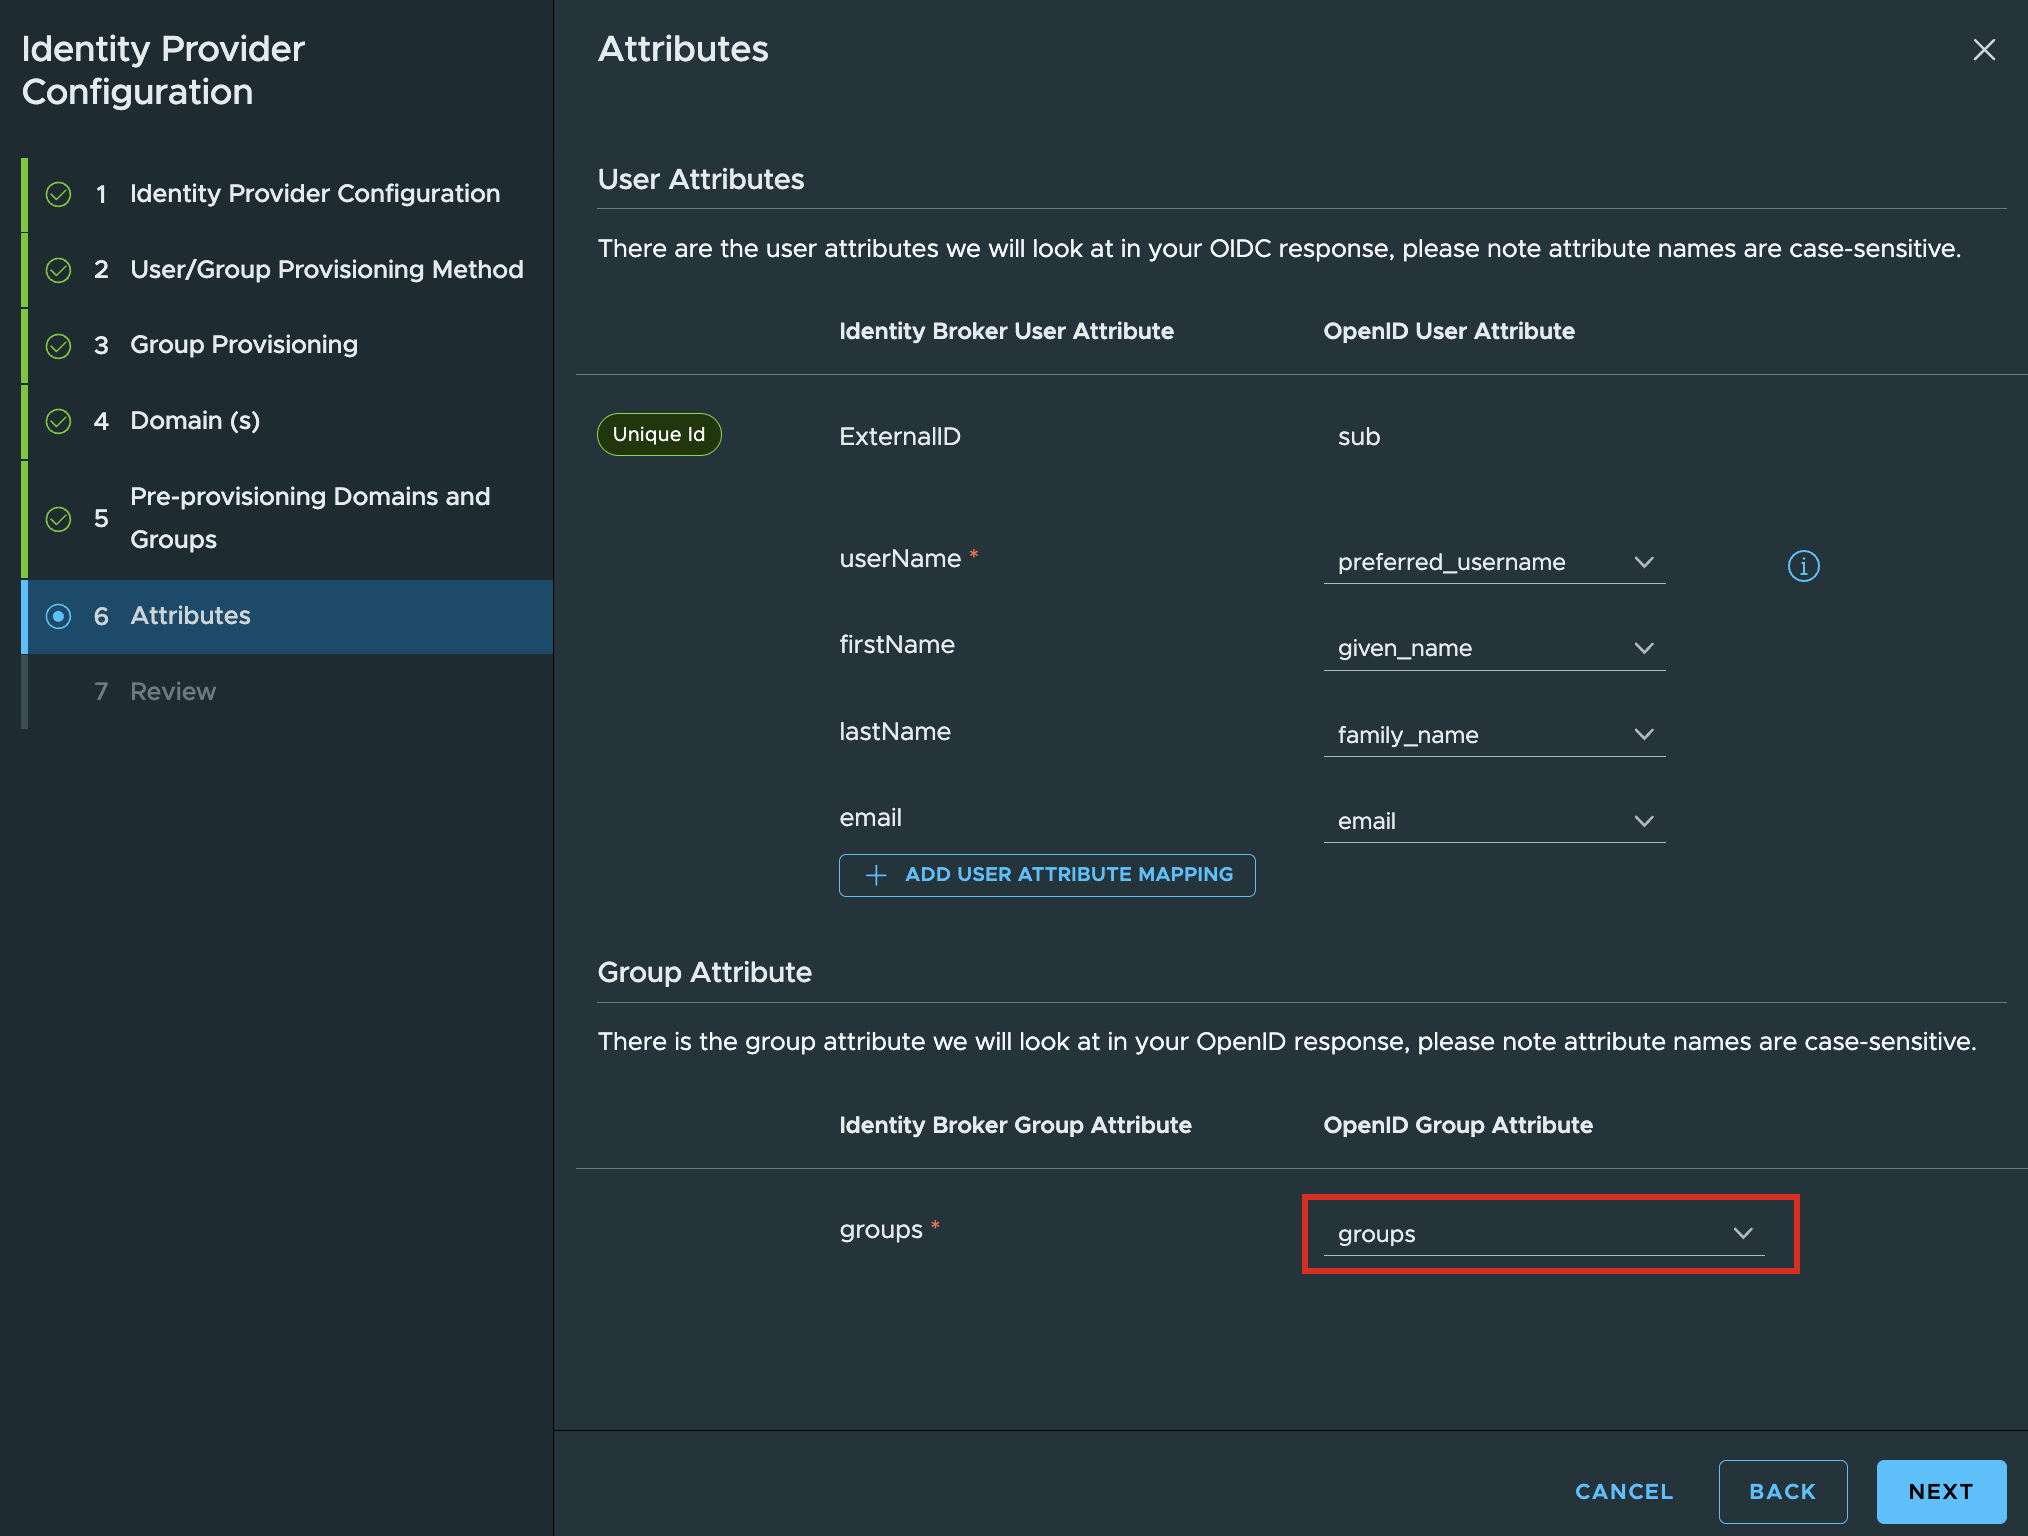
Configure the highlighted section for attribute mappings.
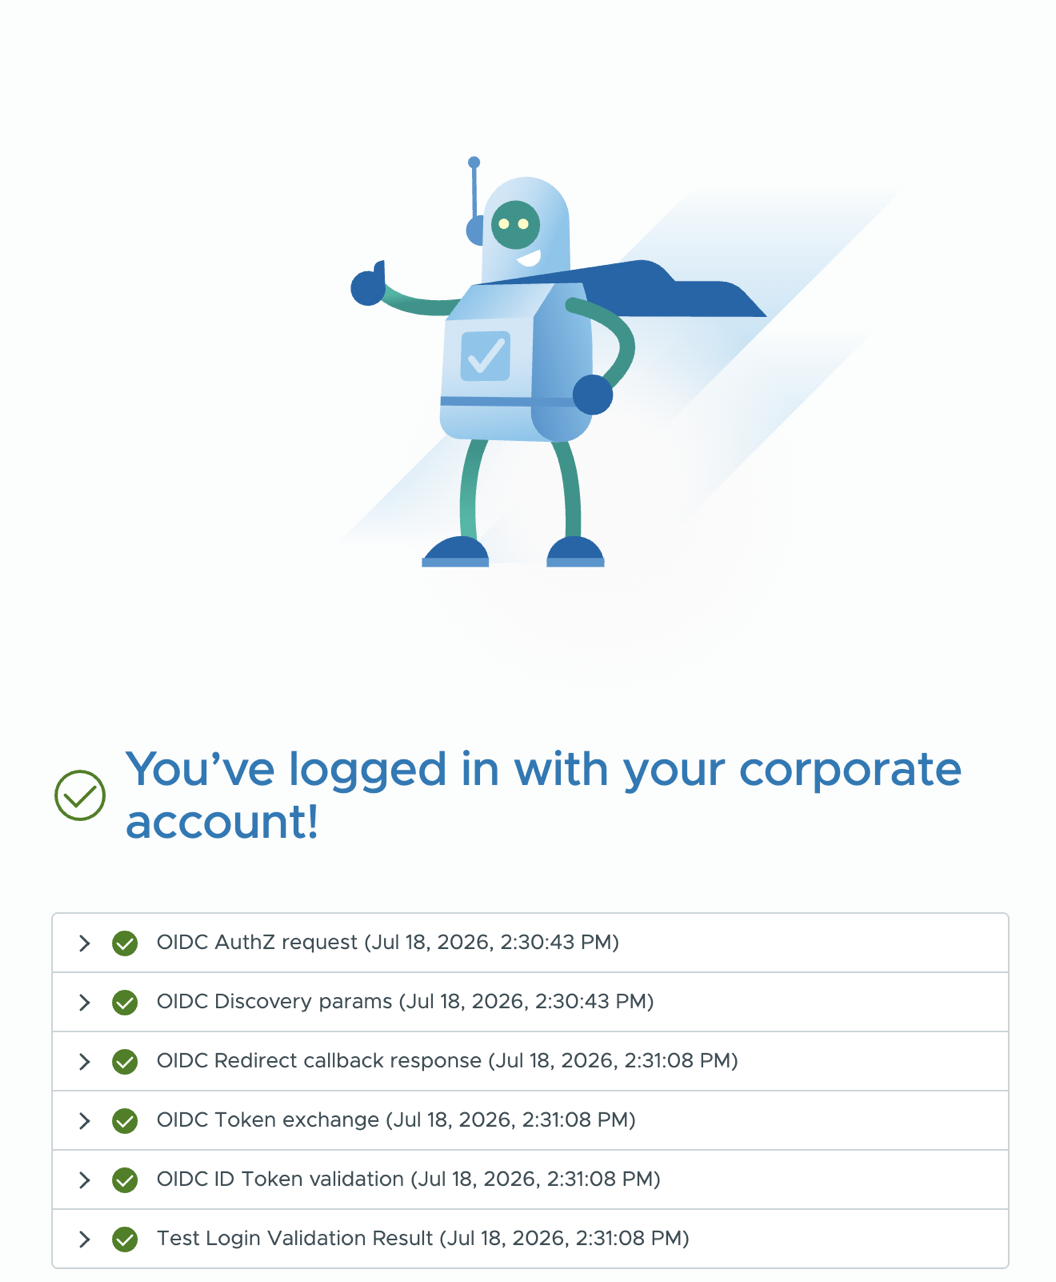
To confirm everything was configured correctly, click on the Test Login and enter the full username (no domain) and password you had configured earlier
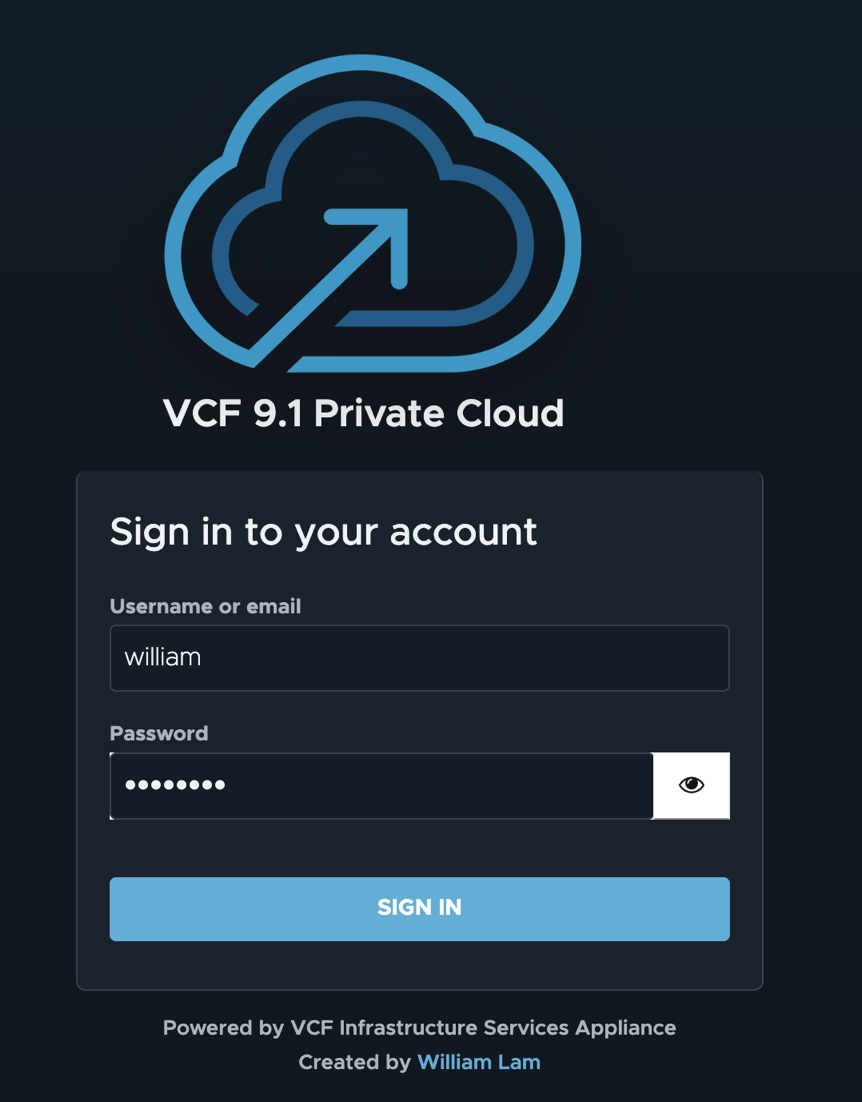
You should see a successful login, which confirms VCF SSO has been properly configured with the OIDC provider.
Setup DNS Server for VCF Environment
Required Input to Initialize Service:
- DNS Domain
After saving your configuration to initialize and click Enable service.
If you would like to forward to an upstream DNS Server, select Forwarding and enter the list of DNS Server(s)
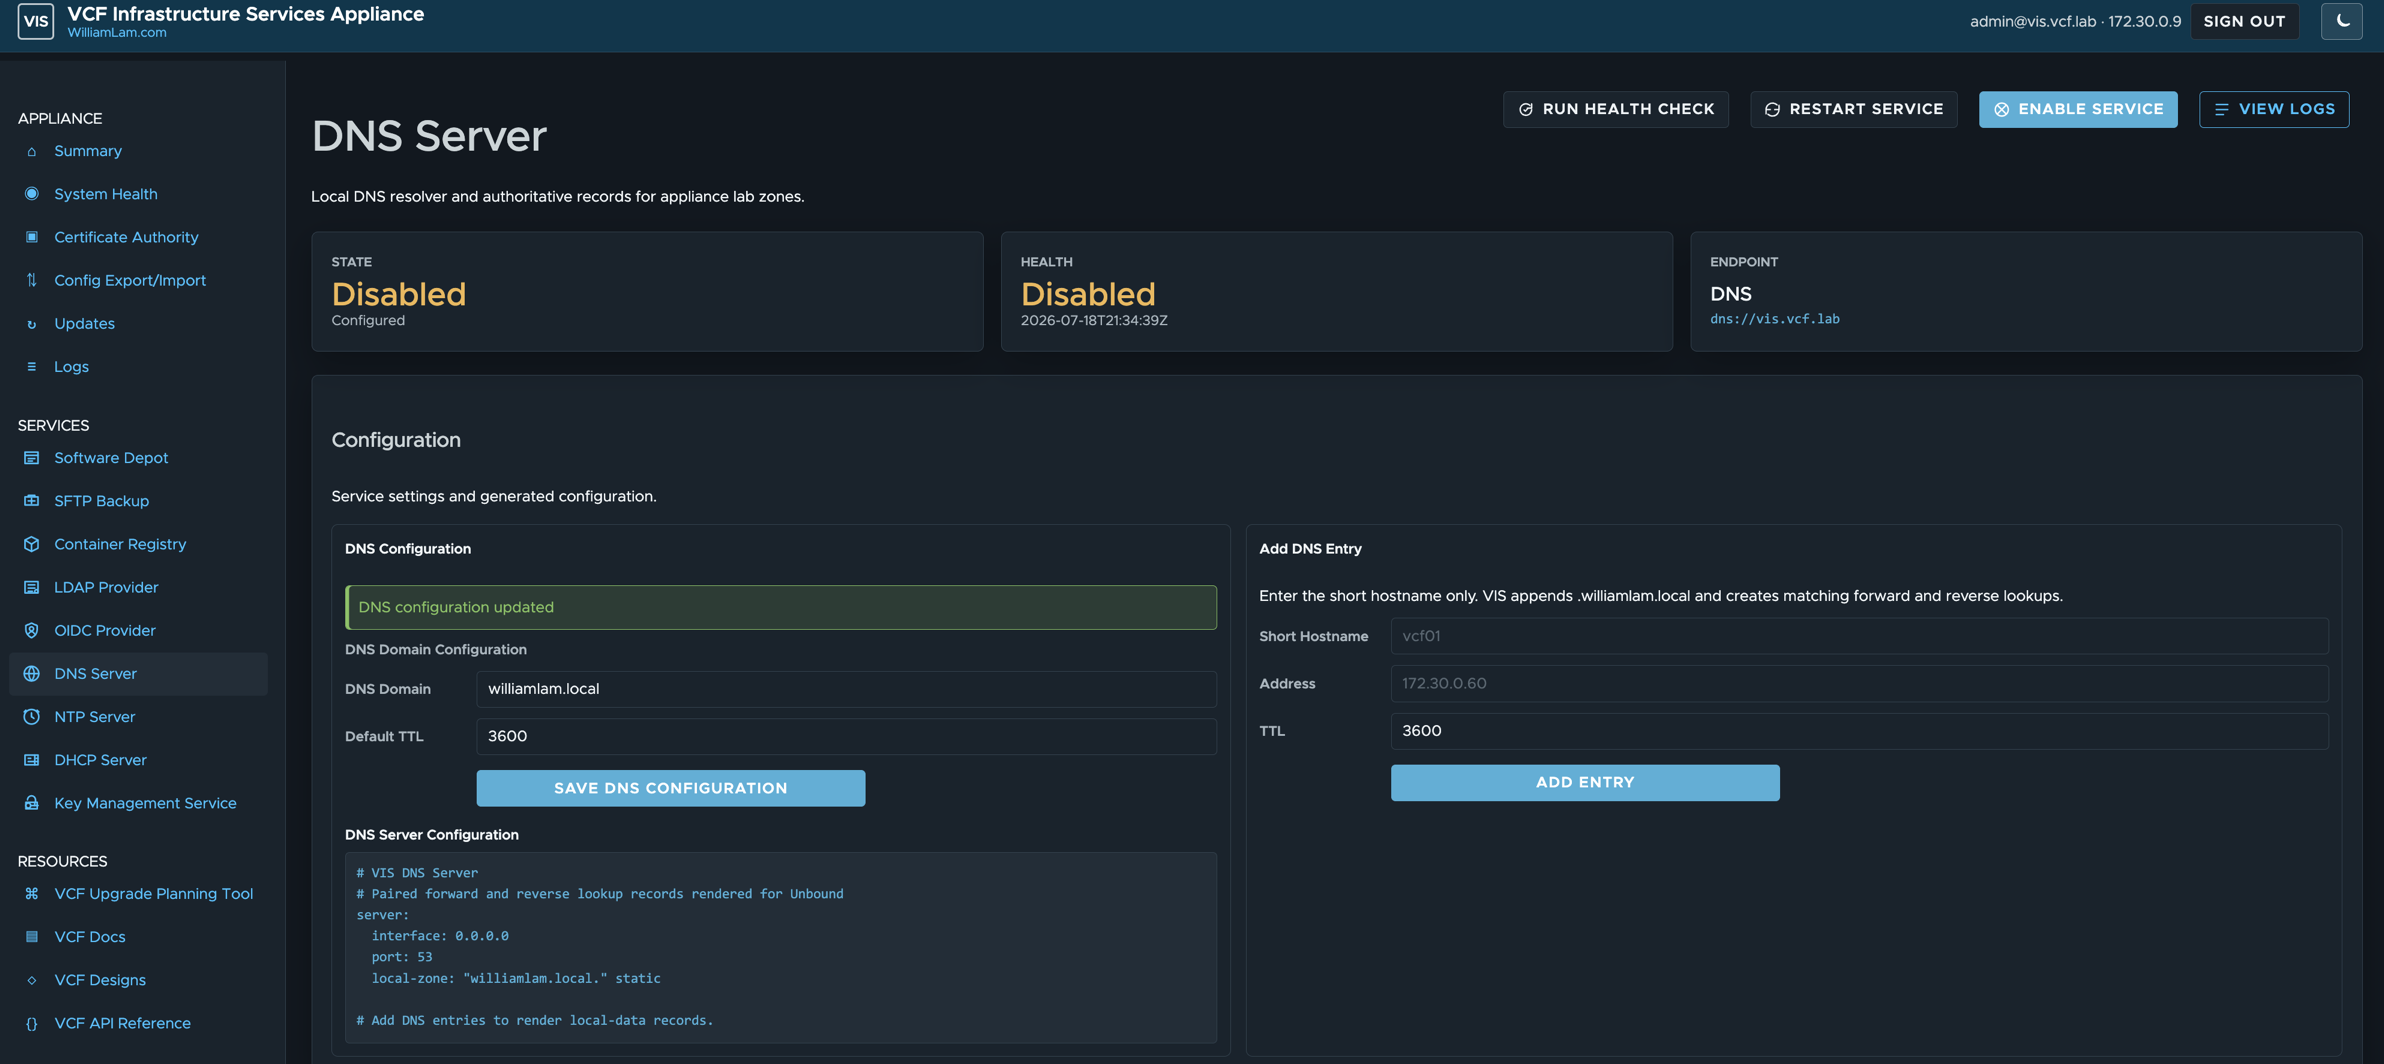
You can add and manage DNS using the admin panel

Setup NTP Server for VCF Environment
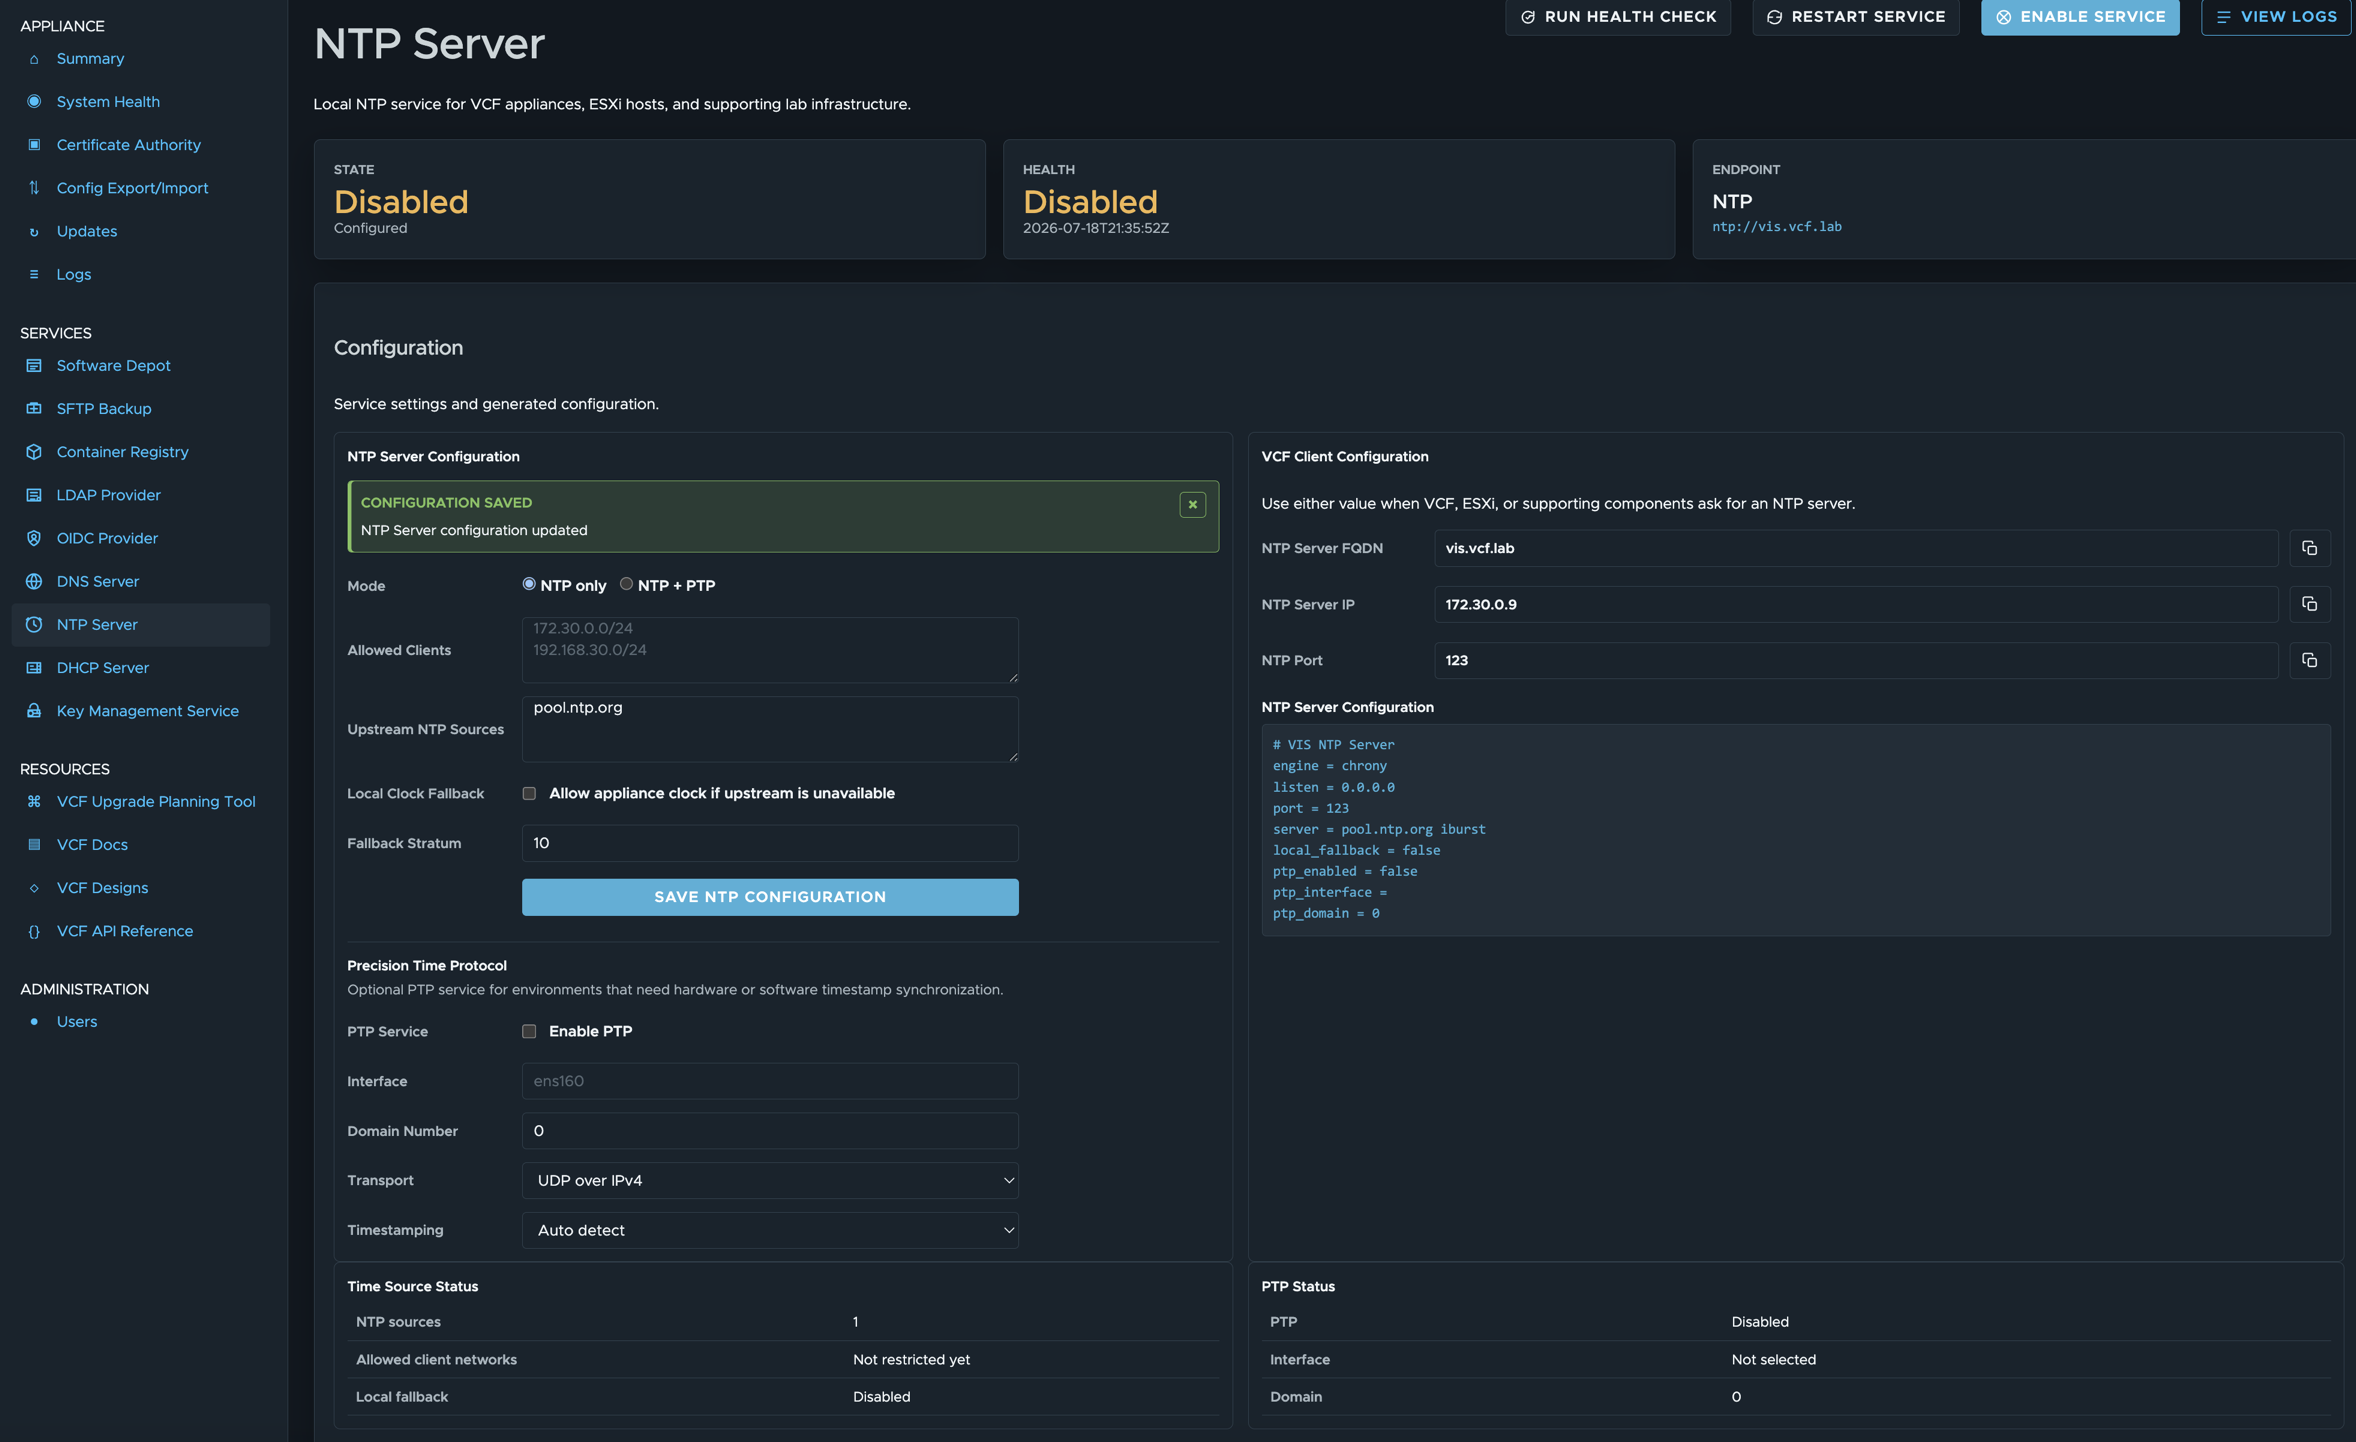
Required Input to Initialize Service:
- Mode (e.g. NTP or NTP+PTP)
- Upstream NTP Sources
After saving your configuration to initialize and click Enable service.
Setup DHCP Server for VCF Environment
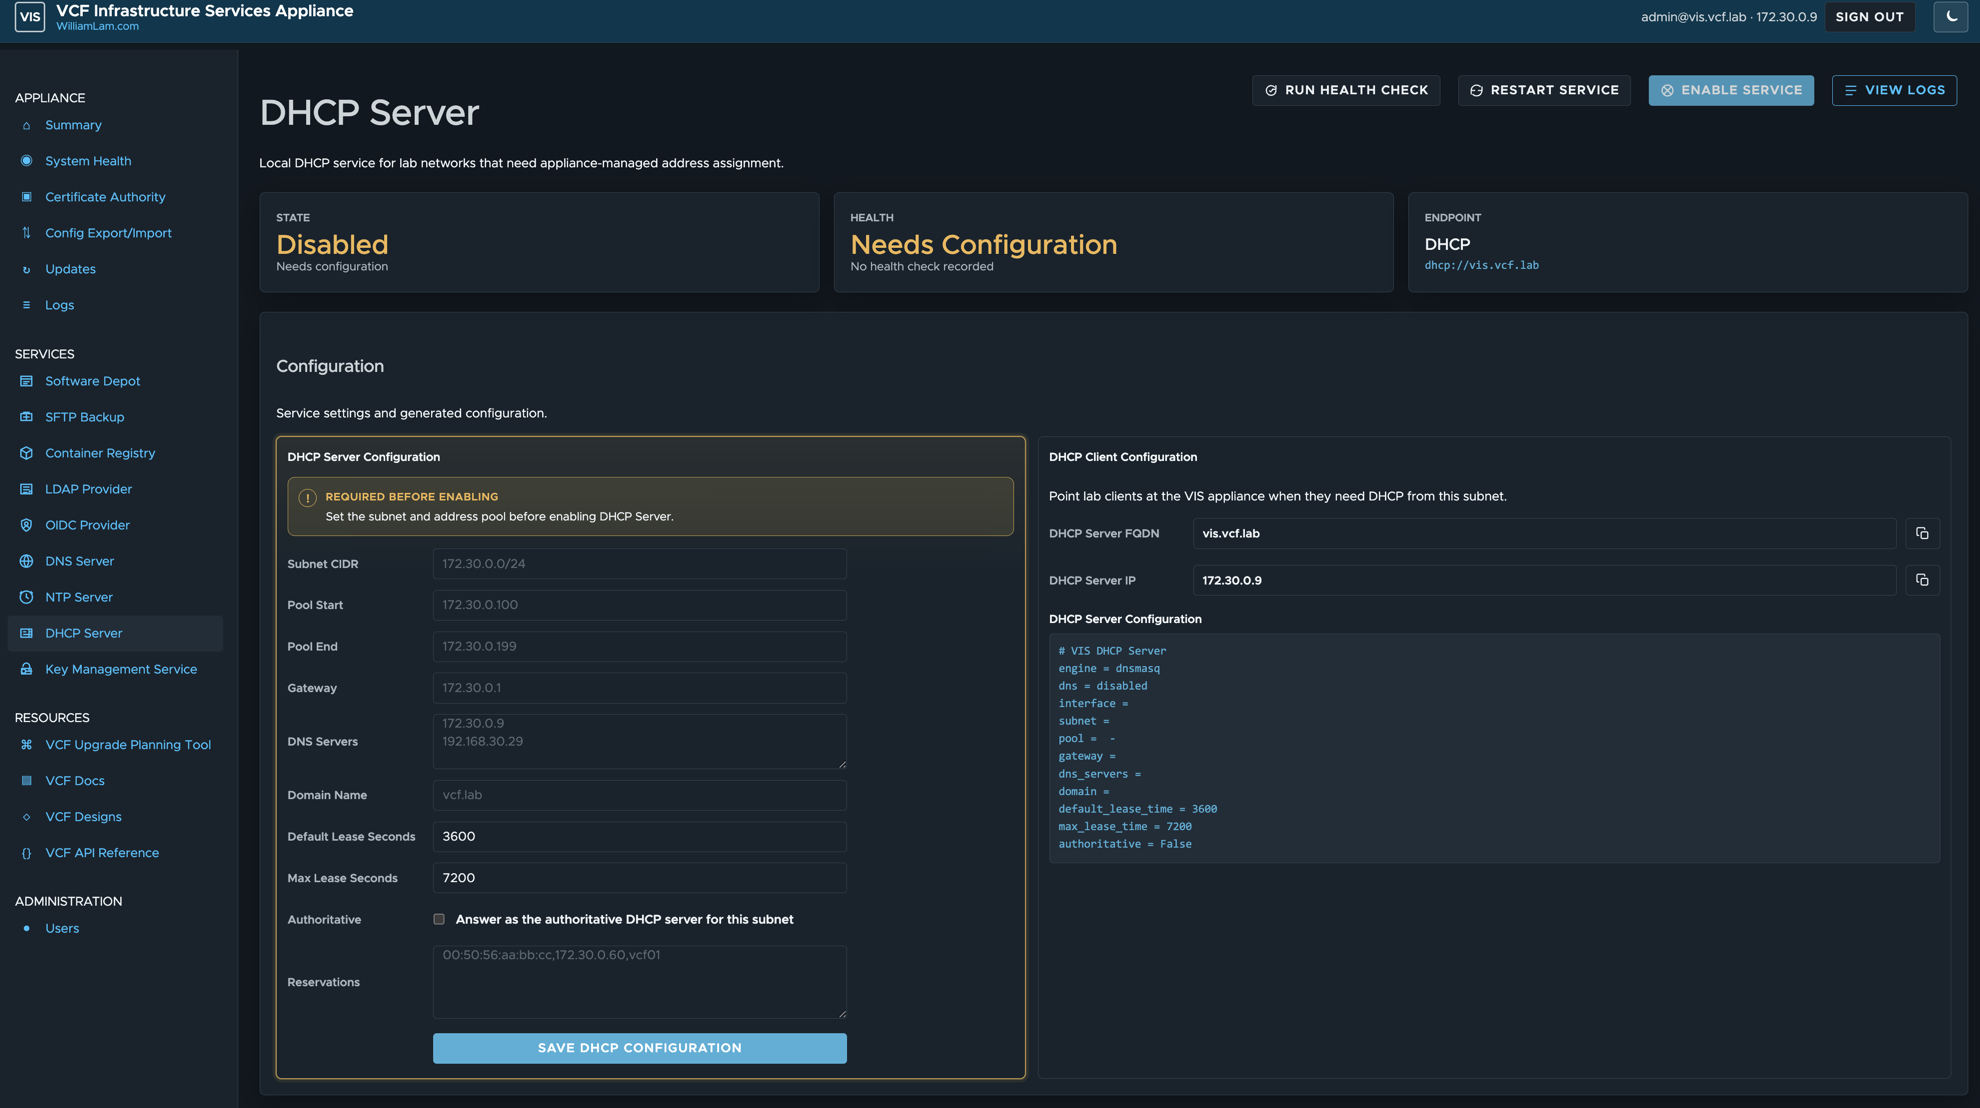
Required Input to Initialize Service:
- Subnet CIDR
- IP Pool Start
- IP Pool End
- Gateway
- DNS Servers
- DNS Domain Name
After saving your configuration to initialize and click Enable service.
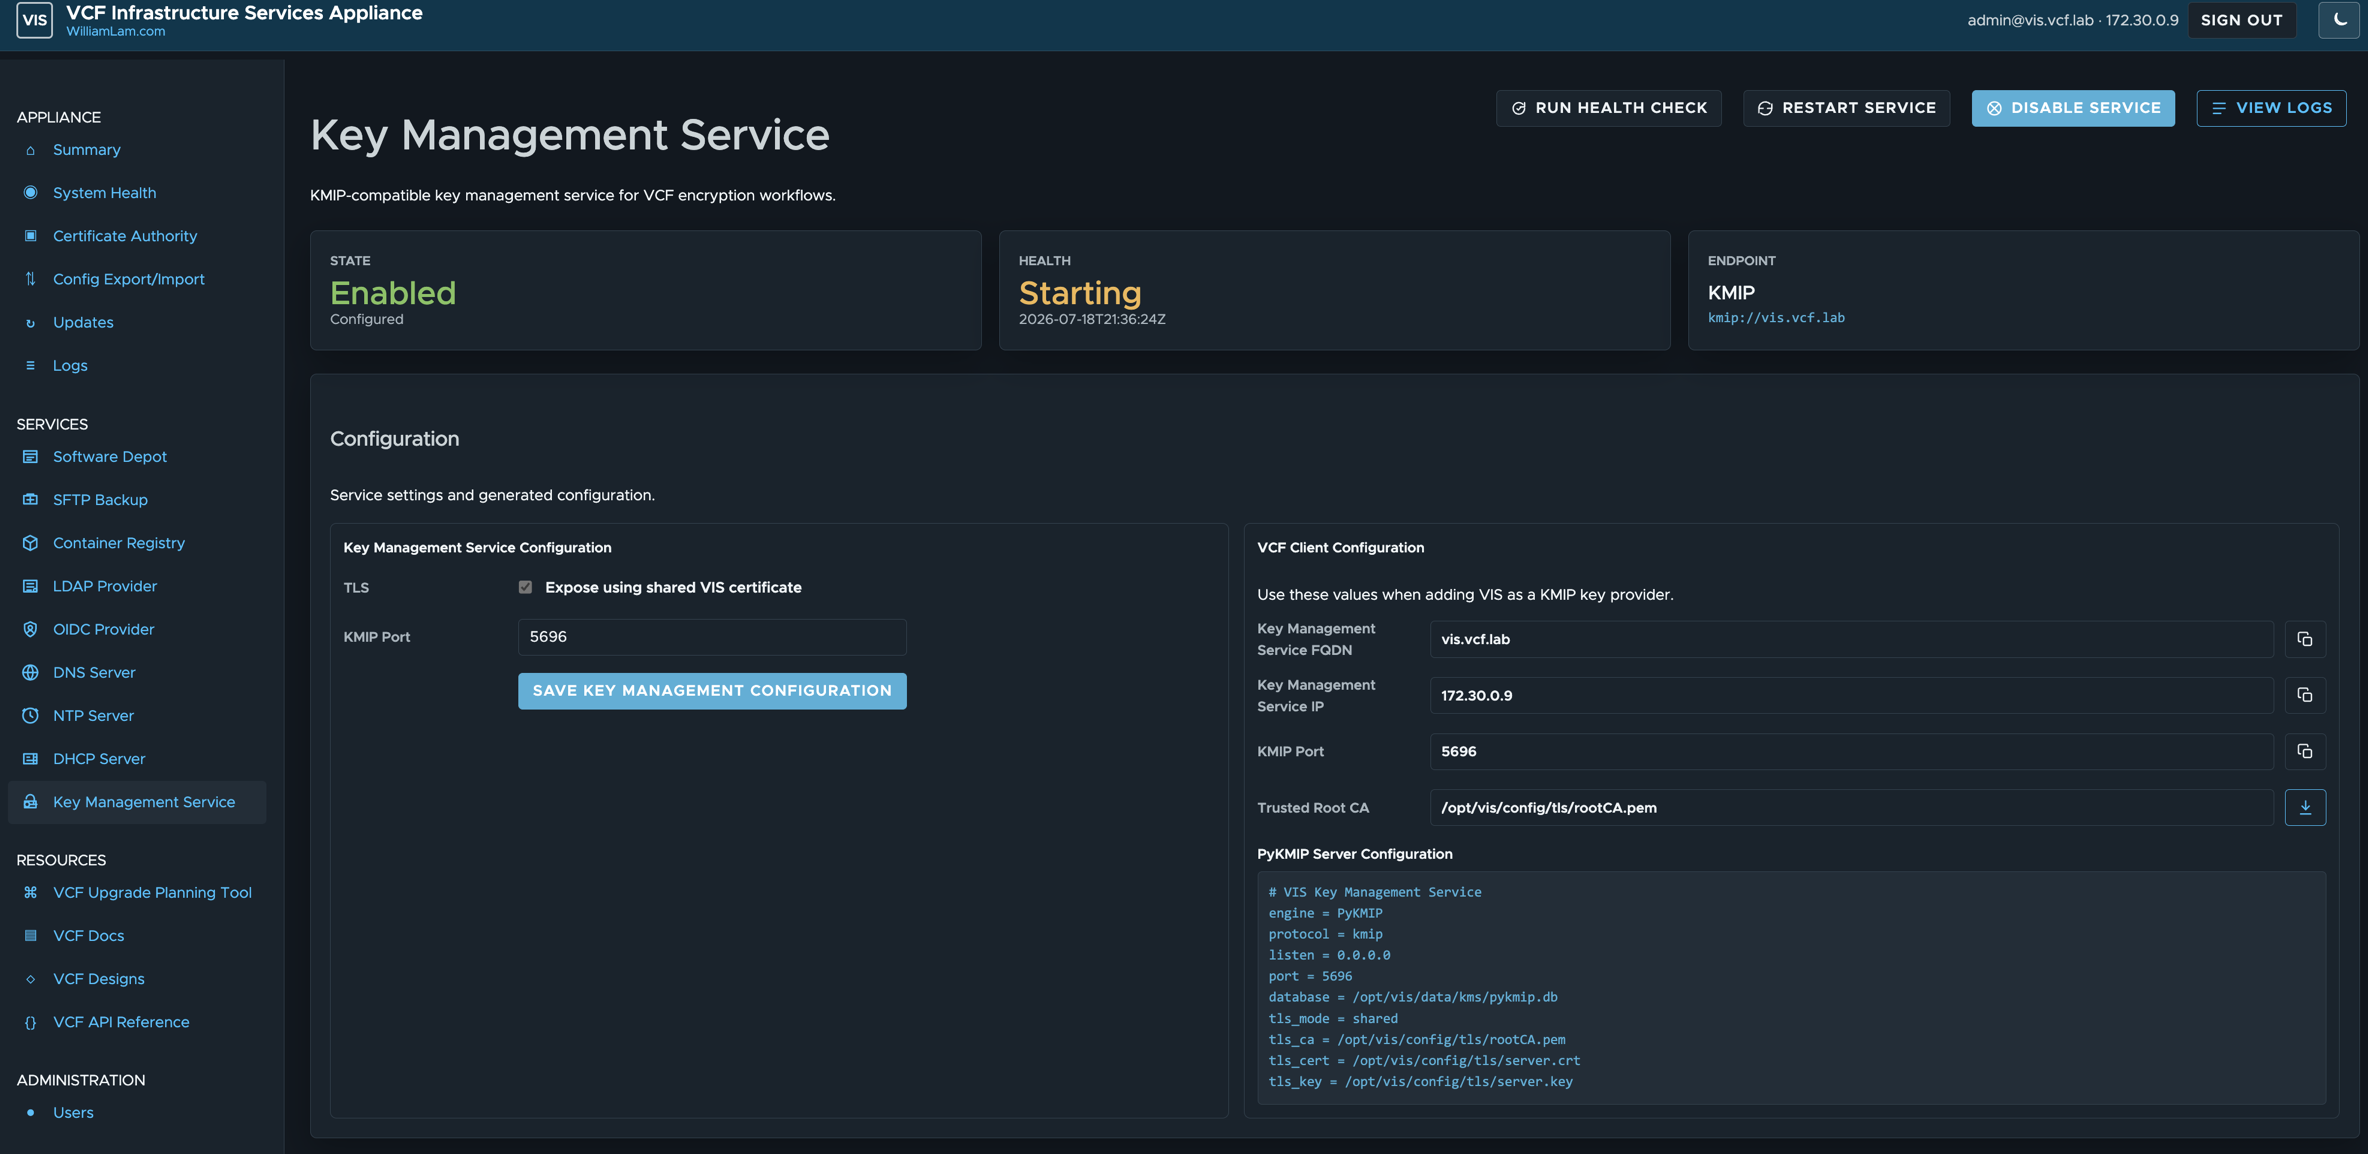
Setup KMS Server for VCF Environment
Required Input to Initialize Service: